|
Tag Art Tutorial- Project One
This is the first in a series of tutorials about tag art. There is no right way to do this, but I hope that this will help you find the best way for YOU to make a tag. I am by no means an expert when it comes to making tags, rubber stamping, or anything else, as a matter of fact. These are the basic steps that I go through when I sit down to make a tag. I'm just trying to share my love for art and making tags! :-) The first project will be a collage tag. If you have any questions or comments, please e-mail me.
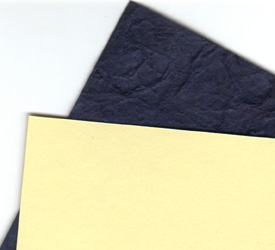
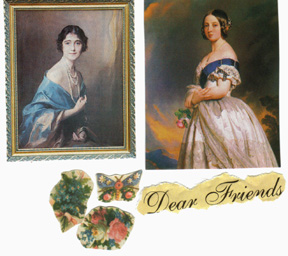
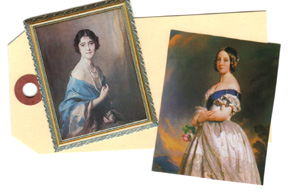
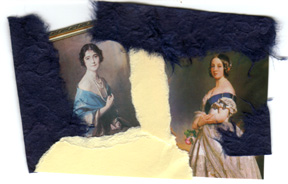
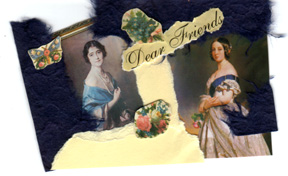
Step 1: Pick a Theme- The first thing that I always do when I'm getting ready to make a tag is to think up a theme. Sometimes I already have an idea, like a certain holiday or a special picture that I want to use. If I don't already have a theme in mind, then I sit down at my table and start rummaging through all of my boxes of clippings. If I find something that appeals to me, then I keep it out and look for other clippings that coordinate with it. Here is what I picked out and why: 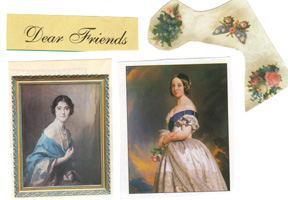 I found the lady in blue first. I knew that I wanted more on the tag, so I kept looking. Then, I found the lady in white. Still wanted more though, so I started looking through my box of words and found "Dear Friends". Well, I thought that fit perfectly with these two, beautiful ladies. Maybe they were dear friends or I can send this tag to one of my special friends. I wanted a couple of accent pieces, so I found the flowers and they seem like they will make a nice touch. Step 2: Decide on Colors- Look at the clippings. I think that blue and ivory would be a nice color for any accent papers. Look at the clippings that you picked out. There should be some common color in them. Pick a color out that appeals to you and that will look nice with the clippings. The blue paper that I found is like a thick, very fibrous mulberry paper. I love using mulberry paper to accent my tags, because of the wonderful effect you get when you tear it. I don't like having the straight edges. If you don't have mulberry paper, tear card stock to get a rough edged effect.
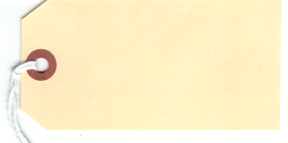
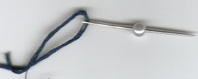
Step 3: Assemble Supplies- Okay, now that you have decided on a theme, get everything ready. Look at your clippings and decide what size of a tag you will need. Will you be using a mailing tag or cutting your own? We're going to use a mail tag that measures 4 1/4" X 2 1/2 ". If you don't have a tag, make you own. Make sure that you have your adhesive handy along with a paint brush to apply it and a pair of scissors. I also keep a glass of water to keep my paint brush in, so the glue won't try on it. Have an old towel there to wipe the excess water off of your paint brush. Remove the string from the tag before starting.
Step 4: Cut out Images- Cut the excess paper from around the images. I decided to tear the edges of "Dear Friends", because I didn't want the straight edges.
Step 5: Decide on
a Layout- Now is when you really get to play. Lay the tag on
your work area and start putting the clippings here and there on the tag
until things look the way you want them too. Don't glue anything
down yet! Make sure that you like how it looks and keep moving things
around until they are just how you want them. This might take awhile
or work the very first way you lay them down. Be patient and let
it happen! :-)
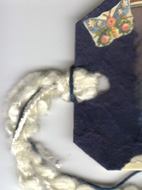
Step 6: Start Gluing- Okay, slide all of the papers and clippings off of your tag and try to remember how you had them. One way is to keep them in a pile after you slide them off of your tag, flip the pile over and start gluing the pieces on in the order they are in your pile. Or, be brave and just take them off and try to put them back where you had them! :-) Place some scratch paper on your work surface to do the gluing on and be sure to not accidentally put your tag in any glue. Change the paper regularly to protect your clippings and tag. Put some of your adhesive in a small, plastic bowl and use your paint brush to apply a layer of glue to the back of the paper. Place it where you want to and then repeat until all of the clippings and papers are adhered to the tag. Make sure that the image is flat on the tag and doesn't have any wrinkles or bubbles. Let dry. I usually place a heavy book on top of my tag to keep it from curling up and helps it dry nice and flat. You might need to trim some of the paper off before you apply some of the accent papers (for example, the mulberry paper). This will help you get the paper right where you want it, especially if you are covering up a small area. (Like the bottom right-hand corner of my tag where there is a small piece of blue mulberry paper). To trim: turn the tag up-side down and cut along the edge of the tag, being careful to not cut the tag itself. Step 7: Trim the Edges- After it is dry, turn the tag over and carefully trim the excess paper from the tag. Notice that my tag isn't exactly like the one in the photo above. I didn't get things glued in the exact same spot as my original layout and I had to put the small bunch of flowers under the phrase "Dear Friends" instead of above it, how I had originally planned. Oh well! That's the excitement of making a tag!
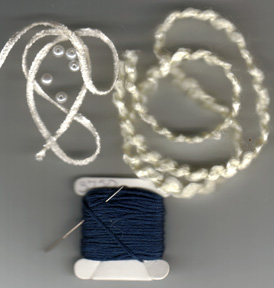
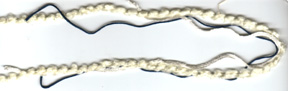
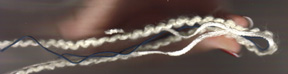
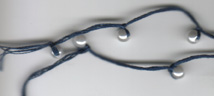
Step 8: Add fibers
and Beads- Before adding fibers and beads, turn the tag over and use
a hole punch to punch through the original hole in the tag. This
is where you will string the fibers/ribbon through.
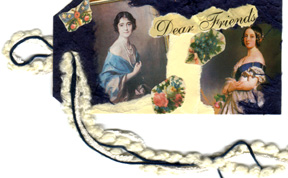
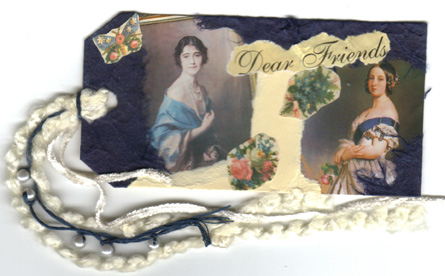
Step 9: Sign Your Artwork- Always remember to sign your artwork! Put your name and the date that you made it. You can also put a short note on the back, if the tag is a gift. Step 10: The Finished Tag- Here it is, a collage tag:
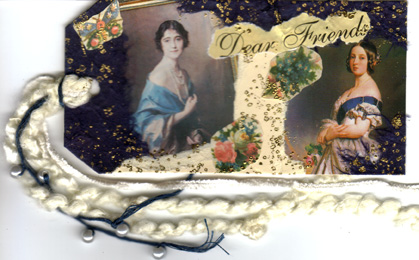
Step 11: Add Some Glitz- This is an extra step that you don't have to do, but I love how it looks with a little gold on it. And, to me, it makes it look like it's been around for a long time and gives the tag a more finished look. I used a speckle stamp that comes in the Stampin Up! set "Itty, Bitty Backgrounds" and embossed with gold embosing powder. Here is the tag after adding the some glitz to it:
Congratulations! You just made a collaged tag! Wasn't that easy and so much fun? I hope that you enjoyed this tutorial. If you have any questions, please e-mail me. I am planning on having some more tutorials about tag art, so be sure to check back often to see if there is anything new. Better yet, join my mailing list and you will receive an e-mail whenever I up-date my pages.
This set is courtesy of:
This page was last updated
on:
|