| PAGE THREE |
| JUNE 2001 1-6-2001 Started working on the rear shocks, again one at a time. After de-grease the shock was stripped down. I realised that I should have sent the springs to the blasters with the other stuff. Ah well, out with the paint stripper. Using the buff, I polished up the shafts like new again. After masking up, the mounts, and springs were primed and then sprayed gloss black. Shocks reassembled and placed in the "finished" pile in the lounge room. (I'm running out of room in the garage!) 2-6-2001 I got the bits back from the blasters today. They did a good job and the etch priming came out well. There is a small section on the frame that the blaster said it looked like someone had repaired with some unknown substance so I'll have to grind it down and repair with bog. 3-6-2001 I took the paint codes that I'd gotten from the Velo Club, down to the paint shop today. Unfortunately the codes are incompatable with the Australian paint coding system. The colour (a kind of metallic silver grey) is a special mix designed by the Velo Club to match the original paint. |
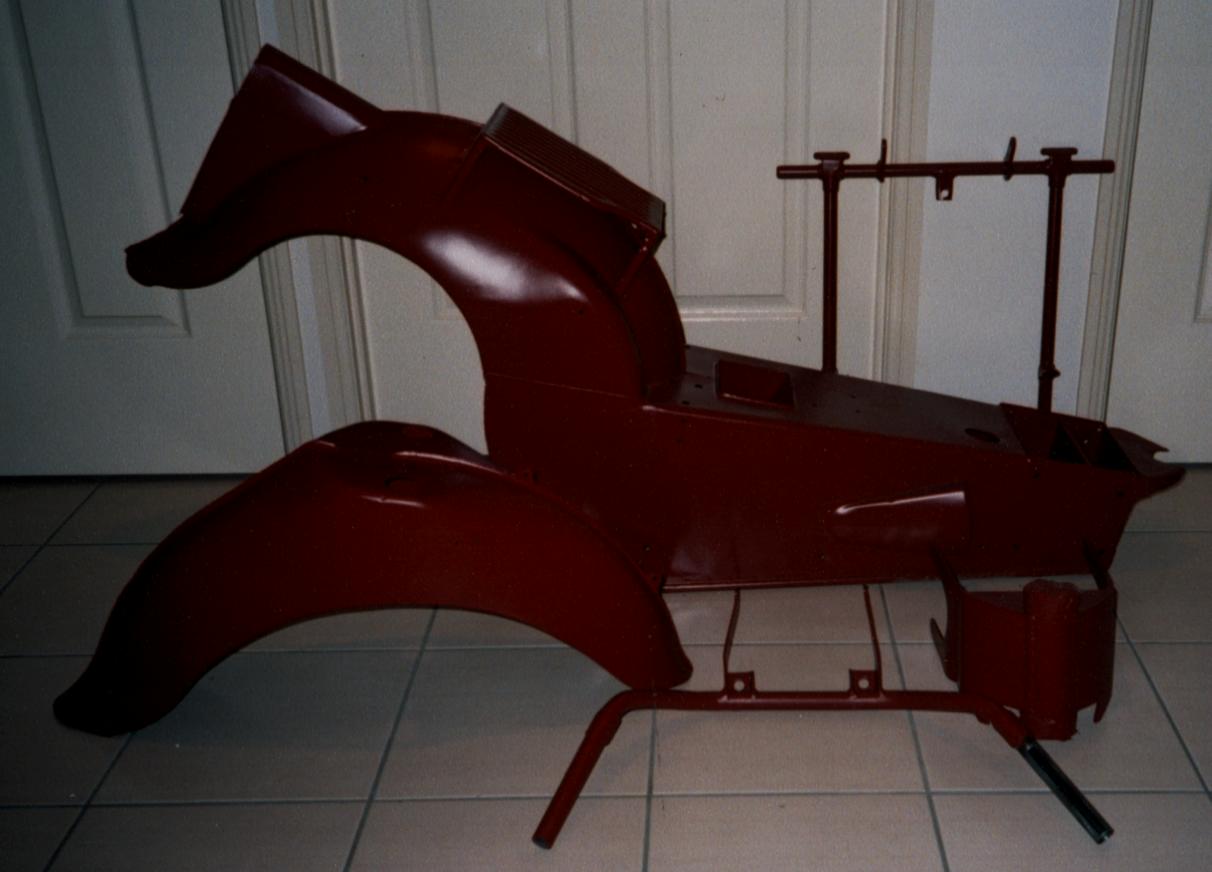
| The guy at the paint shop said he could match the original colour if I could find a good example of it, otherwise I will have to try and contact the UK paint supplier and try and sort out the codes. Today I also rubbed down the radiator support frame (600 wet and dry) and started spraying it gloss black. I'm just using rattle cans of paint for this as the compressor is too noisy to run at night (or so the neighbours tell me!) The finish came out great after a quick rub down with 1200 wet and dry and then polishing with 3M hand glaze |
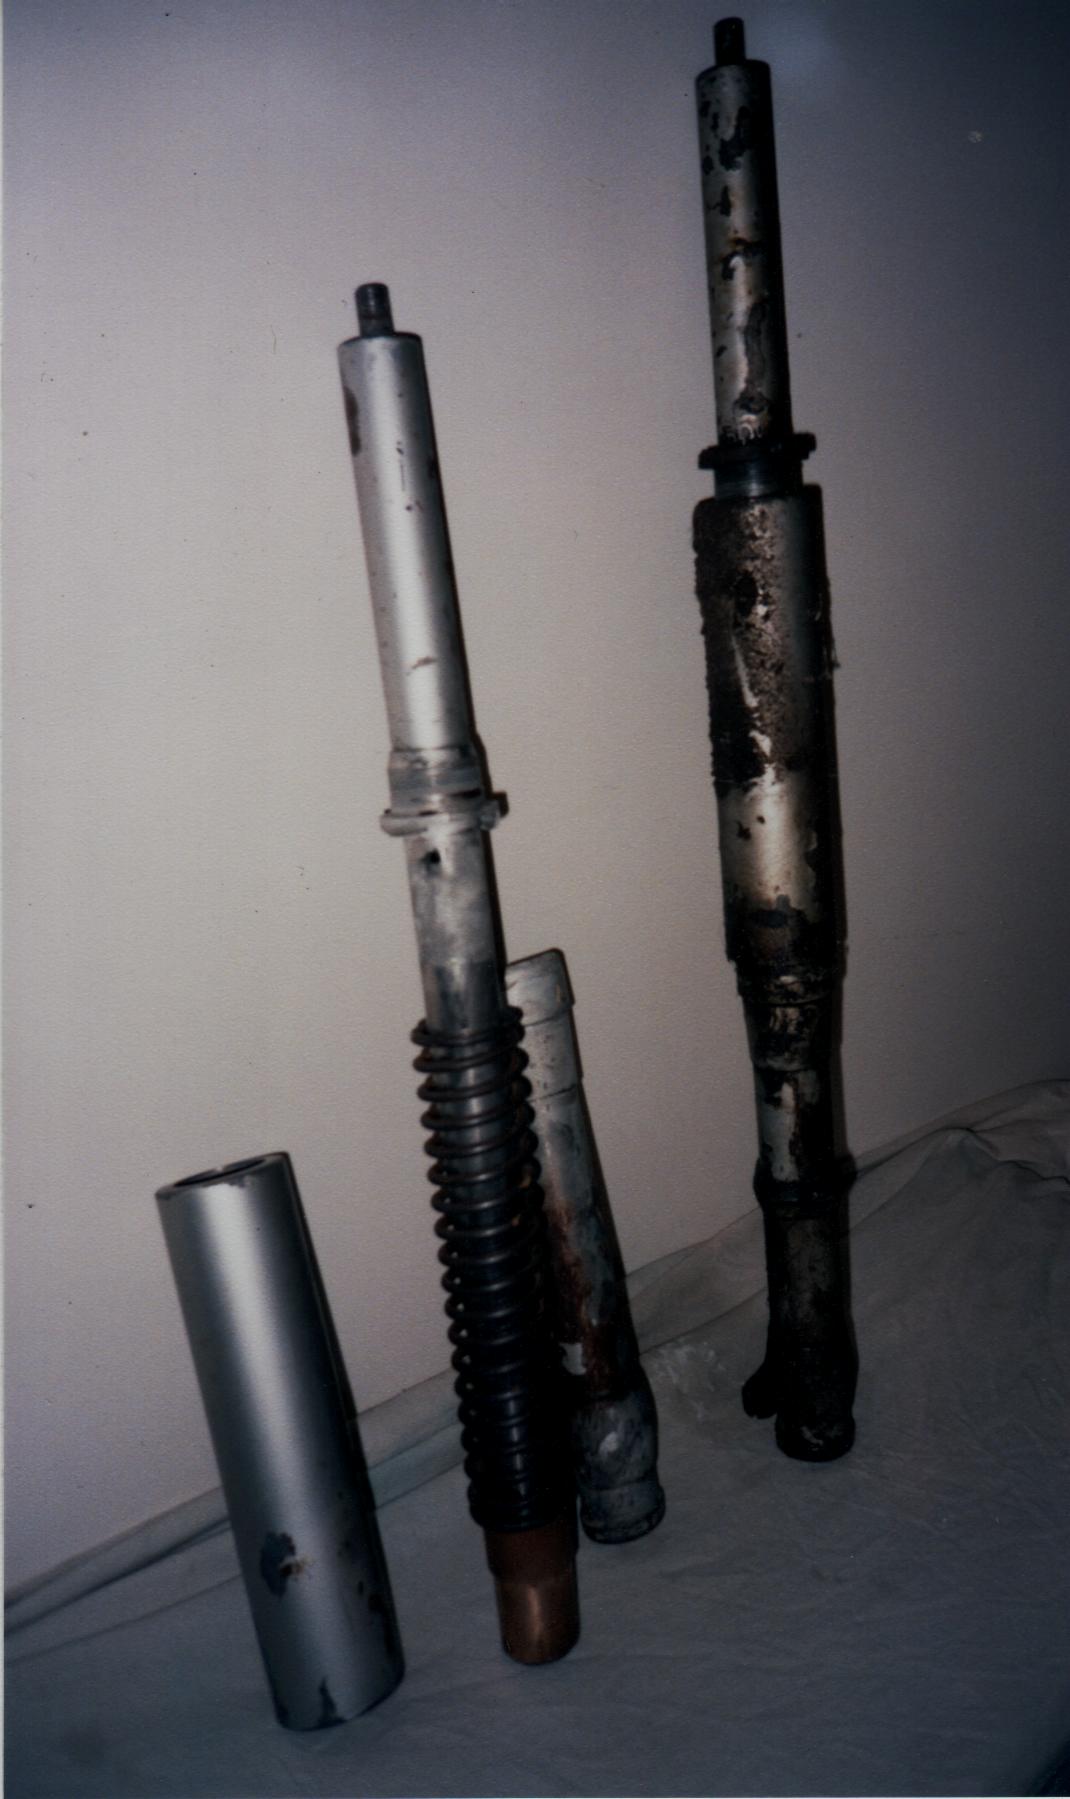
| 8-6-2001 Time to pull the front shocks to bits. After stripping and cleaning I found that one of the top shrouds (where it sits under the front guard) still had a good finish of original paint on it. Bewdy - that's the paint sample problem solved!! I've stopped work on the shocks until I can get the time to take the shroud in for colour matching |
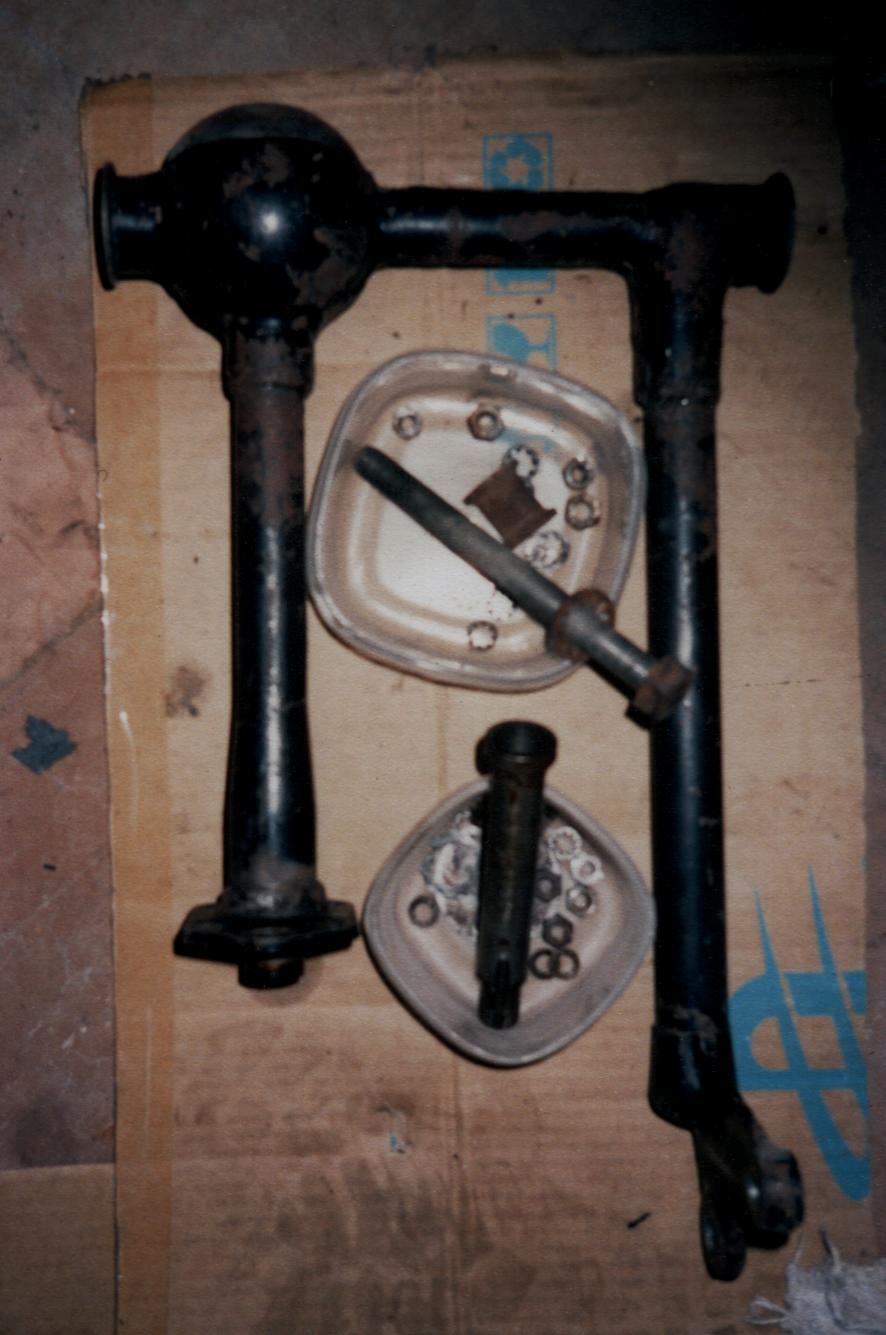
| 9-6-2001 Separated the swing arm from the rear diff housing ( or the "rear bevel drive casing assembly" according to the manual!) The swingarm has been put aside for later (to be sprayed gloss black) The diff casing is alloy. I'm still trying to decide whether to give it a bead blast finish or to polish it. I think it will look good polished because of the gloss black hub and swingarm attached to it. I've semi stripped the casing to get better access for polishing. I managed to take the rough casting finish off the larger areas with a sandpaper flap wheel attached to the electric drill. The rest I'm attacking by hand with 180 wet and dry. 10-6-2001 Starting to think bead blasted finish would look ok!!!! 11-6-2001 This morning I buffed a small area to see how I was going ( and to give me some motivation) I've decided to stick with the polished finish but have decided to finally lash out and buy a die grinder and attachments to get at all the nooks and crannys |
 |
 |
| Click on pics for bigger view |
 |
 |
 |
 |
| Click on pics for bigger view |
| Click on pics for bigger view |
| 17-6-2001 Not much has happened this week. I ended up completely stripping the diff which wasn't too bad except for getting the pinion assembly from the casing. A special tool is required to remove the lock nut, a tool which of course I didn't have! After stuffing around for 3 hours with various modified tools and not getting anywhere, I had a look in the spares and found an old diff casing with a lock nut that I could get off! So I completely butchered out the nut on the original diff using an electric drill, chisels,punches and a variety of different sized hammers. The actual pinion assembly is removed by expanding the casing. This was done by placing the casing in (my best) large saucepan and filling with boiling water. The assembly popped out - no problem! I've also stripped the internal shaft drive out of the swing arm and have paint stripped it (the swing arm) ready for priming. I think I'll have to buy a digital camera soon. I'm getting sick of waiting to use up all of a film before processing it. I'll also be able to make sure that photos are turning out ok. |
| 15-6-2001 An exciting day today!! Returning home from work I found a large parcel on the front door step from the UK. Yep, all the parts ordered from the Velo club had arrived! Radiator hoses, clamps, petrol cap, throttle, speedo, and brake cables, a complete engine gasket set, riders and pillion seat covers,frame transfers, starter grip, carb air cleaner pipe, gear knob, and footboard rubbers. It felt like Christmas!! |