IN COLOR SEPARATION | FULL IMAGE COLOR SEPARATION | By: Rodelio D. Balagot
| ARCHIVE DIRECTORY | STEP 1 - CONVERTING IMAGE | STEP 2 - COLOR SEPARATION | STEP 3 - PRINTING REFERENCES |
 |
||
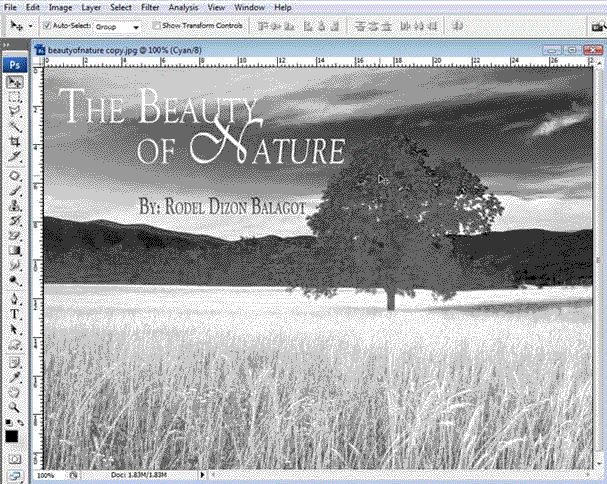
CYAN CHANNEL |
 |
||
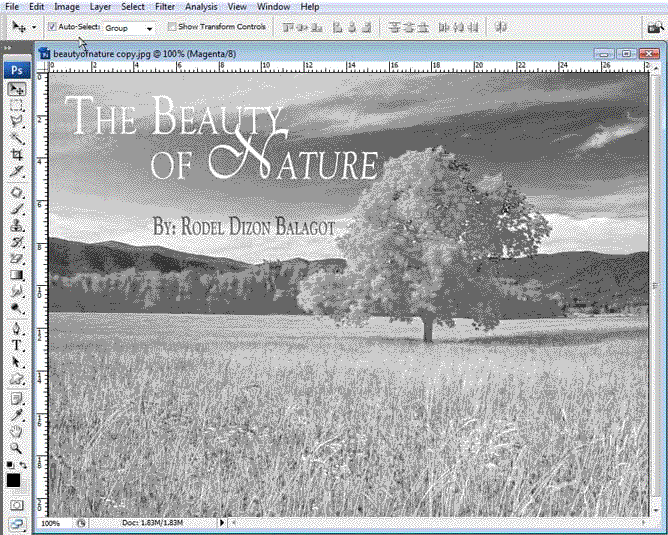
MAGENTA CHANNEL |
 |
||
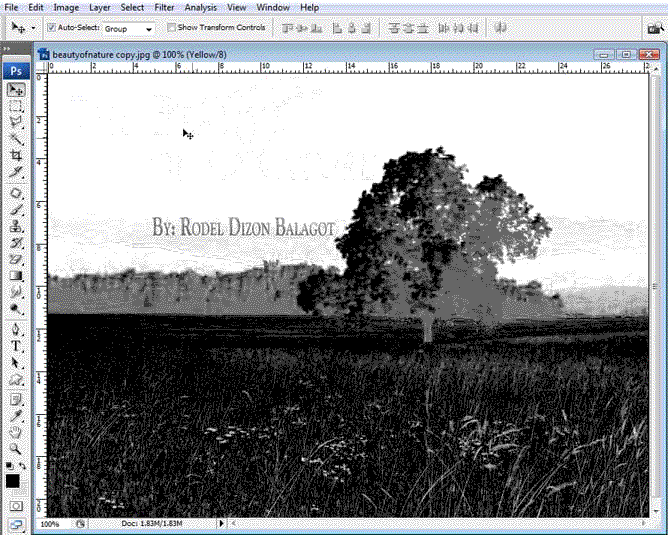
YELLOW CHANNEL |
 |
||
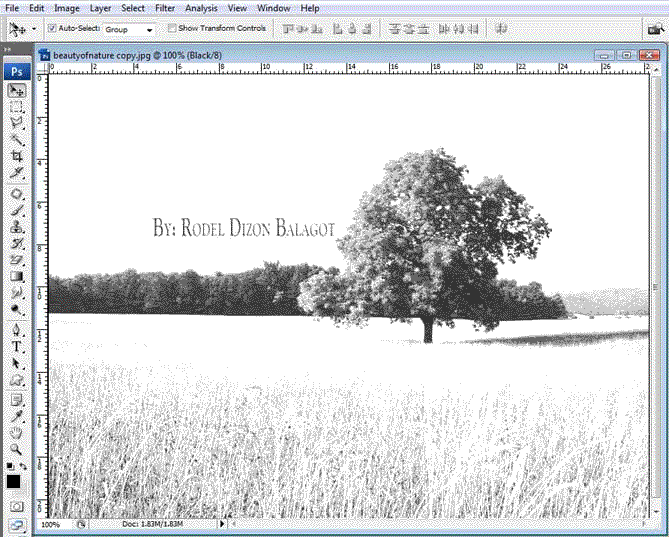
BLACK CHANNEL |
 |
||
Figure 5 - IMAGE RESULT WITH COMPLETE DETAIL READY FOR PRINT OUTPUT |
|
Photoshop Color Separation - Step 2 |
|
Color Separation Color Separation is the process of converting an image, such as full color photograph into four separate components, corresponding to the four primary colors used in process color printing—cyan, magenta, yellow, and black,
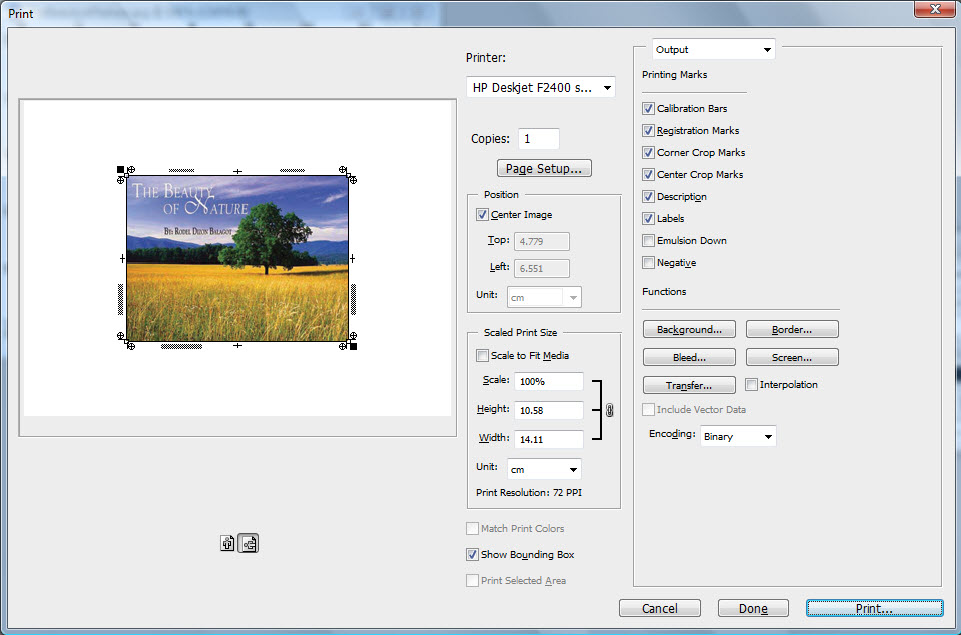
Task 3: INDIVIDUAL COLOR SEPARATION - PRINTING PER CHANNEL You have now changed your picture from RGB to CMYK colour settings ready for Individual Channel printing. Task 4: COLOR SEPARATION Printing using Laser Printer or Deskjet printer 1/ Open the Print options box [pictured right] When the Print box is opened, basic printers will have options ‘greyed out’ and made unavailable. Basically your computer can’t tell your printer how to use the functions and therefore doesn’t make them available [they are set to default values that your printer can understand]. Options you should have available, regardless of printer model, include: 2/ Click the Setup button on the right [under the OK and Cancel button] 3/ Close the Printer Properties box and Page Setup boxes to return to Print box.
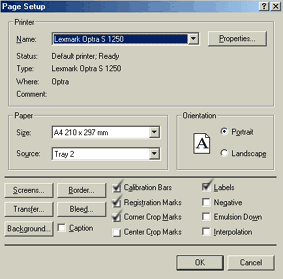
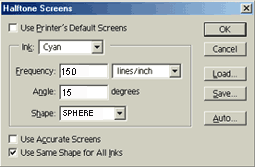
1/ With a channel selected [Cyan for example] open the Print options 2/ Open the Page Setup box [pictured right] by clicking the Setup button from the Print box
This is how it will look, when the settings are all done. Task 5: COLOR SEPARATION Printing using Imagesetters or CTP spoolers A raster image processor (RIP) is a component used in a printing system which produces a raster image also known as a bitmap. The bitmap is then sent to a printing device for output. The input may be a page description in a high-level page description language such as PostScript, Portable Document Format, XPS or another bitmap of higher or lower resolution than the output device. In the latter case, the RIP applies either smoothing or interpolation algorithms to the input bitmap to generate the output bitmap. Generally, the Printing and Page setup are almost all the same if we will spool or print it it in the imagesetter machine. |
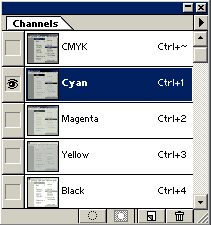 Selecting Channels
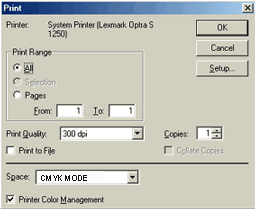
® Design & Developed by: Rodelio Dizon Balagot