In The Beginning
Links Page
Contact Me
![]()
![]()
![]()
![]()
![]()
![]()
![]()
![]()
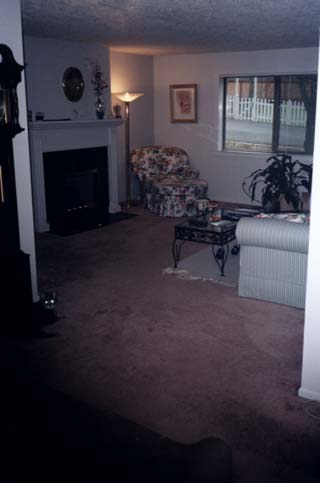
 If you want to install a
new floor and your old floor is carpeting that is in ok shape, do what I
did. I placed an ad in the local paper that said "Free carpeting, you
remove and haul". I was amazed at how many calls I got. The
phone rang all day long and the first person who came and looked at it, took
it. And not only did he take the carpet and the pad, he also removed and
took all the carpet tack strips. This saved me a lot of work and the cost
of hauling the old carpet away. When I placed the ad, I had no idea the carpet
would be gone so fast. No procrastinating! I was forced to decide what I wanted to do
next right away. I had
pretty much made up my mind my new floor would either be Pergo or solid
hardwood. I don't have children and the solid hardwood was so much
prettier than the Pergo, I decided to go with Bruce prefinished 3/4 inch
hardwood tongue and grove strips. If you do have
children or a dog, the hardwood does scratch fairly easily, so you might want to
consider a different choice.
If you want to install a
new floor and your old floor is carpeting that is in ok shape, do what I
did. I placed an ad in the local paper that said "Free carpeting, you
remove and haul". I was amazed at how many calls I got. The
phone rang all day long and the first person who came and looked at it, took
it. And not only did he take the carpet and the pad, he also removed and
took all the carpet tack strips. This saved me a lot of work and the cost
of hauling the old carpet away. When I placed the ad, I had no idea the carpet
would be gone so fast. No procrastinating! I was forced to decide what I wanted to do
next right away. I had
pretty much made up my mind my new floor would either be Pergo or solid
hardwood. I don't have children and the solid hardwood was so much
prettier than the Pergo, I decided to go with Bruce prefinished 3/4 inch
hardwood tongue and grove strips. If you do have
children or a dog, the hardwood does scratch fairly easily, so you might want to
consider a different choice.
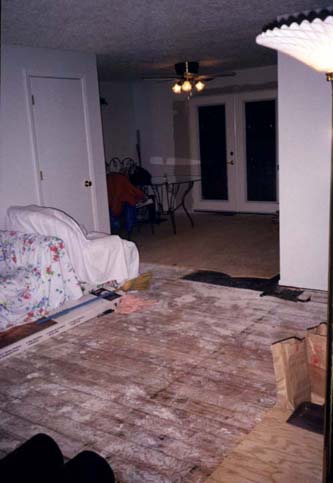 The process
started with ripping up the particle board subfloor. I made cuts in the
particle board with a circular saw set at a depth to cut only the subfloor.
You don't want to cut into the main flooring. I then pried the particle
board up using a pry bar. I then laid down a vapor barrier paper and
started installing the wood strips. It is very important to get the first
row of strips straight. Your floor is built from that first row and if it
is not straight, your whole floor will be off. I suggest measuring several
times before you start and measuring again after you lay each strip in
the first row. I have a marble hearth
The process
started with ripping up the particle board subfloor. I made cuts in the
particle board with a circular saw set at a depth to cut only the subfloor.
You don't want to cut into the main flooring. I then pried the particle
board up using a pry bar. I then laid down a vapor barrier paper and
started installing the wood strips. It is very important to get the first
row of strips straight. Your floor is built from that first row and if it
is not straight, your whole floor will be off. I suggest measuring several
times before you start and measuring again after you lay each strip in
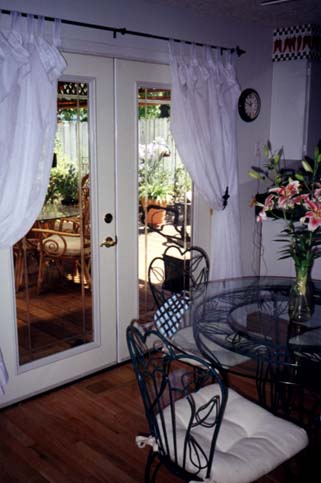
the first row. I have a marble hearth 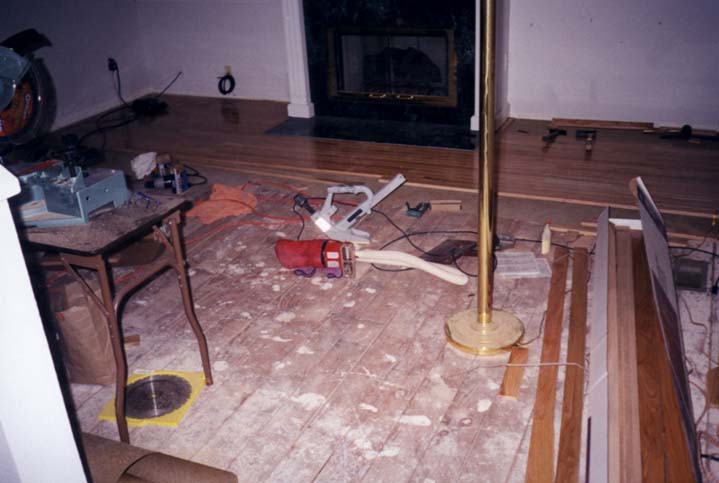 I had to go around so in order to
have the wood strips fit around the hearth, I decided to start my floor
there. Luckily the measurements from the front of my hearth to the
opposing wall were fairly even. I first installed wood strips to surround
the hearth. I felt this would give the hearth a more finished
look. This is hard to see in the pictures but is more visible on the
last picture on the mantel page. I then had to start my first row along
the front of the hearth and work back toward the wall and then forward from the
hearth. To help get the first row straight I measured and nailed a 2x4
into the floor. This gave me a firm support area to line my first row
against and also kept the first strips in place when I started nailing them
in. To install a wood floor, you use a floor nailer which is a device that
fits into the tongue of the floor and you then hit the end with a pretty big
hammer, so it is important that your flooring is positioned so it won't move
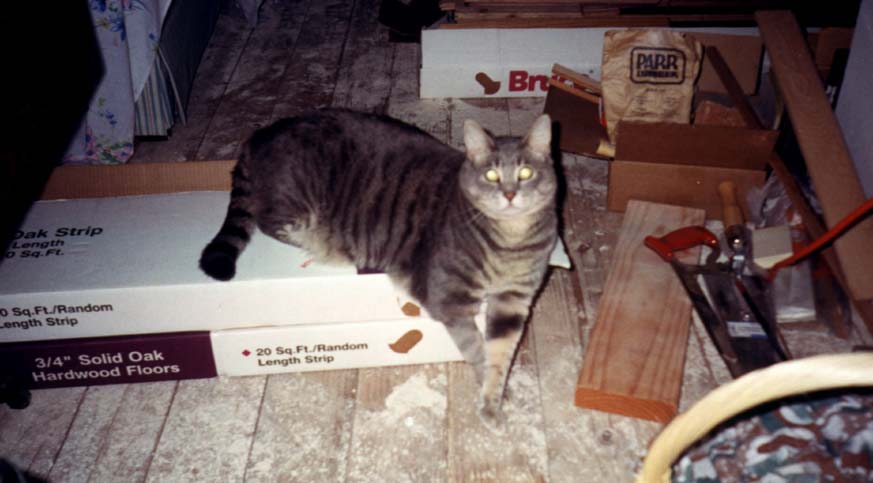
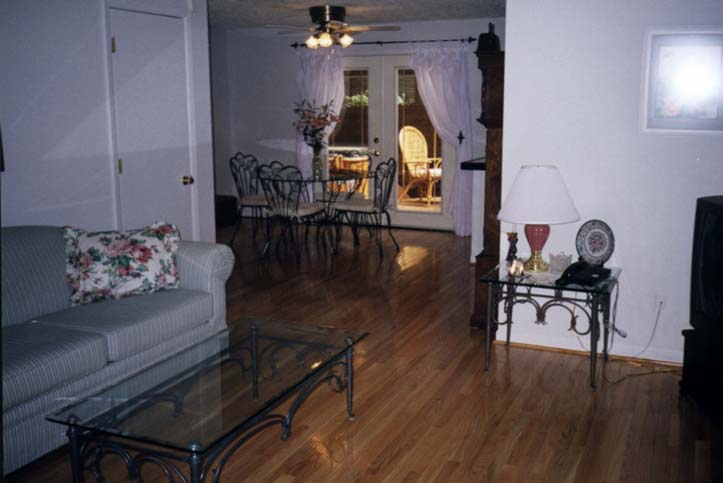
when you nail it. Well it took me about two months, from start to finish,
but here are pictures of my little helper and the final results. The last
picture shows that I installed inset wood vents instead of vents that slide in
afterwards.
I had to go around so in order to
have the wood strips fit around the hearth, I decided to start my floor
there. Luckily the measurements from the front of my hearth to the
opposing wall were fairly even. I first installed wood strips to surround
the hearth. I felt this would give the hearth a more finished
look. This is hard to see in the pictures but is more visible on the
last picture on the mantel page. I then had to start my first row along
the front of the hearth and work back toward the wall and then forward from the
hearth. To help get the first row straight I measured and nailed a 2x4
into the floor. This gave me a firm support area to line my first row
against and also kept the first strips in place when I started nailing them
in. To install a wood floor, you use a floor nailer which is a device that
fits into the tongue of the floor and you then hit the end with a pretty big
hammer, so it is important that your flooring is positioned so it won't move
when you nail it. Well it took me about two months, from start to finish,
but here are pictures of my little helper and the final results. The last
picture shows that I installed inset wood vents instead of vents that slide in
afterwards.

![]()
![]()
![]()