
Walkthrough, Level 13: Nuclear Infiltration
I do not guarantee that this walkthrough is complete.
The route described below is the one I have found be the easiest. I
know and you probably know as well that there are plenty of different
ways to finish the level.
Objectives: |
- Secure deployment zone for Anya and friendly forces
|
This level consists more or less by three parts.
- First you shall make your way to a tunnel entrance, which is pretty much
"normal" Project IGI play. Either you shoot your enemies from distances
greater than 50 m. with AK47 and binoculars or you watch your map computer and
time your movements to sneak up in their backs.
- Then comes a "tunnel part" which might be difficult if you don't know the
trick. When you know the trick it's a walk in the park.
- The last part is taking out a whole compound, which is preferably made
with the Dragunov, so don't waste your Dragunov-ammo in the earlier parts.
If you ask me it's not a very funny level. I
don't like this tunnel business, since it limits your alternatives.
 In most other levels you have several opportunities, but not here. And what a strange
nuclear power compound. Only one single gate in the whole compound. What do they
do with heavy trucks which need to get to the radar compound? Take everything
through the tunnel system? Why is there a garage at the radar compound, no cars
can get there... Anyway, who cares what I think? On with the walkthrough;
In most other levels you have several opportunities, but not here. And what a strange
nuclear power compound. Only one single gate in the whole compound. What do they
do with heavy trucks which need to get to the radar compound? Take everything
through the tunnel system? Why is there a garage at the radar compound, no cars
can get there... Anyway, who cares what I think? On with the walkthrough;
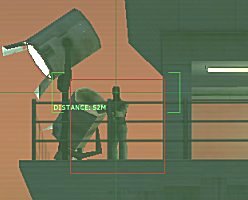
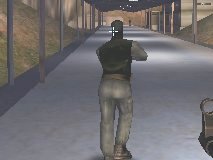
You start outside the compound. You'll have one guard in the
watchtower to shoot with binoculars and M16A2 (screenshot right). You have three
patrolling guards in the closest area and another one under the camera of the
very large warehouse. Try to get their attention by either shooting some shots
at them or by just showing yourself. Once you have their attention they will
come running after you. Back off, out of the compound and a few steps up the
hill (close to where you started). The guards will stop at a spot 52-53 meters
from you and make easy targets (screenshot below, left). They will make even
easier targets when they get bored by waiting and walks back (screenshot below,
right).
 Enter the large warehouse (not the super-large) and pick up hand- and
M16A2-grenades. Exit warehouse. You shall now go north. Stand 50 meters from the
corner of the brick wall and wait until the patrolling guard has his back
towards you. Run forward, be a sport and shoot him in his back. Do the same with
the two patrolling guards on the ramp.
Enter the large warehouse (not the super-large) and pick up hand- and
M16A2-grenades. Exit warehouse. You shall now go north. Stand 50 meters from the
corner of the brick wall and wait until the patrolling guard has his back
towards you. Run forward, be a sport and shoot him in his back. Do the same with
the two patrolling guards on the ramp.
If you want you can enter the northern
barrack and pick up some M16A2-ammo. Be careful not to alert the two guards in
this barrack and three in the other barrack, though.
 Shoot the guard at the balcony of the Guard's HQ. When you hit him the first time he
will make a clever move. He will change balcony! Don't let this infamous trick
disturb you. When he's dead, go for the other guy patrolling anti-clockwise
around the building. Run and stab him in the back! Oh, yes, Don't run in the
gravel, he might hear you.
Shoot the guard at the balcony of the Guard's HQ. When you hit him the first time he
will make a clever move. He will change balcony! Don't let this infamous trick
disturb you. When he's dead, go for the other guy patrolling anti-clockwise
around the building. Run and stab him in the back! Oh, yes, Don't run in the
gravel, he might hear you.
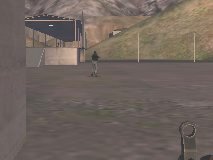
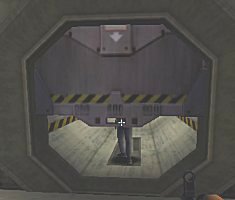
Enter the Guard's HQ. Pick up medikit and go up on the eastern balcony. From there
you will be able to snipe a guard in a watchtower (screenshot).
 Now it's time for the tunnel part. The trick is to
alert the guards behind doors so that they have to open a door to come to you.
Here's how to do it;
Now it's time for the tunnel part. The trick is to
alert the guards behind doors so that they have to open a door to come to you.
Here's how to do it;
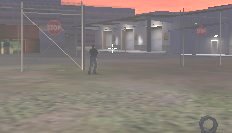
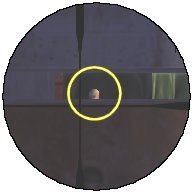
Open a door, shoot any guard nearby. If there isn't
anyone there, wait until the door starts to close, then fire one shot. Now wait
behind the closed door. If a guard was alerted he will come running and open the
door. Since he only can see your head (yes, this is strange) and you can see his
whole body it's easy to shoot him while the door is opening, see
screenshot.
Then enter the room, shoot one shot and go out through the door
again. Wait. Shoot if anyone comes. If not, continue to the next door and
perform the same actions. It is a very time but not health consuming way, but it
works very well.
Locate the entrance to the tunnel. Ride the elevator down. A guard will wait
to the left. You can't shoot him once and then wait him out, since he is one of
the few guards who feels pain and anger and he will not stand still and wait for
your next shot. Once he is dead, quickly change weapon if you're low on ammo on
the one you're carrying, since another guard will come running through the door
and you will maybe not have the time to reload.
When the next one is dead, open the door, run to the next door, open it,
shoot one shot and quickly return to the elevator room before the first door
closes. Two guards will come after you. They won't open the door (all the next
guards will, but not these two lads) so you will have to open it by yourself.
Big deal! Open and shoot them where it hurts the most.
Now you can enter the second door and open the third. Shoot one shot. 1 + 2
guards will come running. In the room after you won't find any guards, but a
neat pick-up; Jackhammer and ammo. From now on the Jackhammer is the recommended
weapon to use in the tunnel. It has excellent fire-power in short distance and
you can almost shoot automatic fire with it. Now continue, using the tactics
mentioned above. I lost count, but there are rooms and corridors, all with
guards who will hear your shots and come running to open the doors. Jackhammer
them away and you'll be safe. Don't waste Jackhammer-ammo when you just wanna
alert guards, you won't get anymore shotgun-ammo.
I could have had some more screenshots here, but they all look the same as
the one above, a guard opening a door. Let's not waste any more time in the
tunnels. Oh yes, one more thing, there is a junction where you shall go right
(the room straight ahead contains nothing).
Ride the elevator to the surface. There are four guards patrolling the area
around you. Check your map and exit to shoot them one by one. To play it safe
you can return to the elevator room between the kills, no guards will enter the
elevator room.
When you have cleared the area, check out the western small
warehouse (flashbangs and hand grenades) and the eastern barrack (medikit +50).
Again check your map so that you can sneak up in the back of the enemy
patrolling the area behind the crates.

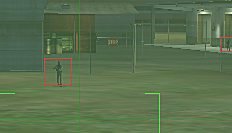
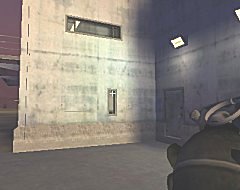
 Now it's finally sniping time! If you've wasted your valuable
dragunov-ammo and only have a few shots left, there are three guards who you
should pay extra attention to; The sniper on the top of the tank, the guard in
the watch tower (screenshot left) and the one inside the heavy machine gun post
(screenshot right).
Now it's finally sniping time! If you've wasted your valuable
dragunov-ammo and only have a few shots left, there are three guards who you
should pay extra attention to; The sniper on the top of the tank, the guard in
the watch tower (screenshot left) and the one inside the heavy machine gun post
(screenshot right).
The rest of the guards can be quite easily be killed with
AK47 and binoculars. Once alerted they will run outside the gate, but wait at a
certain spot. Don't get closer than 50 meters and you can be of good courage and
easily kill them. All in all there are 15 guards that you can snipe.
Save the
guards at the communication centre to the last. If you're getting low on ammo
you can climb the tank at the fuel dump where the sniper was and take get some
extra ammo.
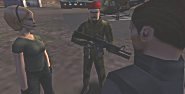 The last guard hides in the communication centre. A well placed hand
grenade through the narrow hole will finish him and the level. Anya and Harrison
will come and give new directives (Funny, now that you killed everyone by
yourself there is a multiplicity of friends who want help and give advice. I
have been wrong, this game is truly realistic).
The last guard hides in the communication centre. A well placed hand
grenade through the narrow hole will finish him and the level. Anya and Harrison
will come and give new directives (Funny, now that you killed everyone by
yourself there is a multiplicity of friends who want help and give advice. I
have been wrong, this game is truly realistic).
|
