 |
|
|
|
|
|
|
|
|
|
|
|
|
|
|
|
|
|
|
|
|
|
|
|
|
|
|
|
|
|
|
|
|
|
|
|
|
|
|
|
|
|
|
|
|
|
|
How to make a stand alone charger for your 2 cell mini RC car. |
|
|
|
 |
|
 |
|
|
|
|
|
|
|
|
|
|
|
|
|
|
|
|
|
|
|
|
|
|
|
|
|
|
|
When I first built my 2 cell Bit, I found out through trial and error that the original controller wouldn't cut it for charging my car. 3-4 alkaline batteries are enough to charge a 2 cell Bit or ZZ. |
|
 |
|
|
|
|
|
|
|
|
|
|
|
Parts you will need |
|
|
|
|
|
|
|
|
|
1) The transmitter from your project car to donate it's charging base.
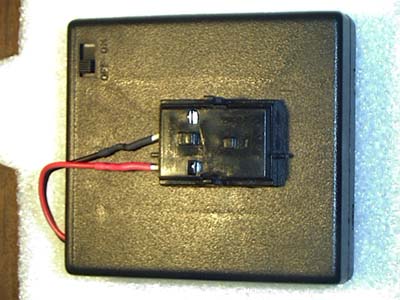
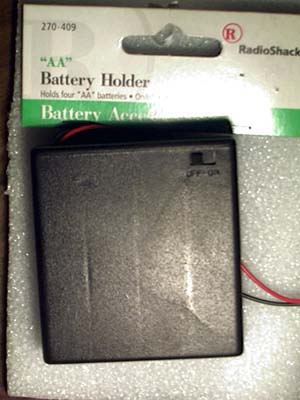
2) Radio Shack #270-409 4AA battery holder with on and off switch. |
|
|
|
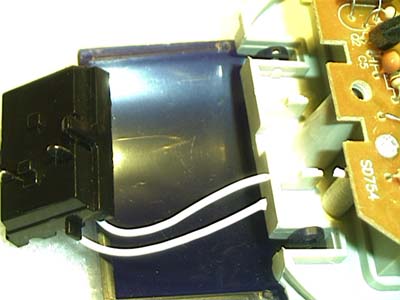
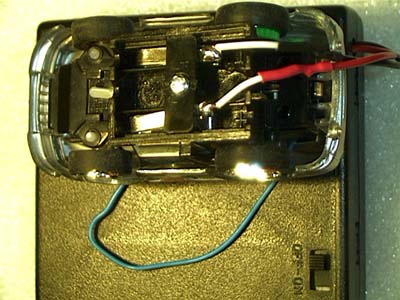
First thing to do is to determine which lead is the postive on the charging base. This is easily done by snapping the charging base onto the car and flipping it over to see the wires. The wires on the right-hand side of the car (from the car's perspective,,, not yours!) are the positive wires.
Next thing to do is to connect the wires from the RS 4 AA battery holder to the charging base. The red wire is the positve one and needs to be connected to the car's positive lead.
Connect the ground wire to the car's ground wire.
Make sure your connections are insulated and the charging contacts never short out! (touch each other)
You're Done!
Congrats |
|
|
|
front of car |
|
|
|
|
rear of car |
|
|
|
|
|
|
|
|
 |
|
|
|
|
|
Charging Tips |
|
|
|
When charging your car I suggest that people start conservatively and build up from there. I often feel the bottom of the car after I charge it and see if the cells are warm. If they get too hot it's no good. With really new batteries I would start charging at 90 seconds and slowly increase from there to increase run times.
4~5 minutes for 60~70 mah cells is OK,, this charger is NOT a peak charger, longer run times are possible but how much damage are you willing to risk?
10+ minutes of runtime are common with 150 mah cells,, but the charge times are also longer,, sometimes as long as 5+ ,minutes.
This charger will also work for a 3 cell car, but I don't have any time suggestions yet but I am open to hear about other people's experience with charge times. |
|
|
|
Bunta's 2 cell Bits mods |
|
multi cell ZZ mods |
|
|
|
|
clone gallery |
|
|
|
|
|
PCB swap tips |
|
mini RC pics |
|
|
|
|
|
|
|
|
|
|
|
|
|
|
|

|
|