|
|
|
|
Tarikh
|
|
|||||||||||||||||
|
|
|||||||||||||||||||||
Home
|
Ikatan
|
Perambut
|
Jenis ikan
|
Petua
|
Galeri
|
||||||||||||||||
|
|
|||||||||||||||||||||
Pancing Dot Com
|
|
||||||||||||||||||||
IKATAN DAN SIMPULAN |
|||||||||||||||||||||
|
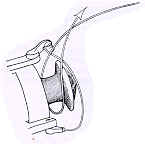
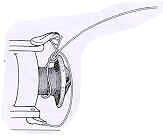
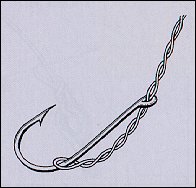
ATTACHING
LINE TO YOUR REEL Our
first task, after buying a rod and reel, is to wind a line of suitable breaking
strain onto the reel. We are going to attach the line to the spool of the
reel with a Centuari Knot. I suggest that the line should be wound onto the reel under moderate tension, enough to load the rod slightly. This is easier to do should someone holding the spool of line on a pencil, or the like, and applying a small amount of pressure. A better alternative is to first wind the line onto another reel. This reel is also mounted on a road, which is placed in a rod holder. Then the drag (clutch) of the first reel is adjusted to the desired tension for spooling the second reel. |
|||||||||||||||||||||
|
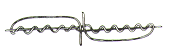
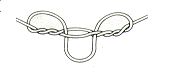
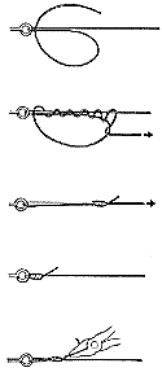
1. First loop the line around the spool |
2. Encircle the main line, or standing part with the tag |
||||||||||||||||||||
|
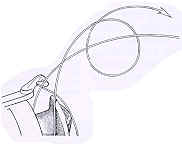
3. And again, |
4. Then a third time, this time passing the tag right over, then back through, the previous loops. |
||||||||||||||||||||
|
|
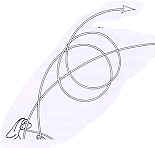
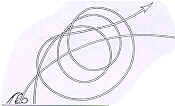
5. By following these steps, we create a noose, which is pulled tight on the spool of the wheel. When the noose is pulled tight we can wind the line onto the reel. |
|
|||||||||||||||||||
|
The Blood
knot
|
|||||||||||||||||||||
|
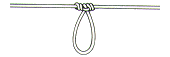
The Dropper
loop
|
|||||||||||||||||||||
|
The Swivel
knot
|
|||||||||||||||||||||
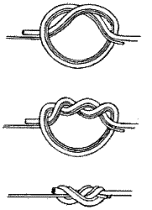
|
Double the end of the line forming a
loop allowing extra line to work with. Put the loop around some stable object
like a cleat or rod butt to keep the loop open. While keeping the line taut,
make 20 tight twists in the lines. Holding the twists tight, wind the
end of the line over the twist until you reach the neck of the loop; keep
these wraps tight and compact. Make a half-hitch around one side of
the loop; pull it tight. Make another half-hitch around the
other side of the loop; pull it tight. To complete the Bimini Twist, make 3
half-hitches around the base of the loop, tighten it and clip off the excess
line at the end. |
|||||||||||||||||||||
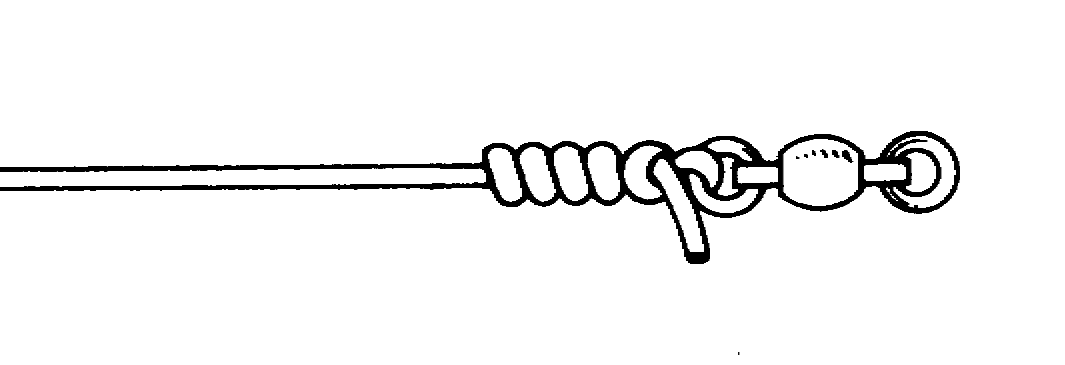
|
A basic knot for tying on hooks, lures, swivels, etc. You may
find it easier to tie than the Improved Clinch Knot. Properly tied it's just
as strong. Pass line through eye of hook and return through eye making a
3" or 4" loop as shown. Hold line and hook eye with one hand and use other hand to tie a
loose overhand knot in doubled line. Do not tighten. Hold loose overhand knot and pull loop over hook, swivel or
lure. Pull on doubled line to draw knot up making sure loop does not hang up in hook eye or swivel. Pull both line ends to tighten. Clip off end about 1/8" from knot. |
|||||||||||||||||||||
|
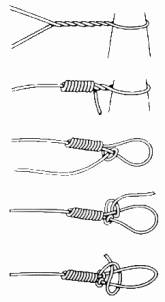
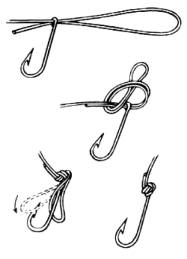
Knot Tying - The Improved Clinch Knot
2. Hold the tag end and
standing line while coils are pulled up. Take care that coils are in
spiral, not lapping over each other. Slide tight against the eye.
Clip tag end. |
|||||||||||||||||||||
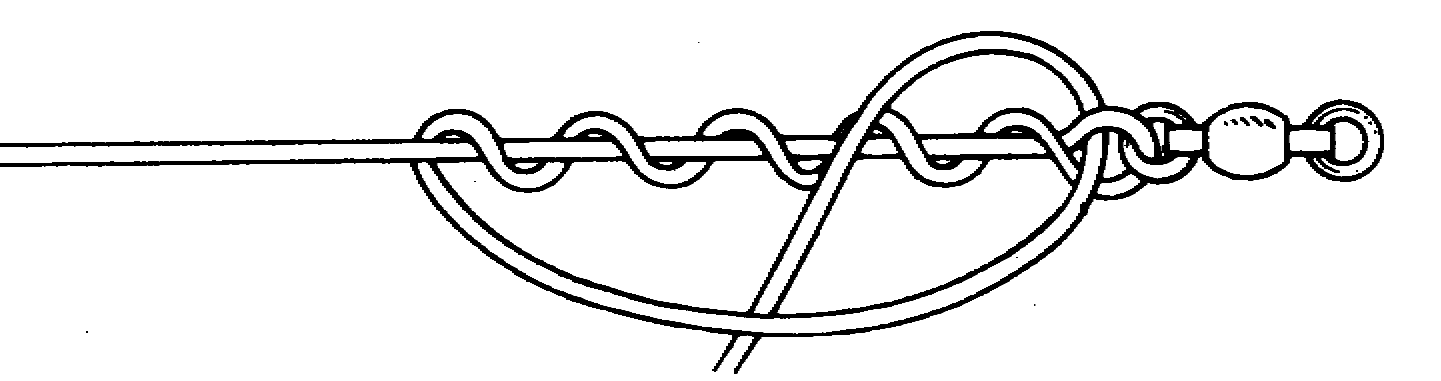
|
Run the line through the eye for at least 6
inches. Fold it back to form a double line and make a circle back toward the
hook or lure with the tag end.
To tie a small loop into the eye of a lure or
fly, giving it free movement in the water, tie the same knot, up to the point
where the turns are snugged up around the standing line.
Under normal casting and retrieving the loop will
hold. Once a fish is hooked, the knot will slide tight against the eye for
better security. |
|||||||||||||||||||||
|
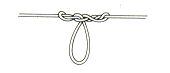
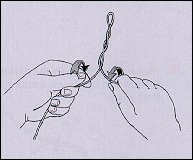
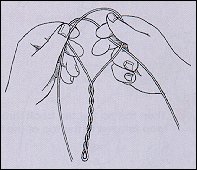
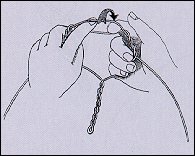
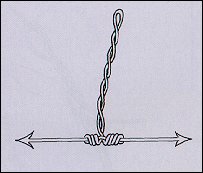
Twisted Dropper Loop The Twisted Dropper Loop enables a hook to be attached at any point along the line in such a way that it is most unlikely to tangle. This loop is simply a variation of the standard Dropper Loop, but with a twist in the main loop. It is ideal to use as a replacement for a three-way swivel.
|
|||||||||||||||||||||
|
For tying a leader to
a line end, where the diameters are unequal.
|
|||||||||||||||||||||