
Navigation Bar Tutorial #4, Page 4:
Okay, now you've got something that looks like the image below, so all we have to do is add the photos.

The photos I added came from the NetStudio 2000 CD. Use the INSERT
PICTURE ![]() icon to choose the photo you want to add.
icon to choose the photo you want to add.

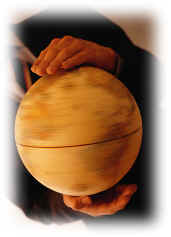
In this case, I chose the one NetStudio calls Spinning Globe. You can click on the picture if you want to see the full-size image.
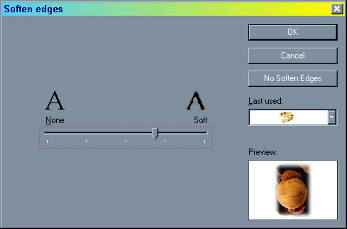
I applied the SOFTEN EDGES ![]() feature to the photo to smooth the transition of the edges of the photo. You can
also choose FORMAT > SOFTEN EDGES from the menu, which opens up a box
like the one below. The latter option gives you more range with regards to how
much you want to soften the edges of the image. This is a real useful feature
when you're blending one photograph into another.
feature to the photo to smooth the transition of the edges of the photo. You can
also choose FORMAT > SOFTEN EDGES from the menu, which opens up a box
like the one below. The latter option gives you more range with regards to how
much you want to soften the edges of the image. This is a real useful feature
when you're blending one photograph into another.
By dialing in the amount of edge softening I wanted, I got the image below:
I had to make it smaller in the NetStudio workspace in order to get it to fit within the framed border I had created. Next, I added the other two photos to get something like you'll see on the next page.


![]()
![]()
Home Navigation Bars Buttons Backgrounds Cool Tricks Next Page