Stock Machine
Planning
Transformation I
Transformation II
Big Step
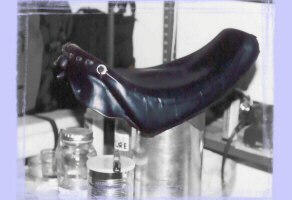
Solo Seat
Finished Product
Gallery 1
Gallery 2
from scratch!!
Oh well, once again I would have to delve into the cold nether-regions of the unknown. "I don't know how to build a seat"
I learned.
No, I couldn't do that. The seat was still too wide for my liking. For the seat pan, I had two choices: either aluminum or fibreglass. Fibreglass gave me some flexibility and allowed me to basically wrap the seat around the frame. Clean lines. Cool.
So I started with a cardboard template which was then stiffened and taped. I applied some mold release and then layed down approx. 3 layers of cloth a day, using a cold-cure epoxy resin, til I had about 12 layers. I trimmed the finished pan to follow the lines of the side covers exactly.
Next came the foam. Rather than carve up a big thick chunk of foam, I applied multiple layers of 1/4" foam, cut to shape. I placed a couple extra layers in the butt and used a couple of thin strips to help shape the forward section as well as the butt crack area. It's pretty comfortable ...but I stand on the pegs over train tracks.
My wife helped me cut the three pieces of seat cover which were stitched together, glue down, and pulled around the back to form a bit of a seat bib. That bib helps to cover the tube ends which were cut earlier. I gotta say, I was pretty impressed with myself. If you think you can, you can. If you can picture it, you can make it happen. Good old cliches.