Previous Page |
 Next Page | |
 | ||
Previous Page |
Next Page | |
| ||
Lesson 18: Adding Comments & Tracking Changes
You can add comments to a document that will not appear when the document is printed, although you can also print the comments if you want to. There are many reasons why someone might want to use comments in a document. One example might be an author who gives his or her editor the document to read. The editor can add comments on what he or she thinks needs to be changed and the author can later read the comments and decide whether or not to make those changes. Comments can also be used to track changes in a document. A tracked change is a mark that shows where an insertion, deletion, or other editing change has been made to a document.
Add a Comment
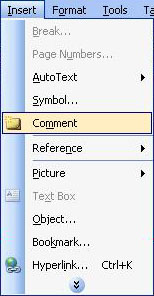
To add a comment, first select the text you want to comment on. Next, open the Insert menu and select Comment.
In some versions of Word, a "comment balloon" will appear in the document, to the right of the text, with a line pointing to that text. Type your comment in that balloon. In other versions of Word, a "comment pane" will appear at the bottom of the document window where you can type your comment. Click the Close button to close the comment pane; your comment will be saved. (NOTE: The name of the organization that was entered when Word was first installed on the computer will appear in the comment balloon or pane to identify who [which computer] wrote the comment. If different people are using the same computer to add comments to the document, each person should add their name to their comments.)
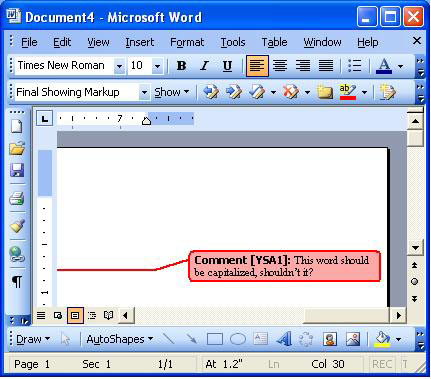
In some versions of Word, the word(s) with comments will be a different color (highlighted in yellow, for example) and the comments will appear when the mouse pointer hovers (rests) over the colored area. In other versions, comments will appear in the right margin area, with lines that connect to the word(s).
Remember that you can always use Microsoft Word Help if you have problems or questions regarding comments. (See the lesson called "Using Word Help.") Microsoft Word Help can explain how to respond to a comment, how to track changes with comments, and other features comments can be used for.
Delete a Comment
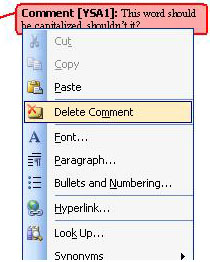
To delete a comment, right-click over it and select Delete Comment from the shortcut menu. (Again, remember to use Microsoft Word Help if you need more information.)
Print With or Without Comments
In older versions of Word, open the Print dialog box and in the "Print what" drop-down box, change it to Comments to print the comments or Document to print only the document. In Word 2003, change the "Print what" drop-down box to Document showing markup to print the document including the comments, Document to print only the document, or List of markup to print only the comments. Again, use Help if you need help in any of these areas.
Track Changes
As changes are made to a document, you might want to be able to keep track of what was changed and in what order. You can do this by tracking your changes. The Track Changes feature works differently on older versions of Word and Word 2003, so the instructions will be separate. Click here to go to instructions for Word 2003.
Instructions for Older Versions of Word:
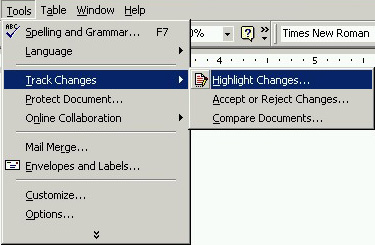
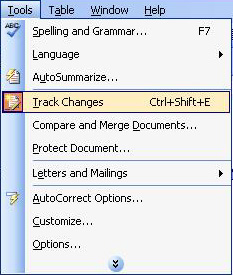
To turn on the Track Changes feature in older versions of Word, open the Tools menu, go to the Track Changes submenu, and select Highlight Changes.
The Highlight Changes dialog box will open.
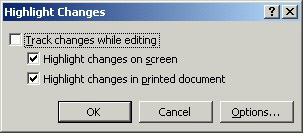
Click on the box next to Track changes while editing if you want to do so. (This will show your changes as you are typing and editing.) Click the Options button to change the way tracked changes are shown in the document. The Track Changes dialog box will appear.
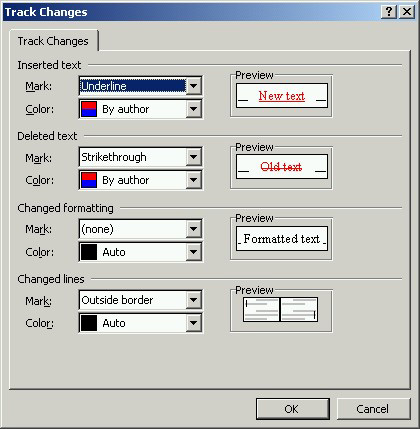
Make your changes and click the OK button on the Track Changes dialog box. Finally, click the OK button on the Highlight Changes dialog box.
When you are ready to work with the tracked changes, open the Tools menu, go to the Track Changes submenu and select Accept or Reject Changes. The Accept or Reject Changes dialog box will then appear.
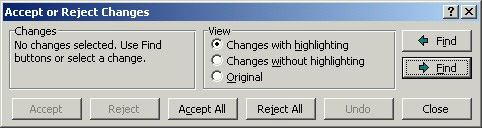
Use this dialog box to find each change and accept or reject the change(s). Use the Undo button to reverse an accept or reject decision you just made. Click the Close button when you are finished.
To stop the tracking of changes while you edit, go back to the Highlight Changes dialog box and clear the checkmark from the Track changes while editing option.
To turn on the Track Changes feature in Word 2003, open the Tools menu and select Track Changes.
The letters TRK will be shown in the status bar at the bottom of the document window to tell you that the Track Changes feature is on (for more information about the status bar, see Lesson 1: "Microsoft Word: Document Windows and Document Views"). While you are typing or editing a document, you can either show the changes as they are made or show the document as a normal document. To show the changes as they are made, open the View menu and select Markup.
The Reviewing toolbar will appear while you are working with tracked changes. (If the toolbar does not appear, right-click over any toolbar and select Reviewing.)

If you want to see the tracked changes made by each individual person, click the Reviewing pane toolbar button (the names of the buttons will appear as the mouse point hovers over each one); click the button again to close the Reviewing pane. You can also use the toolbar buttons to turn Track Changes on and off, insert comments, highlight changes, accept and reject changes and many other tasks.
For more information about tracking changes, use Word Help (see Lesson 6, "Using Word Help).
Practice: To practice what was learned in this lesson, open Word (create a new document). Type a word or sentence and then follow along with the lesson to add a comment. Type another word or sentence and add another comment to that text. Move the mouse over the text and see if your comment appears, or follow the line to the comment balloon (depending on your version of Word). Follow the instructions to delete the comments. Close Word and the document without saving the changes.
 Previous Page |
Next Page |