Previous Page |
 Next Page | |
 | ||
Previous Page |
Next Page | |
| ||
Lesson 8: Templates & Wizards
Microsoft Word has templates and wizards to make creating documents easier. (Older versions of Microsoft Word, however, may not have templates and wizards, or may have limited ones.) Templates are designs that have already been created. All you have to do is add your own information. Wizards are guides that "walk" you step-by-step through creating a new template. A wizard will ask questions and, based on your answers, will build the right design template for your needs.
Templates
Below is a list of common templates available for Microsoft Word. However, not all templates may be available for all versions of Word.
| Microsoft Word Documents
Letters |
To choose a template in Microsoft Word, open the File menu and select New.
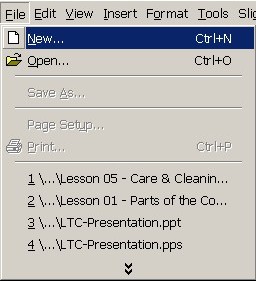
Older Versions of Word:
The New dialog box will appear, looking something like this:

Word 2003:
In Word 2003, the New task pane will appear on the right side of the window.
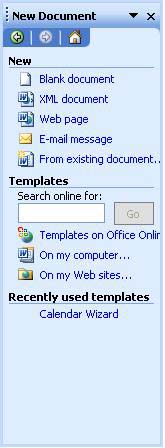
In the section called Templates, left-click once on the line that says On my computer.... The Templates dialog box will appear.
All Versions of Word:
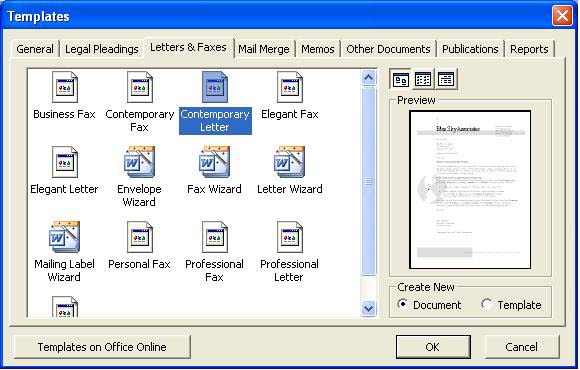
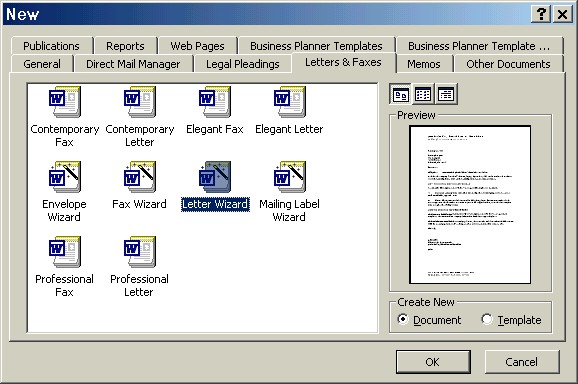
The tabs at the top of the dialog box are headings for different types of templates. Click on one of the tabs to view those templates.
Left-click on each template to view it in the Preview area of the dialog box.
In the Create New section, make sure the Document option button is clicked (not the Template option) because you want to create a new document using an existing template. Click on the OK button to use the selected template and that design will appear in your document window.
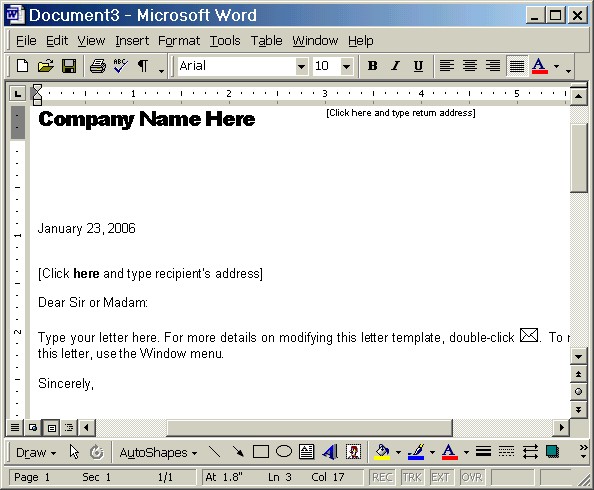
Many templates have information on how to input your information. Here is an example Professional Letter template. Notice how it tells you where to put the company name, where to click and type the return address, etc.
Practice: Open Word and start a new document. Open the File menu and select New. (In Word 2003, the New task pane will appear on the right side of the window. Under the Templates section, select On my computer....) In the dialog box, click on the different tabs to see what is available. Next, click on the Memos tab and then click on each memo template type listed (Contemporary Memo, Professional Memo, etc.) and see what it looks like in the Preview box. Click on Professional memo again, make sure the Document option is selected in the Create New section, then click on the OK button. In the document window, the Professional Memo template will appear. Select the text where it says to put the company name and type My Business, Inc.. Click where it says Click here and type name next to "To:" and type a name. Repeat this step and type your name next to "From:" and someone else's name next to "CC:". Repeat this step for the "Subject:" line and type New Employee. Read the information provided about how to use the memo template. (Note: Some of the information mentioned may be confusing because it has not yet been covered in the lessons.) Close Microsoft Word, with or without saving the changes.
Wizards
Sometimes you want to use a template to design your document to make your work easier, but you don't want to use any of the templates provided. In that case, you may be able to use a wizard to create a different design. However, wizards are only provided for certain types of documents such as memos, letters, faxes, r�sum�s, agendas and calendars. Again, not all versions of Word will have all available wizards.
To use a wizard, open the File menu and select New, just like you do to choose a template.
Older Versions of Word:
The New dialog box will appear, looking something like this:
Word 2003:
In Word 2003, the New task pane will appear on the right side of the window.
In the section called Templates, left-click once on the line that says On my computer.... The Templates dialog box will appear, which also includes wizards.
All Versions of Word:
The tabs at the top of the dialog box are headings for different types of templates and wizards. Click on one of the tabs to view the available wizards.
Click on the wizard you want to use (Letter Wizard, Fax Wizard, etc.). Click on the OK button to open the selected wizard.
A wizard takes you step-by-step through the process of creating your own design for a document. We're going to use the Letter Wizard for our example.
If you are using a wizard in a Microsoft Office application, that application's "Office Assistant" may appear to help you:
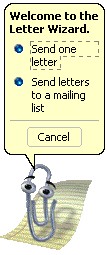
Click on one of the choices offered, or click on Cancel to cancel the wizard. In this example, we are creating only one letter.

Wizards will provide you with options and ask for your input. For example, in the first step of creating a new letter design, the wizard asks you to choose how you want the date to look in your letter, which page design and letter style you want to use, and whether you are using preprinted letterhead stationery or plain paper. Click the Next button when you have made your choices.

The second step of the Letter wizard is where you type the recipient's name and address and choose how you want the salutation to look. Click the Next button to go to the next step.
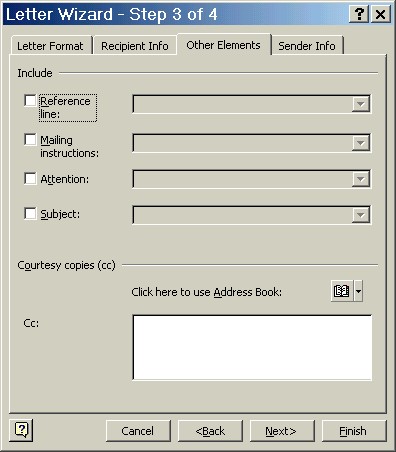
Step three of the Letter wizard is the "Other Elements" section. You can check the boxes of the details you want to add to the letter, such as a subject line, and you can add a name or list of names of people who will be receiving copies of the letter. Click Next to go to the fourth step.
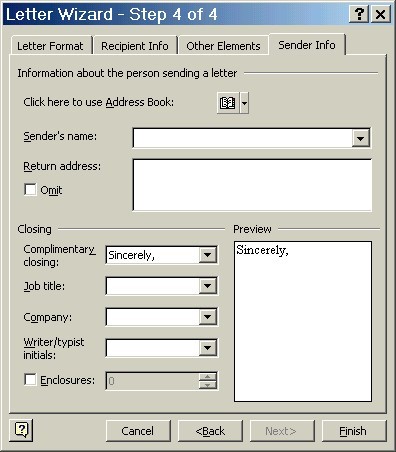
The fourth step in the Letter wizard is for the sender information and the closing. After entering the information, you can either click the Back button to go back to a previous step (or click the tab at the top if you want to go to a certain section) or click Finish if you are done designing the letter.
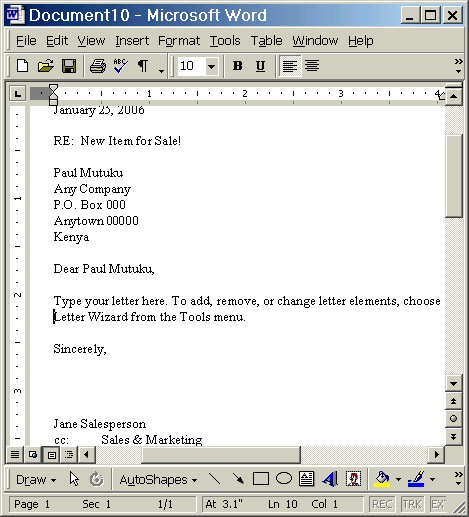
The picture above shows a letter designed using the Letter wizard. Note that the finished letter helps you by telling you how you can add the rest of your information.
Practice: Open Word and start a new document. Open the File menu and select New. (In Word 2003, the New task pane will appear on the right side of the window. Under the Templates section, select On my computer....) In the dialog box, click on the Other Documents tab, then click on the Calendar Wizard. Click on the OK button. If there is no Calendar wizard, use any other type of wizard in any of the tab sections. Once the wizard opens, read the information and click the Next button to go from step to step. Select any options. Continue to the end, then click the Finish button. Look at the calendar (or other document) you created with the wizard and then close Microsoft Word, with or without saving your calendar (or other document).
 Previous Page |
Next Page |