Previous Page |
 Next Page | |
 | ||
Previous Page |
Next Page | |
| ||
Lesson 7: Headers & Footers
Headers and footers appear in the top and bottom margins of documents (headers at the top; footers at the bottom). Headers and footers can contain any text or graphic (picture) and the text can be formatted like any other document text. Examples of headers are book and chapter titles, company logos, the current date or the date the document was created, page numbers, and document and file names. Footers can contain the same information as headers, but are usually used for page numbers and/or dates. If you wish, you can use one header and/or footer for the first page and different headers and footers for subsequent pages and sections of your document. For instance, some documents do not need header information and the page number to appear on the first page, which would mean the header and footer for the first page would be different (blank) than for the other pages. Headers and footers only appear in the Print Layout view in the document window (see Lesson 1, "Microsoft Word: Document Windows and Document Views") and on the printed pages. You can add headers and footers before you type a document, or after.
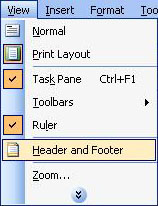
To work with headers and/or footers, open the View menu and select Header and Footer.
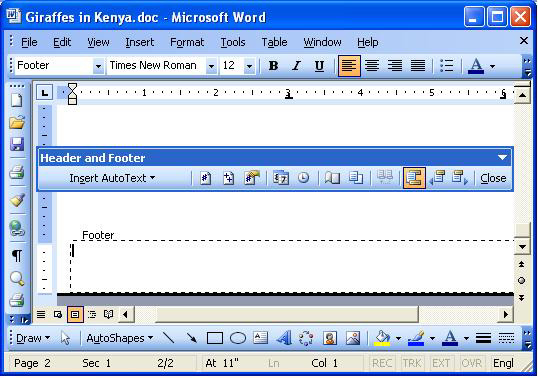
The header will appear, along with the Header and Footer toolbar.
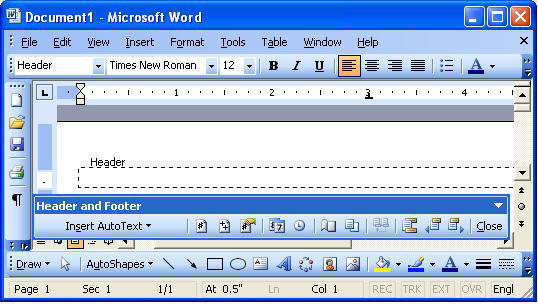
Insert a graphic or type text, then format and align the way you wish. We will use an example in this lesson to better explain headers and footers.
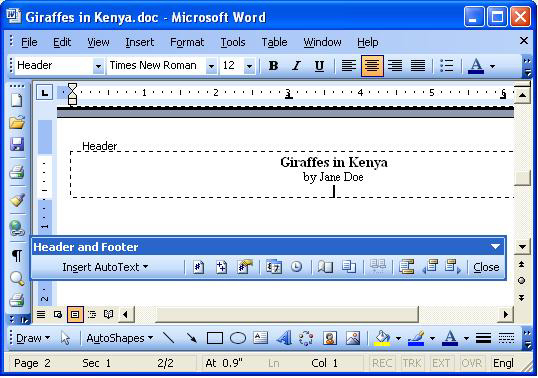
In our example, we will work with a report entitled "Giraffes in Kenya." On our cover page will be a picture of giraffes in Kenya and the title. Since we do not want a header or footer to appear on our cover page, we will go to the second page before we begin creating the header and footer. (Note: You can quickly go to a second page without pressing the Enter key many times: Open the Insert menu, select Break... and then choose the Page break option under "Break types.")

When you have a document that uses headers and footers but you do not want a header or footer on the first page, you need to change the Page Setup. Open the File menu and select Page Setup. On the Page Setup dialog box, click the Layout tab to open that section.
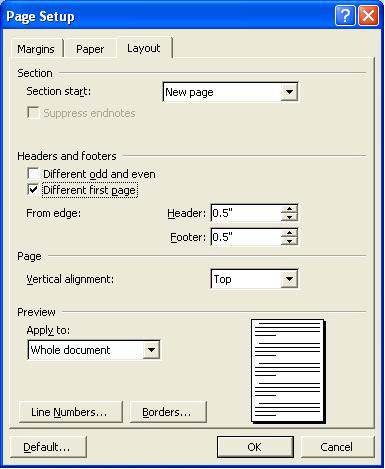
In the "Headers and Footers" section, select the option that says Different first page and then click the OK button to close the dialog box.
Now we want to create the header for all of the pages except the first page. Place the cursor on the second page, then open the View menu and select Header and Footer, as mentioned above. We will put the name of the report and the author's name (a fictional name, Jane Doe) in the header, then align the text in the center, increase the font size for the report name and bold the report name. We will also place a blank line below the author's name for extra space.
Next, we want to switch to the footer so that we can work on that. The toolbar button for switching between the header and footer looks like this:

Click on the toolbar button while in the header and the footer will open.
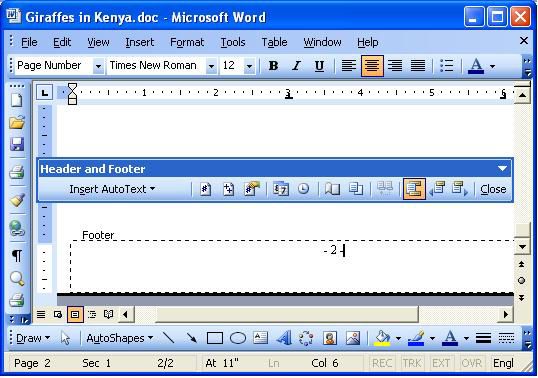
In our example report, we want the page number to appear in the center, with lines on either side, like this: - 2 -. To do this, we will first align to the center, then type a hyphen (-) and a space. Next, we want Word to automatically insert the page number so that we won't have to go through the entire document and manually type each page number. To automatically insert the page number, we will click on the Insert Page Number toolbar button on the Header and Footer toolbar.

After we insert the page number, we will type another space and another hyphen, so that when we finish, our footer looks like this:
To close the headers and footers, click the Close button on the Header and Footer toolbar. Remember to save your document!
Now, every page except the first (cover) page will have this same header and footer, although the page number will change.
If you want to have a different header or footer later in a document (different chapters in a book, for example, may have a particular chapter name in the heading), you have to create a section break at the end of the previous one. To create a section break, go to the end of the previous section and left-click once to place the cursor there. Next, open the Insert menu and select Break..., then select the Next Page option under "Section break types." When you are ready to add the header and footer for this new section, open the View menu and select Header and Footer. On the Header and Footer toolbar button, make sure the Link to Previous toolbar button is off, or else it will also change the previous header or footer. (NOTE: The name of each toolbar button will appear as the mouse pointer rests [hovers] over it.)
You can also automatically insert the date and time into your headers and footers. For information about this and other header and footer features, use Word Help (see Lesson 6, "Using Word Help").
Practice: Open Word and a pre-existing document, preferably one with more than one page. Save the document under a new name (so that you do not change the original). Follow the instructions above to add headers and footers to the document for all except the first page. Experiment by adding ClipArt and/or AutoShapes drawing objects (see lessons about those subjects) to your headers or footers. For more practice, create a new section and a new header and footer for that new section that do not link to the previous ones. When you are finished, close Word and the document, either with or without saving the document.
 Previous Page |
Next Page |