Previous Page |
 Next Page | |
 | ||
Previous Page |
Next Page | |
| ||
Lesson 5: Display/Hide Toolbars and Add/Remove Toolbar Buttons
Toolbars contain buttons that are shortcuts to commands. These buttons are shortcuts because it is faster to click on a button than it is to open a menu to select a command.


In this lesson, we will learn how to display (show) and hide toolbars, how to change docked and floating toolbars, and how to add and remove toolbar buttons.
NOTE: You will need to have Microsoft Word open and either a blank document or a pre-existing document open. When you have finished with this page of lessons, you can close the document, with or without saving the changes.
Display and Hide Toolbars
Toolbars can be organized so that only the toolbars you want are showing in the window, and only the most frequently used buttons are shown on the toolbars. For instance, Microsoft Word might automatically open with the Standard toolbar showing, which contains buttons for opening documents, saving, printing, etc. Word has many different toolbars available besides the Standard toolbar, including a Formatting toolbar with buttons for changing the font style, size, color, etc. There may also be toolbars for drawing, for working with pictures, and for working on the internet, among others.
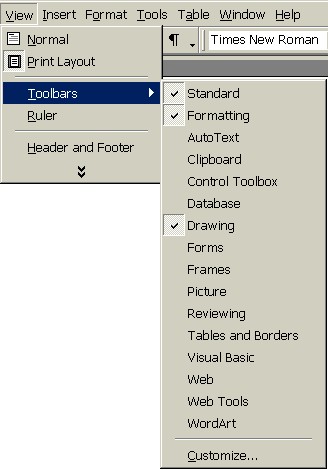
To display and hide toolbars, open the View menu and go to the Toolbars submenu. The toolbars that are currently displayed in the document window will have checkmarks next to their names. Click on the name of a toolbar that does not have a checkmark next to it to display it in the window. Click on the name of a toolbar that does have a checkmark next to it to remove it from the window.
Docked and Floating Toolbars
When a toolbar is "attached" to an application window, it is said to be docked. Most of the time, toolbars are docked at the top of the window, but they can also be docked on the sides of the window or on the bottom.

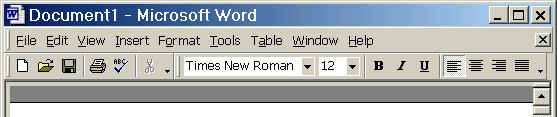
If there is enough room, you can have more than one toolbar docked on the same line. In the picture below, the Menu Bar is the only toolbar on the top line and on the second line are both the Standard toolbar and the Formatting toolbar.
Toolbars can also be floating instead of docked. This means that the toolbars are not attached to the window and can be moved around for convenience while working on certain parts of a document.

To move a toolbar from a docked position to a floating position, or from floating to docked, click on the left edge of the toolbar and drag the toolbar to the new location. (Remember, to drag an object you hold the left mouse button down, move the mouse, and then release the left mouse button.)

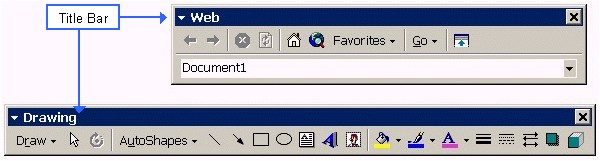
A floating toolbar can be moved to a docked position by double-clicking on its title bar.
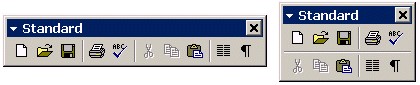
The shape of a floating toolbar can be changed by dragging any border. Left-click on any side (left, right, top or bottom) of a floating toolbar and move the mouse until the toolbar is the shape you want.
Add and Remove Toolbar Buttons
You can choose to have on the toolbars only the buttons you use the most often. Each toolbar should have a downward-pointing arrow on its far right side. (Note that if there is more than one toolbar docked on the same line, each toolbar will have it's own downward-pointing arrow on the right side end of that toolbar.) Left-click on that arrow and then click on Add or Remove Buttons.
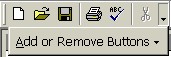
Buttons that are currently showing on that particular toolbar will have a checkmark next to their names. To add buttons to the toolbar or remove (hide) them, click on the button name.
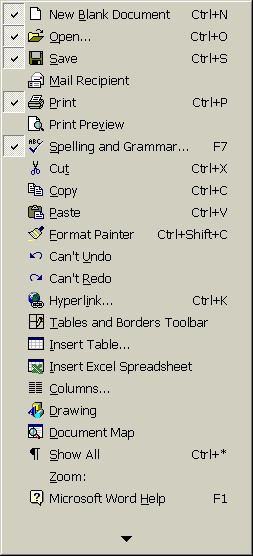
To close the menu, click anywhere in the document away from the menu, or press the Esc key on the keyboard.
Practice: Within a Word document, open the View menu, go to the Toolbars submenu and look at the available toolbar names. Notice which ones have checkmarks next to their names (those are the toolbars that are already displayed in your document window). Select a toolbar that does not have a checkmark next to it and look at it in the window. Use the instructions above to make a docked toolbar float, then dock it again. Return to the Toolbars submenu and re-select the toolbar you previously added, to remove (hide) it from the document window. Choose a toolbar and click on the downward-pointing arrow on the right side of that toolbar, then click on Add and Remove Buttons. Notice which buttons are already displayed on that toolbar. Select different buttons to add and remove them from the toolbar. Click anywhere away from the menu to close it, or press the Esc key on the keyboard.
 Previous Page |
Next Page |