Previous Page |
 Next Page | |
 | ||
Previous Page |
Next Page | |
| ||
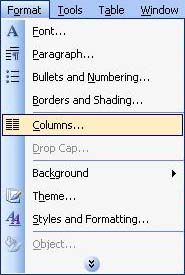
Newsletters sometimes use columns, just like newspapers. For the purposes of this lesson, we are going to use two columns in our newsletter. To create columns, open the Format menu and select Columns.
The Columns dialog box will appear:
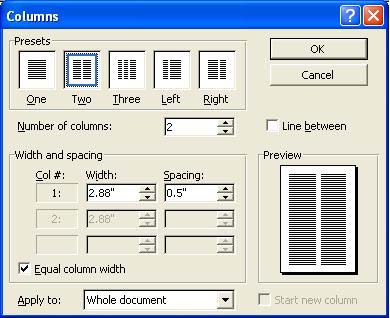
Click on the picture that shows the number of columns you want, or highlight and change the number shown in the "Number of Columns" drop-down box (or click on the arrows to increase or decrease the number). You can apply the columns to the whole document or, if your cursor is at the location of where you want the columns to start, you can change the "Apply to" drop-down box (at the bottom of the dialog box) to This point forward. Click on the OK button when you have chosen your options, or click on the Cancel button if you decide not to use columns.
Practice: Move the cursor in your newsletter so that it is below the title text box (you may need to press the Enter key a few times). Open the Format menu and select Columns. In the Columns dialog box, click on the picture for two columns or change the number in the "Number of Columns" drop-down box to 2. In the "Apply to" drop-down box, select From this point forward. Click the OK button. Save the changes to your document.
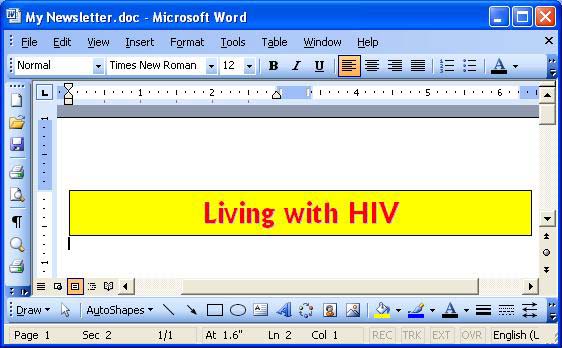
This is what the newsletter looks like now. Notice the changes to the ruler toward the top of the document window. You cannot see the columns in the document yet, but you can see the column margins in the ruler.
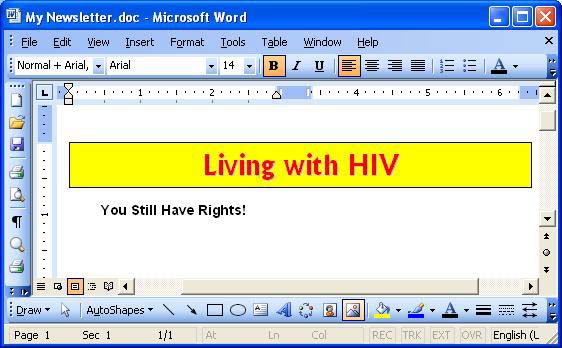
Newsletter articles, like newspaper articles, usually have headlines. Our first headline is going to be "You Still Have Rights!". After typing it two lines below our title text box, we are going to change the font name and size, and make the headline bold and centered.
Change the Font Name and Size:
To change the font name and size, we can use either the toolbar buttons or the Font dialog box from the format menu. If we use the Font dialog box, we can also make our text bold at the same time. To open the Font dialog box, open the Format menu and select Font. (If you have already typed the text, remember to select the text first, before opening the dialog box.) In the Font dialog box we will change the font to Arial and the font size to 14, but you can use whichever font and size you want. We will also select Bold in the Font Style section, clicking the OK button when we have finished making our changes.
Apply Bold Font Style:
As mentioned above, we applied the bold font style already while we were using the Font dialog box, but we could have used the Bold toolbar button instead. If we had already typed our text, we would select it and then click on the Bold toolbar button (it has a big "B" on it). Otherwise, if we had not yet typed our headline, we would click the Bold toolbar button, type the text, then click the button again to turn the Bold off.
If the Bold button is not on the toolbar, use the Font dialog box instead and/or see the lesson called "Display/Hide Toolbars and Add/Remove Toolbar Buttons."
Center the Headline:
Use the Center Alignment toolbar button to center the headline: If the text has already been typed, select the text and then click on the Center Alignment toolbar button. If it has not been typed yet, click on the Center Alignment toolbar button, type the text, press Enter twice, and then click on the Left Alignment toolbar button so that the rest of the text is aligned on the left.
If the alignment buttons are not on the toolbar, see the lesson called "Display/Hide Toolbars and Add/Remove Toolbar Buttons."
Another way to center the headline is to select the text, right-click over it, and select Paragraph from the shortcut menu. In the "Indents and Spacing" tab section, go to the General section and change the Alignment to Centered.
Practice: Place the cursor in the document so that there is a blank line beneath the title text box (press Enter as needed until the cursor is two lines below the text box). Type You Still Have Rights!, then press the Enter key twice. Go back and highlight the headline. Open the Format menu and select Font. Change the font to Arial (or any other font), the font style to Bold, and the font size to 14, then click the OK button. If it is not still highlighted, highlight the headline again and use either the Center Alignment toolbar button or the Paragraph dialog box (see instructions above) to center the headline. Move the cursor so that it is two lines below the headline (it should be left-aligned already; if not, repeat the centering instructions above but align on the left instead of center). Save your document.
To save time, we are going to copy and paste most of the newsletter text so that you won't have to type it.
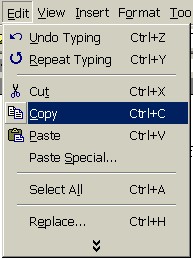
To copy something (text or any other object in a document), you first need to select it. Then, open the Edit menu and select Copy.
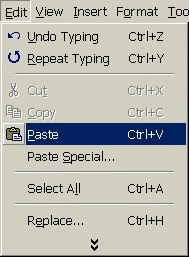
Move the cursor to where you want to insert the copied text or object (left-click once to insert the cursor at your new position), then open the Edit menu and select Paste. The text (or other object) will now be in both locations.
If you wish, you can move the text or picture (instead of copy it and have it in your document twice) by selecting Cut instead of Copy on the Edit menu. This will remove the item from its original location. When you select Paste the item will be moved to the new location. However, if you select Cut and do not select Paste, the item will be deleted. (If you accidentally cut something, you can use the Undo feature if it is available.)
There are actually three other methods to Copy & Paste (and Cut & Paste):
Practice: Copy the text in the box below and paste it into your newsletter by following these steps: Move the mouse pointer just to the left of the first word in the box ("Just") [the mouse pointer will change from an arrow to a line], hold down the left mouse button, move the mouse down to the end of the text in the box so that all of the text is selected, then release the left mouse button. Open the Edit menu and select Copy. Go to your newsletter and place the cursor two lines below the headline (left-click once at that location). Open the Edit menu in Word and select Paste. The text may carry over to the next column, but that's OK for now. When you finish pasting the text, select what you have just pasted and change the font to match the font in your headline (example: Arial), but in the Regular font style (not bold) and size 11 (open the Format menu and select Font to open the Font dialog box). Save your document.
|
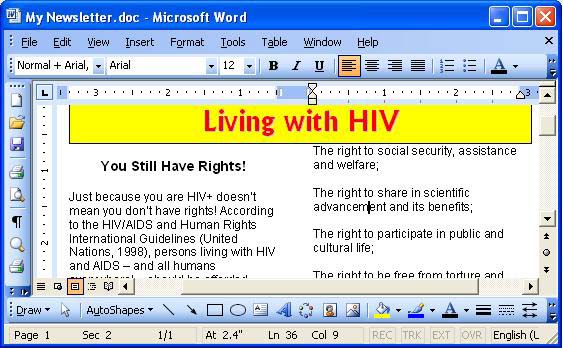
Just because you are HIV+ doesn�t mean you don�t have rights! According to the HIV/AIDS and Human Rights International Guidelines (United Nations, 1998), persons living with HIV and AIDS � and all humans everywhere! � should be afforded these rights: The right to life; The right to non-discrimination, equal protection and equality before the law; The right to the highest attainable standard of physical and mental health; The right to liberty and security of person; The right to freedom of movement; The right to seek and enjoy asylum; The right to privacy; The right to freedom of opinion and expression and the right to freely receive and impart information; The right to freedom of association; The right to work; The right to marry and found a family; The right to equal access to education; The right to an adequate standard of living; The right to social security, assistance and welfare; The right to share in scientific advancement and its benefits; The right to participate in public and cultural life; The right to be free from torture and cruel, inhuman or degrading treatment or punishment. |
Your newsletter should now look something like this:
 Previous Page |
Next Page |