Previous Page |
 Next Page | |
 | ||
Previous Page |
Next Page | |
| ||
Step 7: Automatically insert the current date.
If the AutoComplete feature in your Microsoft Application is turned on - and the date is set correctly on your computer - Word can automatically insert the current date in a document. Just start typing the first few letters of the month and the current date will appear in a little yellow box. To insert that date into the document, press the Tab or Enter key on your keyboard.

Turn on AutoComplete:
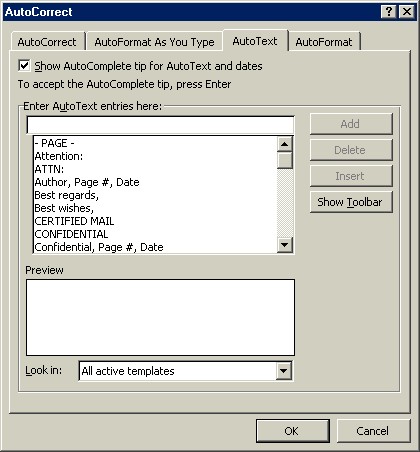
If the date does not automatically appear when you start typing it, check to see if the AutoComplete feature is turned on. To do this, open the Insert menu, go to the AutoText submenu and select AutoText. In the AutoText tab section of the AutoCorrect dialog box, make sure there is a checkmark in the box for Show AutoComplete tip for AutoText and dates. Click on the OK button when you have finished.
Change the System Date:
If AutoComplete is turned on but the date that appears when you type is the wrong date, or no date appears at all, you can try checking the system date on your computer. NOTE: You will not be able to perform this task if you do not have the correct security privileges on your computer.
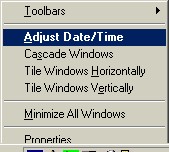
To check or change the system date in this way, the time must be appearing on the taskbar. Right-click over the time on the taskbar and select Adjust Date/Time from the shortcut menu.
Set the correct date (and time if you wish) and click the OK button. Now when you start to type the date in a Word document and the AutoComplete feature is turned on, you can automatically insert the date. NOTE: If there is a problem with the internal battery in your computer, the date will not stay current and will have to be reset every time the computer is turned on. If this is the case, it is recommended that you do not change the date and do not use the date AutoComplete feature.
Practice: Place the mouse pointer at the top left of your document. Press the Enter (also called Return) key on your keyboard 13 times. Start to type the current date and if the yellow box appears with the date, press the Tab or Enter key to insert the date into your letter. If the date does not automatically appear, follow the "Turn on AutoComplete" instructions above. If AutoComplete is turned on and yet the date still does not appear, type it in manually. After the date, press Enter four times. Save your document.
As you have seen in Step 7 above, the date can be automatically inserted. But Microsoft Word includes a lot of other words and phrases that can be automatically inserted, to save you time in typing. These are all called AutoText.
Some of the AutoText options Microsoft Word offers are:
| Attention Lines Closings Headers/FootersMailing Instructions Reference Lines Salutations (Greetings) Subject Lines |
To insert one of these commonly used phrases, open the Insert menu and go to the AutoText submenu. For each AutoText heading there is a submenu. Open the submenu and make your selection. That word or phrase will be inserted into your document.
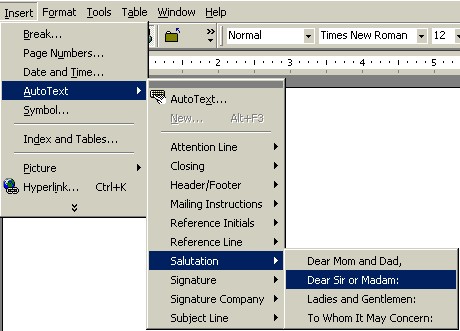
Practice: With your cursor four lines below the date, open the Insert menu, go to the AutoText submenu, continue on to the Reference submenu and select RE:. Press the spacebar twice. Type Your Application. Press Enter twice. Return to the Insert menu, go to the AutoText submenu, continue on to the Salutations submenu and select Dear Sir or Madam. Press Enter twice. Save your document.
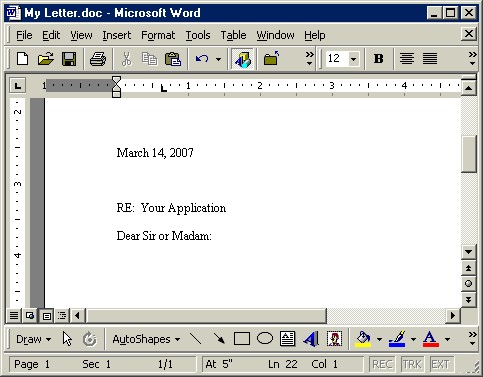
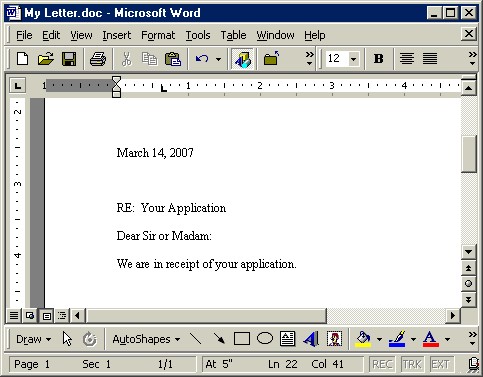
Your letter should look similar to this now:
Now you are at the point where you can type the body of your letter. For the purposes of this lesson, we will type only one sentence at this point (see Practice below).
Practice:
With the cursor two lines below where it says Dear Sir or Madam:, type the following sentence: We are in receipt of your application. Press the spacebar twice. Save your document.
Your letter should look similar to this now:
Undo:
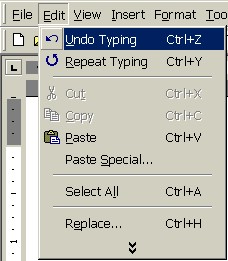
Sometimes you change your mind after typing or inserting something and want to return your document to the way it was before you made your change. You can do this by using the Undo command. There are three ways to use Undo. One way is to open the Edit menu and select Undo (Undo Typing, Undo Insert Picture from File, etc.; whatever your last act was).
Another way is to click on the Undo button on the toolbar, if there is one.

A third way is to press and hold the "Ctrl" key on the keyboard, press the "Z" key once and then release both keys ("Ctrl+Z").
Once you use the Undo command, your document will return to the way it was before your last act. For example, if you have just typed the sentence Today is a great day! in a Word document and immediately use Undo, the sentence will be removed from the document. You can continue using Undo as far back as Word has the stored information in its memory. If the Undo command on the Edit menu is dimmed (not able to be selected), it means you cannot go back any farther.
NOTE: You can also use Undo when inserting objects such as pictures and clip art.
Redo:
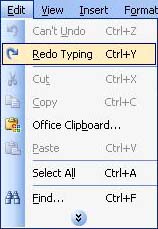
If, after you have used Undo to remove your last act (typing, inserting, etc.), you wish to Redo it (put it back where it was), you can. There are three ways to use Redo. One way is to open the Edit menu and select Redo (Redo Typing, etc).
Another way is to click on the Redo button on the toolbar, if there is one.

A third way is to press and hold the "Ctrl" key on the keyboard, press the "Y" key once and then release both keys ("Ctrl+Y").
If you use the Undo command, your last act will be removed. If you then use Redo, it will be placed back into the document.
Practice: With the cursor two spaces after where it says We are in receipt of your application in your letter, type the word Remove. Open the Edit menu and select Undo Typing. Notice how the word Remove is gone. Open the Edit menu again and select Redo Typing. The word Remove will be back in the document. Open the Edit menu a third time and select Undo Typing again so that the word Remove is no longer in the document. Save your document. Optional: Repeat the above steps with the two other methods mentioned in the lesson (the toolbar buttons and the keyboard keys).
 Previous Page |
Next Page |