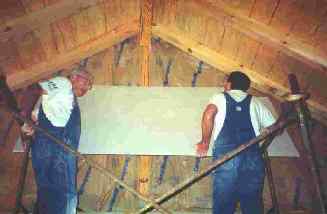
INSIDE WORK - Part II
Log Home Construction by the Homeowners:
Ron and Susan Colbow & Families


HOME

1. BEFORE THE KIT ARRIVES - Part I
2. BEFORE THE KIT ARRIVES - Part II
3. THE KIT IS DELIVERED
4. LOG WALL CONSTRUCTION - Part I
5. LOG WALL CONSTRUCTION - Part II
6. ROOF CONSTRUCTION - Part I
7. ROOF CONSTRUCTION - Part II

8. WALK OUT BASEMENT WALL SIDING
9. SHINGLING THE ROOF
10. SEPTIC SYSTEM INSTALLATION
11. OUTSIDE TRIM
12. INSIDE WORK - Part I
13. INSIDE WORK - Part II


  The family starts the ceiling and insulation installation with the attic ventilation baffles. These baffles are installed wherever the soffit vents are installed, preventing insulation from blocking the soffits.
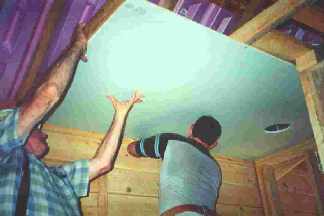
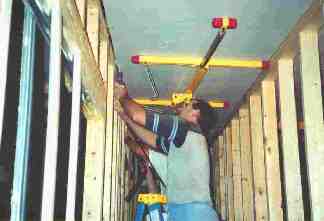
Top of Page

The first piece of ceiling drywall goes up in the master bathroom.

Top of Page

Using a drywall lift and drywall screw gun is the only way to put a ceiling up. By using the lift, the family was able to use 12 foot long sheets of drywall on the ceilings. It took the family about 5 days to do the ceiling.

Top of Page

The walls are started from the top. The Great Room walls were the first and hardest to hang.

Top of Page

With the drywall hung, each room starts to take shape.

Top of Page

A subcontractor is hired to finish the drywall.

Top of Page

<<< Previous Page  


This site is sponsored by:

B & H CEDAR LOG HOMES, L.L.C.
"Life-Styles in Solid Cedar"
65 Nottingham Dr. - Fredericksburg, Virginia 22406
------------
Phone: 540-752-4106 - E-Mail: [email protected]

Copyright 2000, 2001, 2002 © B & H Cedar Log Homes, L.L.C. All rights reserved.
Send mail to [email protected] with questions or comments about this web site.
Last updated:05/12/2004


privacy


Hosted by www.Geocities.ws

1