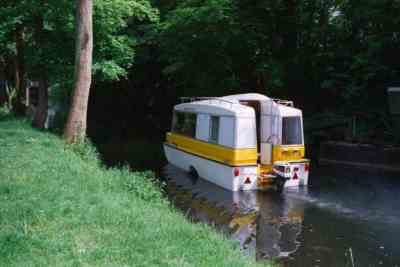
Tom's Caraboat refit
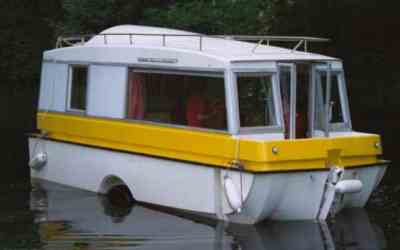
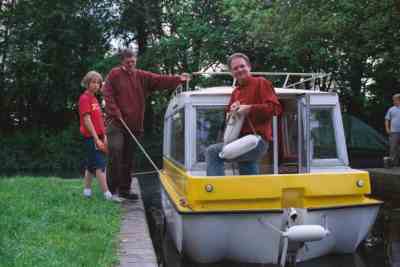
My Microplus convinced me that trailable boats were far more flexible than having a large boat on a fixed mooring with the option of going up the river or down the river. The downside was a small cabin OK for two nights but not good enough for a week. Seeing Mr Lewis on the Mon & Brec in about 1997 with his Caraboat made me realise it was possible to have a trailable boat that would be comfortable for an extended cruise & keep the flexibility of a trailer boat. After searching unsuccessfully for a Caraboat I looked at Wilderness cruisers but in good condition plus a big truck to pull it you can say good bye to almost £20k so it was back to searching for a Caraboat. Fortunately I was given John's number & soon found a suitable boat for restoration.
The chassis was giving way, the wheels were rubbing the hull & the tyres might have burst, so it was not safe to tow home. My car could have towed a Caraboat but a Caraboat plus trailer would have been too much so the job was contracted out. The chap that transported my project from Retford said that it was well over my estimated weight of one tonne because it broke his loading ramps.

That convinced me to remove all unnecessary weight & so after a few days & four trips to the dump I had an empty shell.
Chassis
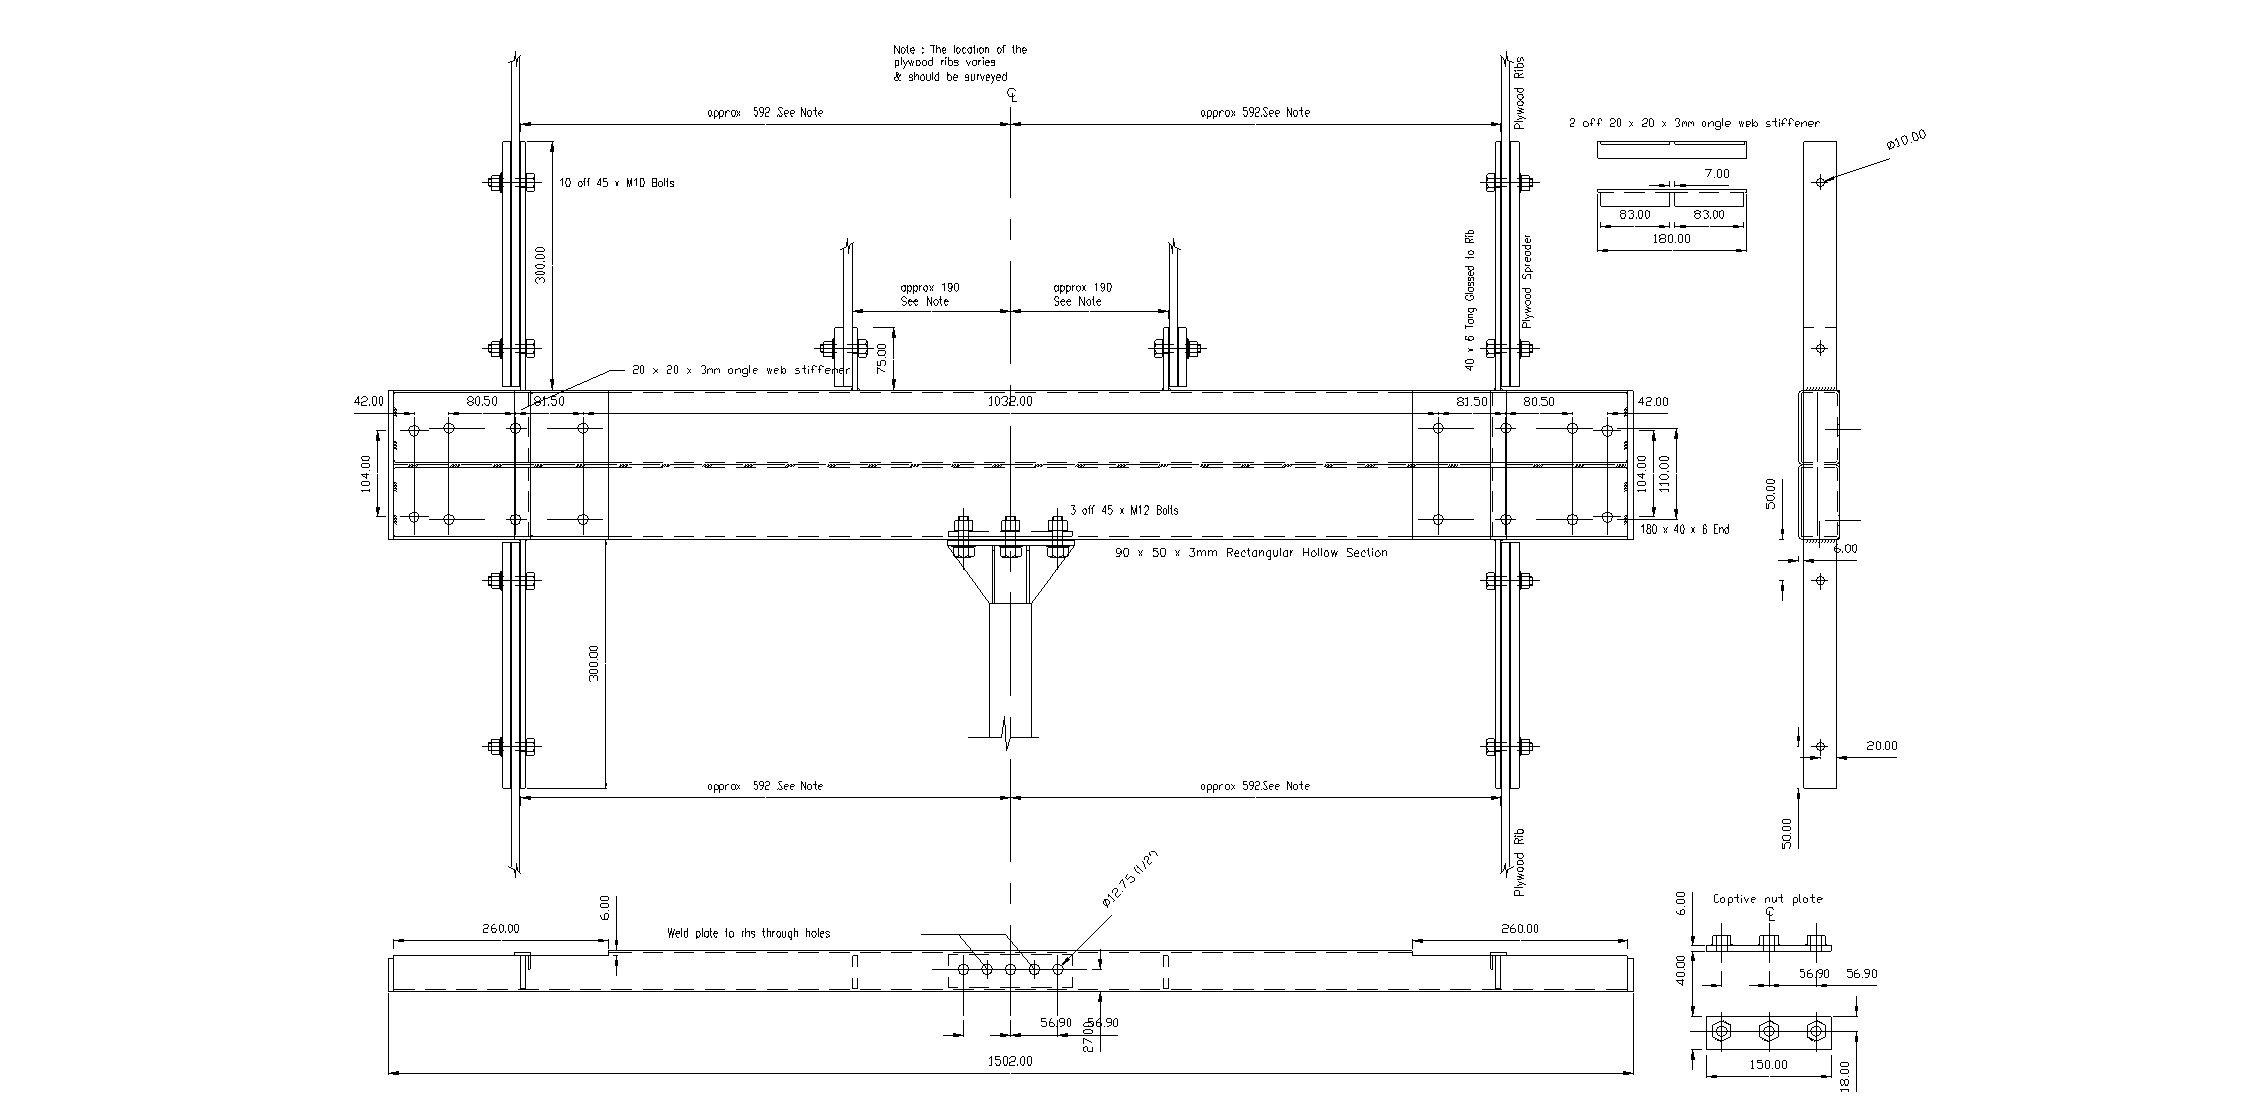
The chassis was bent like a banana so I built a new transverse chassis as described by John (see Drawing)
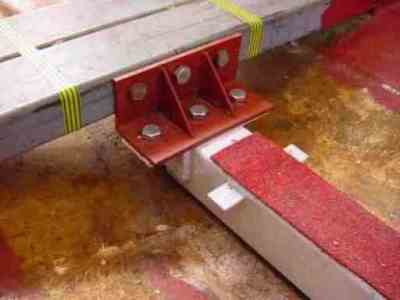
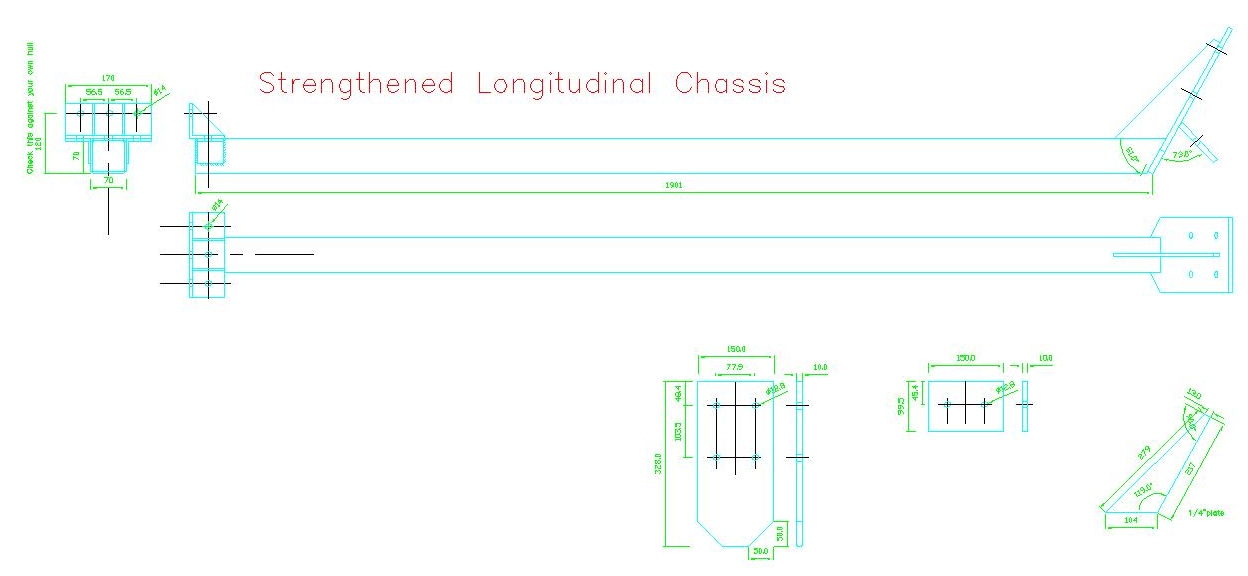
The longitudinal chassis was heavily corroded so it was replaced. I then did some stress calculations which showed the longitudinal member wasn't strong enough so for peace of mind replaced it with a 70 x 70 x 4 box section. (see Drawing)
An expert welded the joint at the front of the chassis as it is highly stressed there. The rear joint was designed to allow removal of this section without having to remove the transverse chassis. This later saved time when a crack in the fibre glass by the hitch caused a leak. A tang welded to the chassis holds a ply strut, which supports the splashwell.
Brakes
The overrun hitch was locked solid & nothing looked like shifting until I replaced the grease nipples & used a grease gun, which locked onto the nipple & has a lever on the side.
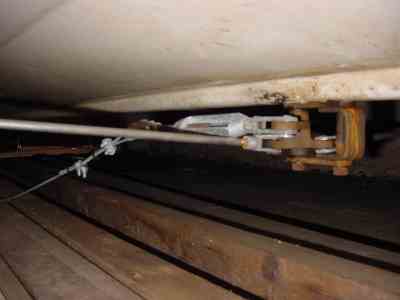
The brake compensator was just a lump of corrosion & had to be cut off with an angle grinder & replaced.
Luckily the brake drums were in pretty good order & only the shoes (Morris 1000) needed replacing & the backplates painted. The bearing were as expected. The discount for trade on bearings can be of the order of 60% so shop around when sourcing them. I heat the grease in an old saucepan before pouring it into the hub through a funnel. Then top up with a grease gun to get the hubs a full as possible.
Internal Layout
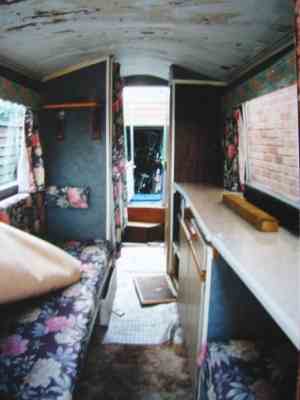
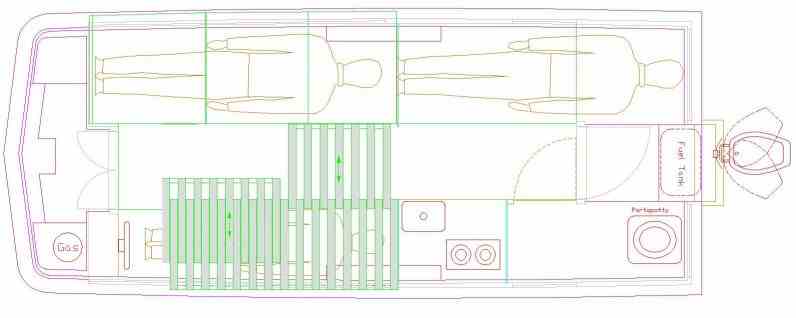
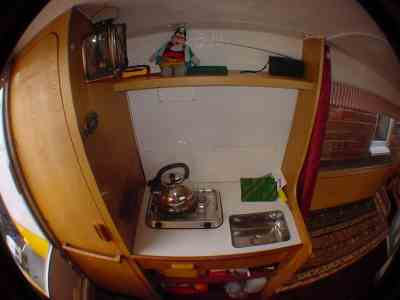
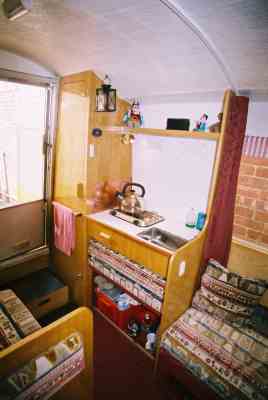
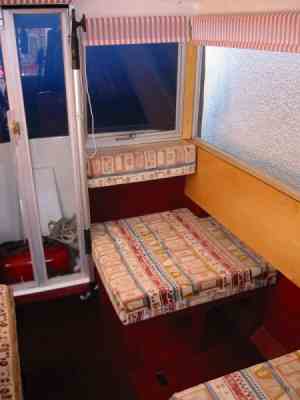
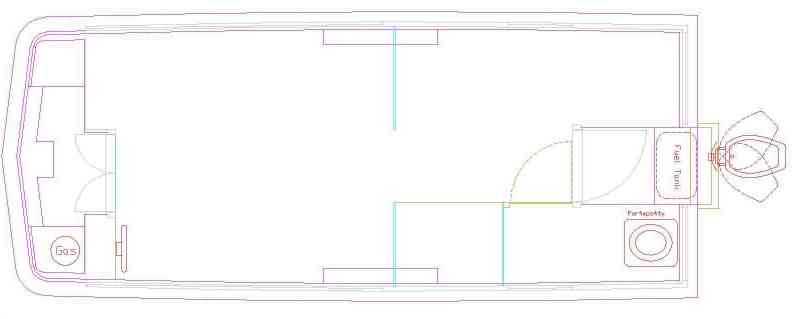
Having striped out the boat the original layout could be changed & a more open plan was aimed for. The existing cooker weighed a ton & didn't have a flame failure device so was condemned. A new oven would cost a fortune & be of little use as pubs are never far away on the rivers & canals, instead a two-burner hob was chosen. By using a very small sink the galley can be squeezed between the loo & bulkhead. That left the front half of the boat for a generous seating area / double bed. This Blank Plan is for you to plan your own layout.
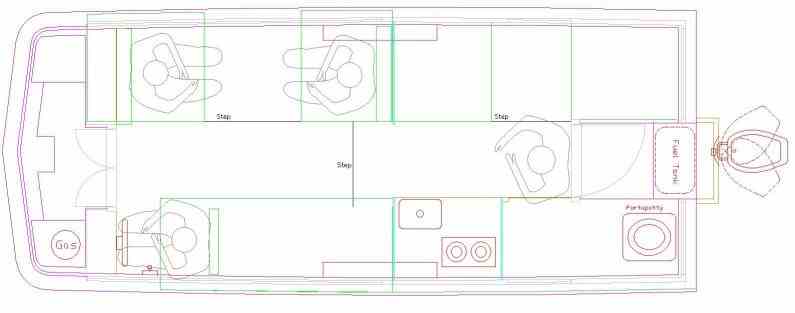 Daytime plan
 Nighttime plan
Internal fit out
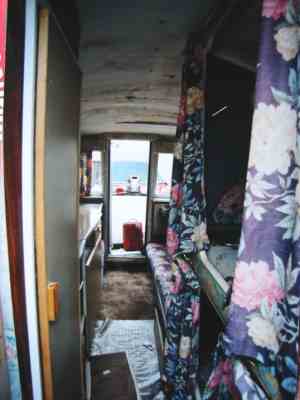
Ash veneered plywood was chosen to keep the inside as light as possible. Rather than replace the internal cladding, which went down to, the floor the fibreglass was simply painted which gains about 6inch overall width, doesn't weigh anything & is free.

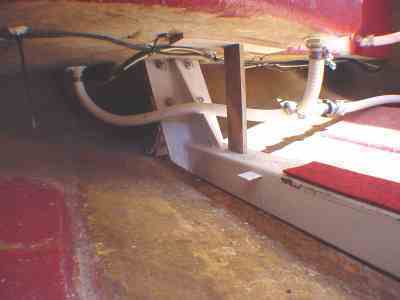
The bulkhead was kept as minimal as possible to retain the open plan & was a copy from John's design. It is a sandwich of 3mm ash-faced ply, 8mm ply & another ash ply. It is securely fixed to the chassis by a welded on tang & angle upright. Angle brackets fix it to the midrail timber.
The toilet wall was constructed in the same way but large areas of unnecessary material were cut out in the pursuit of weight reduction. The door was then cut into the wall using a floorboard saw & then a jig saw so the grain on the door matches the surround. The threshold is high at eight inches so the loo could be accessed with the step in place or not.
Floor
Instead of having a floor from one side to the other the floor only runs down the centre & drops down forward of the chassis. The top of the longitudinal chassis forms the floor at the front & tags welded on support floor panel either side. This reduces weight & importantly for me gives improved headroom although it does create a small step, which is a tripping hazard. A lighter shade carpet has been fitted to the edge but it still trips strangers.
Bed Modules
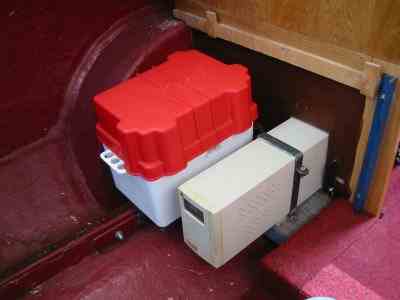
There were numerous leaks, no sooner had one been cured & another was found so most of the woodwork was built as removable modules. That allowed units to be removed if damp affected them & gives excellent access. The module sizes were chosen to take two plastic boxes giving room for six or more. The boxes are liable to end up spread all over the floor during towing so some form of restraint needs adding.
Blinds & Curtains
Roller blinds were chosen for all the windows because they leave the glass completely clear. A steel insert has since been added to the cardboard tubes as they sagged when the atmosphere became damp.
A pair of curtains runs across at the line of the bulkhead to give privacy without having to lower all the blinds. The non-fireproof fabric was treated with a spray & then a sample tested with a blowlamp.
Upholstery
The foam in the original upholstery was tested with a match & burst into flame so joined the woodwork at the tip. The new foam cost about £100 but it stooped burning the moment the blowlamp was removed.
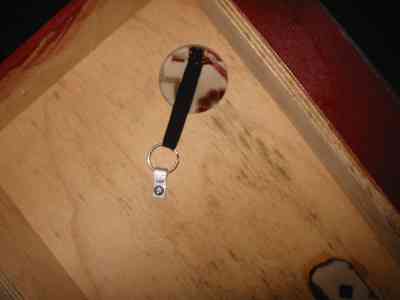
A loop of elastic with a keying on the end is sewn to the cushions. This passes through a hole in the base onto a hook & stops the cushions from being scattered by the drive to the river.
Roof
I decided not to fit a liner to the roof but started to smooth it with filler. This was going to take ages so tried just painting it, which looks pretty good. It does get wet with condensation in the winter & there are now tiny spots of mould so a layer of insulation would be better although I doubt that it would keep it any warmer as there is such a large area of glass. When the temperature is below 5c it is impossible to work even with a 1Kw heater.
Mid section
Rather than strip the paint from the aluminium panels they were replaced with a PVC / foam / PVC sandwich as used in double-glazed doors. That gave a good finish inside & out with no painting, good thermal properties & light weight.
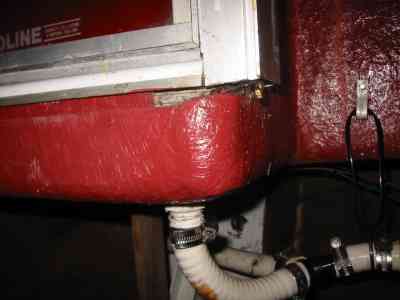
Hull
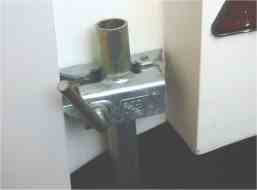
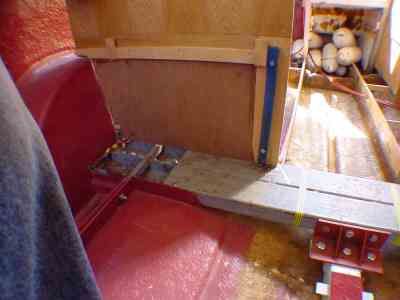
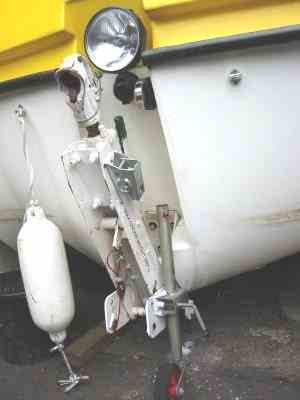
The metal plates behind the leg brackets had rusted away so having removed them it was a good opportunity to replace the brackets with modern ones which allow the legs to be removed easily & left at home. The original solid steel legs were replaced with tubular ones from Towsure
The front legs were removed & leg brackets added to the hitch.
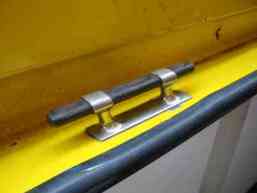
The mooring cleats had seen better days so they were nickel-plated & new oak rails fitted. Ply spreader plates were also fitted inside the hull.
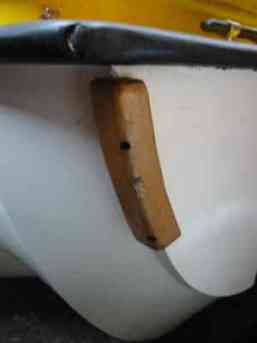
 It is impossible to get a fender to properly protect the front corners & difficult not to touch a pontoon when mooring so oak corner protectors were made.
Hitch
 Engine

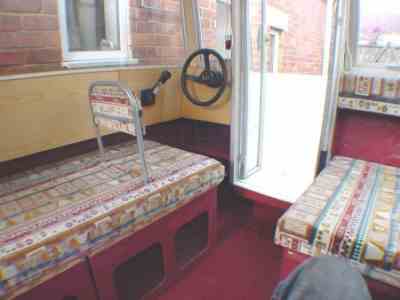
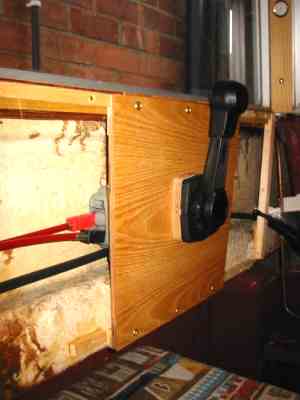
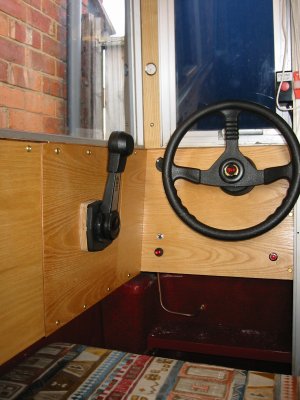
Controls
Steering
Gas Locker
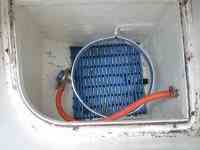
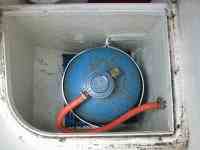 Water leaked into the gas locker & leaked out almost as quickly
into the bilge. A 25 x 25 x 3 angle frame resined in solved the leak in & a
5 mm layer of fire retardant glass fibre will stop any leaks out & satisfied
the boat safety inspector. This locker is now the driest part of the boat
without a drop getting in. The fire retardant resin was obtained from Glasplies
of Southport 01704 540626 at a cost of about £18 for 11 lbs which should be
enough to do both lockers although I have only done one so far. Their literature
is very good but do ask for their supplimentary sheet on fire retardant resins.
I also fitted an aluminium hoop to secure the cylinder in place.
Water leaked into the gas locker & leaked out almost as quickly
into the bilge. A 25 x 25 x 3 angle frame resined in solved the leak in & a
5 mm layer of fire retardant glass fibre will stop any leaks out & satisfied
the boat safety inspector. This locker is now the driest part of the boat
without a drop getting in. The fire retardant resin was obtained from Glasplies
of Southport 01704 540626 at a cost of about £18 for 11 lbs which should be
enough to do both lockers although I have only done one so far. Their literature
is very good but do ask for their supplimentary sheet on fire retardant resins.
I also fitted an aluminium hoop to secure the cylinder in place.
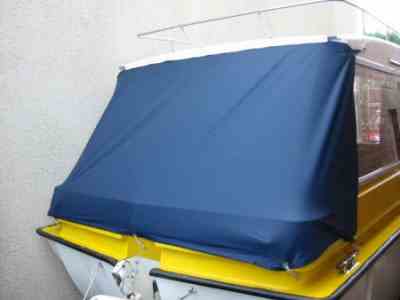
Cover
Electrics
Sea trials
Leaks
 Summary
I expected to take about 18
months doing the re-fit but in fact it took a year to plan and 2 years to do the
work. Some of the extras have been done in subsequent years. The biggest problem
was persistent leaks. I should have solved the leak problem before starting the
fitting-out.
If you are doing a Caraboat restoration I would be flattered if
you would like to incorporate any of my ideas into your project & will be
more than happy to pass on information or show you my boat in Gloucester.Tom(dot)[email protected] Please make sure you
include "Caraboat" in the title as I automatically block all mail without a
subject due to spamming.
Drawings
Port elevation
Blank Plan
Day plan
Night plan
Replacement transverse chassis
Replacement longitudinal chassis
Engine bracket