| Space Wolves - Battle Reports |
|
Scenario B : Time to Wake Up! - Turn 4 
Space Wolves Turn 4 Grey Hunters pack 1 pushed on towards the plasma bug behind bughole 1. Grey Hunters pack 3 finally emerged from the ruins to find themselves lagging behind the rest of their brothers. The Blood Claws along with Wolf Priest Logir pressed on towards the plasma bug behind bughole 2. Wolf Guard Battle Leader Sven carried on his solo march towards the plasma bugs. Without any visible targets, not even a spore mine, there was no shooting. The close combat saw the Carnifex strike down another two more Grey Hunters, shrugging off any hits against it. Still, the Space Wolves remained resolute. 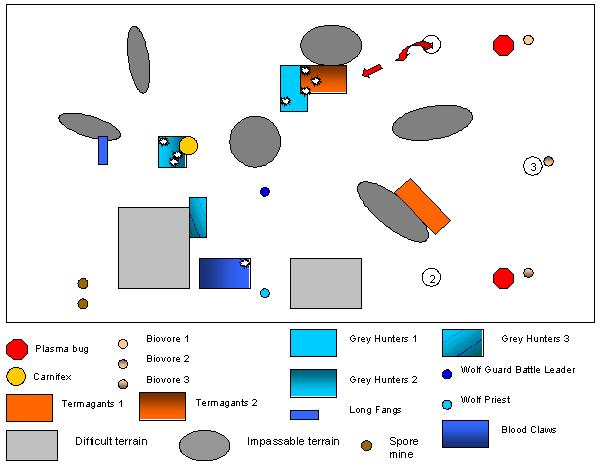
Tyranids Turn 4 Termagant brood 2 emerged from bughole 1 and headed straight for Grey Hunters pack 1. The hail of fleshborer fire brought down one Grey Hunter from Grey Hunters pack 1. Three more spore mines were launched, targeting the Blood Claws. One of them hit, bringing down a Blood Claw while the other two spore mines scattered behind the Blood Claws. Termagant brood 2 proceeded to charge Grey Hunters pack 1. Three Termagants were cut down for no loss to the Grey Hunters. The Carnifex scythed down another three Grey Hunters while ignoring all their attacks. The remaining two Grey Hunters held firm and refused to back down from the fight.
|
Introduction
Background Gallery Army Heroes Battle Reports Space Wolves Liber Imperialis |
|
This site is optimised for Internet Explorer 6 1024 x 768.
Warhammer 40,000 is a registered trademark of Games Workshop and no infringement of intellectual property is intended by the existence of this website. |