|
Cord Belt
Before making this belt you
need to find a suitable buckle. The best range is usually
available in a saddler. For this belt the buckle should have a
25-mm tongue bar. You will need six lengths of 2-mm cord
measured according to the following formula:
(waist measurement* + 10
cm) X 7 = required cord length X 4
For example, if your waist
measurement is 81 cm, the required length is (81 cm + 10 cm) X 7
= 6.4 m X 4 = 25.6 m.
*allowing for thickness of garments worn under belt.
-
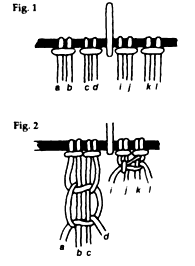
Fold four cords in
half, and tie a lark's head on the tongue bar, as in Fig. 1,
calling the strands a, b, c, d, i, j, k and l.
-
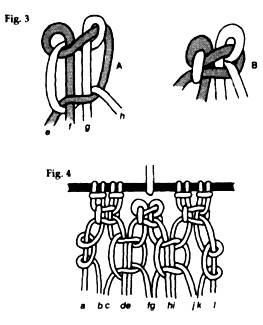
To form a Solomon's
bar, with a and d tie a square knot around b and c, and with i
and 1 tie a square knot around j and k, as in Fig. 2.
-
With the other two
cords put their bights together and call the cords e, f, g and
h. With e and h tie a square knot around f and g as in Fig. 3 (A
and B).
-
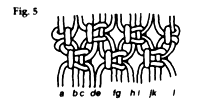
Holding figure three
between the two square knots of figure two, tie a lark's head
with b around a. Tie a square knot around d and e with c and f,
and around h and i with g and j, and tie a lark's head around 1
with k, as in Fig. 4. This completes the first ran.
-
For the second run tie
square knots around b and c with a and d, around f and g with e
and h, and around j and k with i and l, as in Fig. 5. Repeat
Figs 4 and 5, and continue doing so until you get the required
length.
-
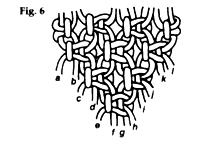
Point the end as in
Fig. 6.
-
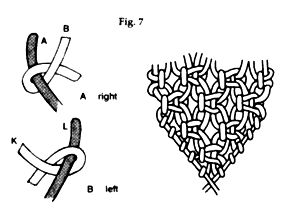
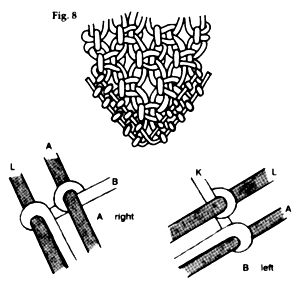
Half hitch b c d e f
around a by coming from underneath, over and down between the
working cord and the standing cord, as in Fig. 7 (A and B). Half
hitch the opposite side in the same way, using k, j, i, h and g
around l, and making sure that you keep the tension on the
cords. Cross cords 1 and a, taking 1 up towards b and a up
towards k, as in Fig. 8 (A and B).
-
To finish, tighten
knots and trim with a heated knife.


|