|
|
|
Scooter Installation |
 |
|
|
Electric Scooter
Gas Scooter |
|
Gas
Scooter
|
FAILURE TO FOLLOW THE INSTRUCTIONS CONTAINED HEREIN MAY RESULT IN
DAMAGE TO YOUR SCOOTER, DECREASE ENGINE LIFE, CAUSE INJURY TO
YOURSELF OR OTHERS AND MAY ALSO VOID THE WARRANTY
BEFORE ASSEMBLING AND STARTING THE SCOOTER YOU MUST CAREFULLY READ
AND STUDY THIS ENTIRE MANUAL
IT IS THE VEHICLE OWNER'S RESPONSIBILITY TO ENSURE THAT ALL LOCAL
AND STATE LEGISLATION REGARDING THE USE OF MOTOR SCOOTERS ARE
COMPLIED WITH. PLEASE CHECK WITH YOUR LOCAL DMV OFFICE OR
DEPARTMENT OF STATE FOR REQUIREMENTS REGARDING MINIMUM LEGAL
DRIVING AGE, LICENSING AND/OR REGISTRATION REQUIREMENTS IF ANY
DURING THE FIRST MONTH OF OPERATION - THE BREAKING-IN PERIOD -
NEVER APPROACH MAXIMUM SPEED; AVOID SUDDEN ACCELERATION AND DO NOT
DRIVE AT HIGH SPEEDS FOR EXTENDED PERIODS OF TIME.
ALWAYS WEAR A STRONG HELMET AS WELL AS SUITABLE PROTECTIVE GEAR
SUCH AS HAND, KNEE AND ELBOW PROTECTORS WHEN DRIVING
DO NOT OPERATE THE SCOOTER WITHOUT PROPER FULLY ENCLOSED FOOTWEAR.
NEVER DRIVE WITH HIGH HEELS, SANDALS, SLIPPERS OR BARE FEET
DO NOT CARRY OR TRANSPORT LARGE OBJECTS ON THE SCOOTER. DO NOT
HANG OBJECTS INCLUDING BACKPACKS, SHOPPING BAGS ETC. FROM THE
HANDLEBARS OR SEATS
DRIVING THIS SCOOTER ON HIGHWAYS OR FREEWAYS IS ILLEGAL AND
DANGEROUS
DO NOT OPERATE ON SIDEWALKS OR PEDESTRIAN ONLY WALKWAYS
ALWAYS ADHERE TO ALL TRAFFIC REGULATIONS. IT IS THE OWNER AND
OPERATOR'S RESPONSIBILITY TO ALWAYS BE AWARE OF AND COMPLY WITH
ALL OPERATION AND DRIVING REGULATIONS AND REQUIREMENTS
THIS SCOOTER MAY NOT BE RIDDEN BY MORE THAN ONE PERSON AT ANY
GIVEN TIME. CARRYING PASSENGERS MAY CAUSE DAMAGE TO THE SCOOTER,
REDUCE ENGINE LIFE AND IS DANGEROUS
DO NOT DRIVE DURING NIGHT OR IN LOW VISIBILITY WITHOUT SUITABLE
FRONT HEADLIGHTS
DO NOT DRIVE ON MUDDY, WET, SLIPPERY OR SANDY SURFACES OR ROADS
COVERED WITH FROST, SNOW OR EXCESSIVE WATER
PERSONS UNDER THE AGE OF 18 MUST USE THIS SCOOTER ONLY UNDER ADULT
SUPERVISION AND ONLY IF LOCAL OR STATE LEGISLATION PERMITS
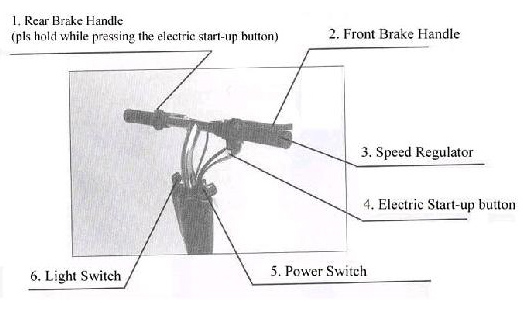
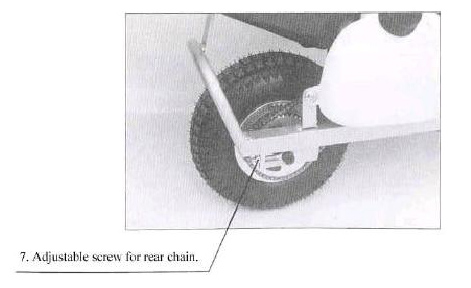
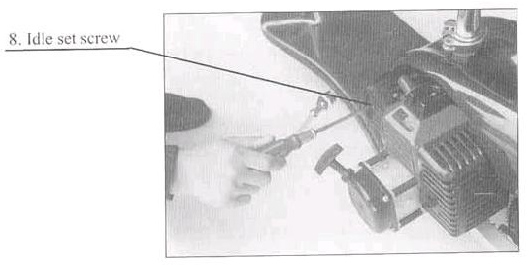
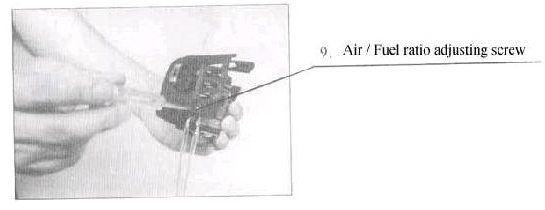
Main Parts Description
ASSEMBLY INSTRUCTIONS
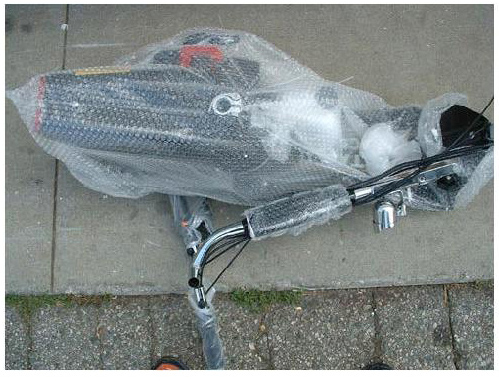
1.Take All the assemblies out of the box;
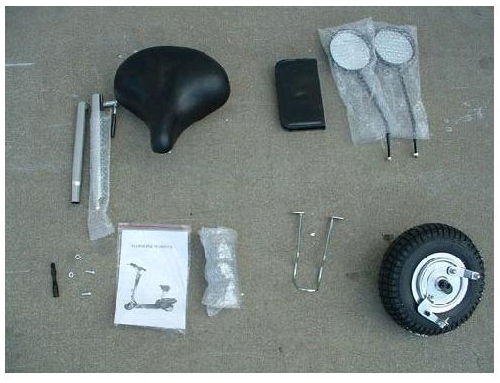
2.Take the plastic wrap from the body
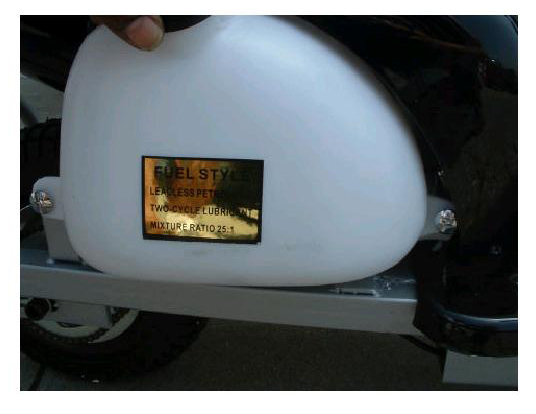
3.There should be two chrome screws for the gas tank
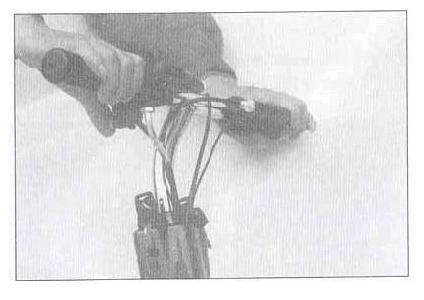
4. Assemble of the handle bars
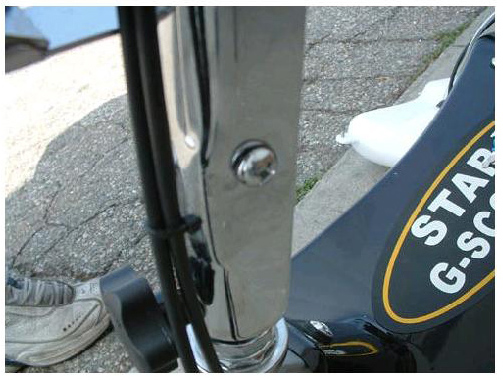
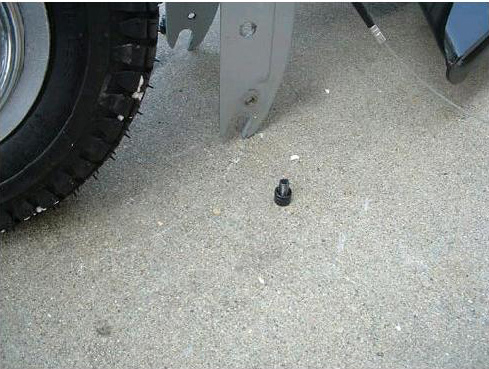
5. Remove the screws from the goose neck as shown in the picture
below
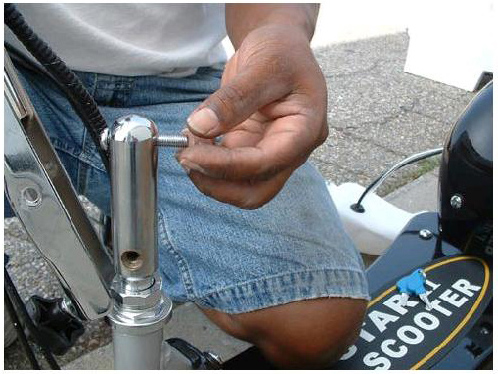
6.Screw in the black knob in the goose neck

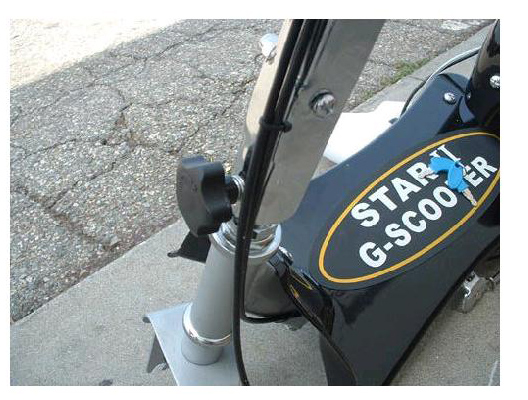
7.Put the long screw through the goose neck
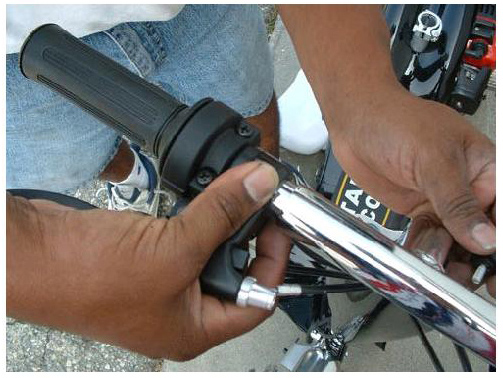
8.Assemble the handle bar and grips

8.Remove the little knobs and insert the grips into the handle
bars and put the knob back.

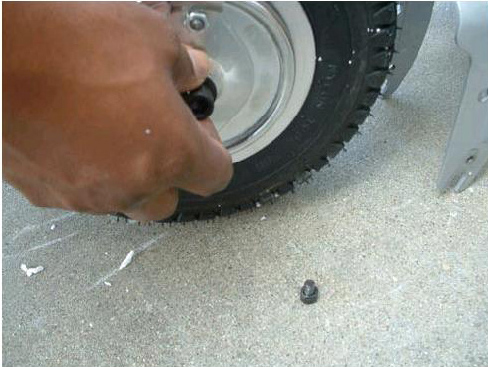
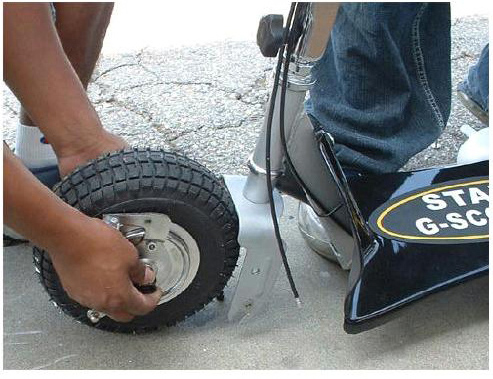
10.To assemble the front wheel, remove the head screws from the
forks, both left and right
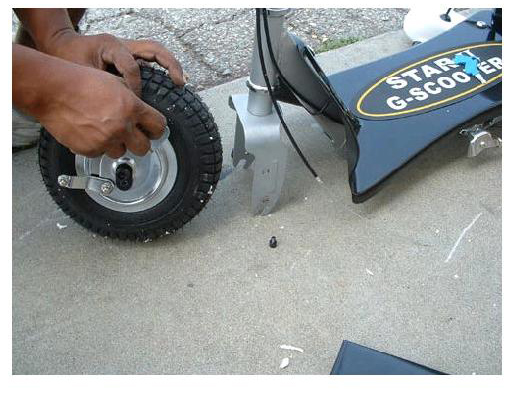
11.The same way you remove it, is the same way you put it back
later on, left screws go to left side the right screws go to right
side
12. Remove the black head screw from the break lever
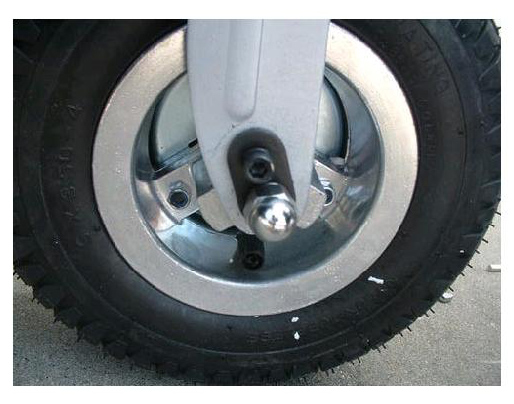
13.On the wheel, you have two chrome washers, they go to the
inside of the fork.
14. Make sure the break lever is in the front of the fork as shown
in the picture.
15.You got two little hex screws, one holding the break lever, the
other one holds the back washer on the right side, you got a
little hex screw that holds the left side of the black washers,
then you put the lock washer and then you put the break cable
through the top break lever, on the bottom lever, there is a screw
with a hole in it, let the wire go through, pull the wire and tie
the nut, now make sure the wheel spins freely, now tighten all the
bolt in the front wheel assembly.

16.Assembly of the tank. Get the tank, put the tank out both the
chrome screw into the tank, now screw the tank in through the
brackets
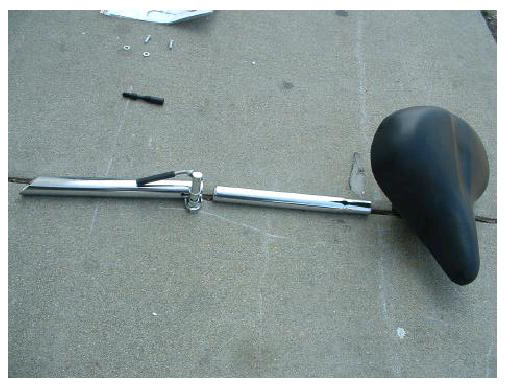
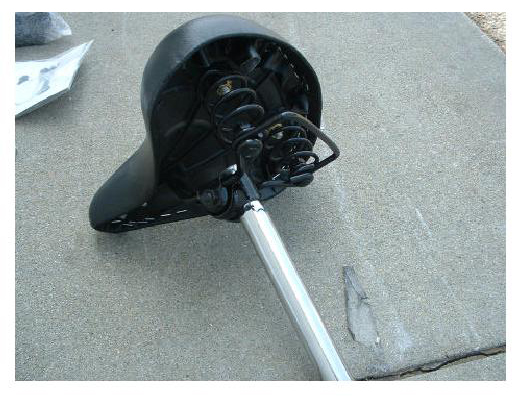
17.Assemble the seat, get the top pole to the seat hole, then
tighten it up, set the bottom pole into the base of the scooter
like shown, tighten the bottom clamp, combine the top and bottom,
pole , and tighten it
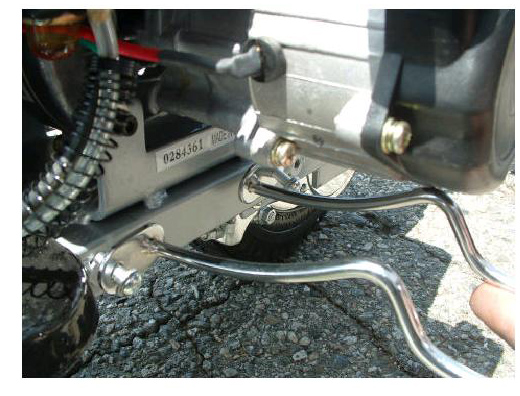
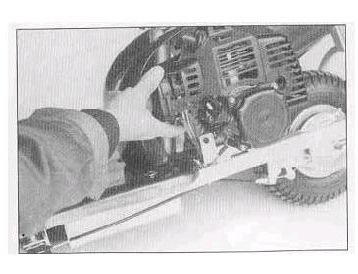
18.Assemble the pulley guard, you got two Phillip screws, and the
chrome guard, then tighten up the screws into the frame of the
scooter.
19.Assemble of the mirrors, remove the hex screws from the left
and right break lever, make sure that nuts stays in bottom or just
hold in had, then place mirror to the hole where you screw remove
the hex screw then put the nut in the bottom.
Check prior to riding and Caution
The following steps are important and must be followed before
starting the engine each time it is used.
THOROUGHLY CHECKING YOUR SCOOTER TAKES ONLY A FEW MINUTES AND MAY
SAVE YOUR LIFE!
1. Check the fuel level in the fuel tank; ensure that it is fully
fueled with the correct fuel/oil mixing ratio;
2. Check the brake operation: Tightly squeeze the brake lever and
firmly push the scooter backwards and forwards. If the scooter
moves with the brakes applied then the brakes need replacement or
adjustment. Do not drive with worn or defective brakes.
3. Check the tire tread: Ensure that at least 1/8 inch tread
remains on the tires. If not then you should consider replacement.
4. Check the tire surface: Look for uneven surfaces, bumps or
embedded objects that could cause tire failure or blowouts. Do not
drive if the tire surface is uneven or if objects such as nails or
stones are embedded in the tire or tread.
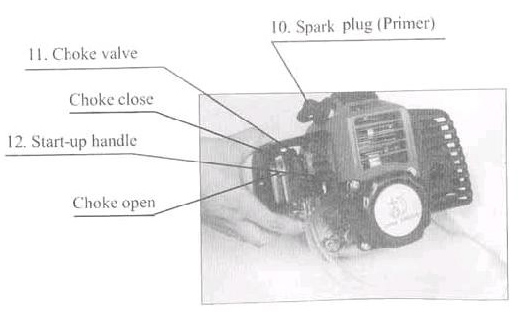
Instruction for operating
Mix regular grade unleaded gasoline and quality-proven motor oil
for air-cooled 2 cycle engines and add it into the fuel tank.
RECOMMENDED MIXING RATIO: Gasoline: Oil= 25:1
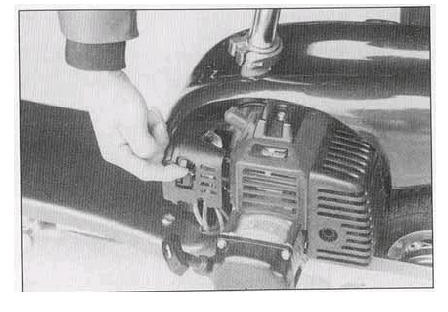
a) Manual start-up
1.Press the clear priming bulb underneath the carburetor until
fuel can be seen in the clear plastic fuel return line.
|
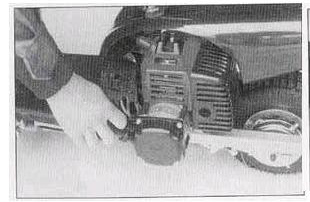
2.Close choke valve.
3.Pull the starter grip quickly and then release it gently, the
engine should start after a few strikes. Then open the choke
valve, the engine should be running now.
4.If the engine can not be started, open the throttle a little
bit, and then try it again.
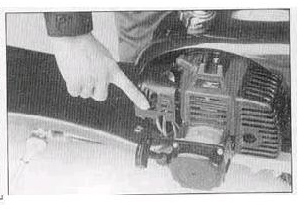
b)Electric Start
1. Press the small priming bulb underneath the carburetor until
there is no air left in the fuel-in pipeline and fuel can be seen
from the clear plastic fuel-return pipeline.
2. Close choke valve.
3. Hold the rear brake tightly
4. Press the electric start button to start the engine. Then
release the start-up button immediately.
5. Open the choke valve. |
Troubleshooting
Q: Why is it hard to start my scooter.
A: 1. Check if there��s any air bubble in the fuel line.
2. Check the spark plug and wiring.
2. Check fuel mix ratio.
3. Check if the air filter is clogged.
4. Check if the power switch is short-circuited
5. If you attempted to start the engine too many times, there
might be excessive fuel in the cylinder. Remove the spark plug and
allow the fuel to evaporate. |
Q: Why is my
scooter so slow.
A: 1. Check if the choke is open.
2. Check if the fuel line is clogged.
3. Adjust air/oil ratio screw. |
Q: I can start
my engine, but when I release the rear brake handle, the engine
stops.
A:
1. See if the air filter is clogged.
2. See if silencer and fuel line is clogged.
3. Adjust idling speed screw.
Technical Specifications:
|
Item
|
Parameter |
Item
|
Parameter |
|
Engine |
Single
Cylinder Air-cooled 2 stroke |
Distance on
Full Tank |
30 miles |
|
CYD DIA x
stroke |
36X32(mm)
|
Fuel tank
vol 1L |
|
|
Spark plug
|
BM6A |
Max Speed
25 miles/h |
|
|
Carburetor
|
Double
Films |
Net weight
50 lbs |
|
|
Ground
clearance |
4.3 inches |
Load
Capacity 250 lbs |
|
|
Package
Size 48.5X15X23.6 in Ignition Mode CDI |
|
|
|
|
Dimensions
|
45X18X55 in |
Start
methods Electric start & pull start |
|
|
Fuel
|
Lead-free
gas Tire dimension 9X3.5 in |
|
|
|
Output |
36cc
|
Rated power
750w/6500rpm |
|
|
Torque
|
1.0Nm/3800rpm Tire Pressure 85 P.S.I |
|
|
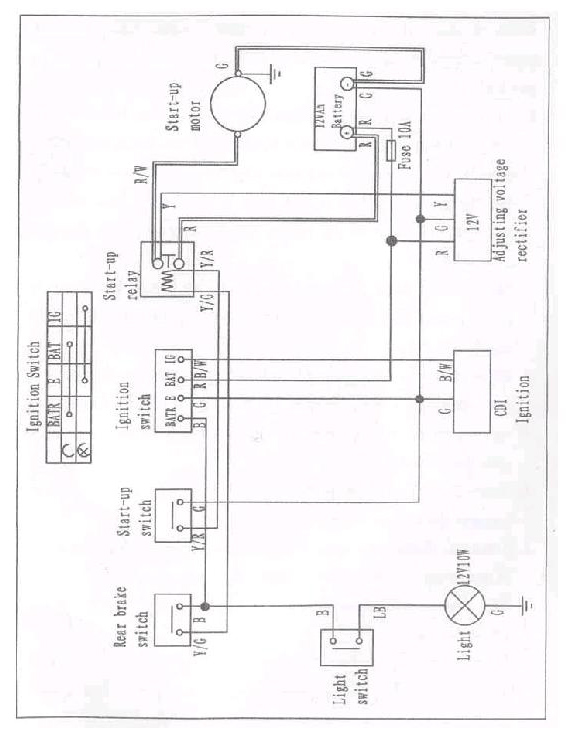
Electronic Diagram
|
|
Home│About us│Gas
Scooters│Installation│Contact
|
Copyright
� 2003 John's e-scooters | |
