DVD to DivX
This guide might not be exact if you have different versions of the software, and because of the frenqency of software upgrades, but if you use the ones from here everything should match up.
!!!
Legal notice:
It is illegal to rip a DVD that you don't own! This guide is meant for teaching people to backup their movies! I AM NOT RESPONSIBLE FOR ANY ILLEGAL RIPPING!!!
Help suppurt my site Make a donation of $5.00, and receive a free DivX Movie of you choice, for each $5.00 donation, shipping & handleing may be needed.
Before you begin:
You should have at least 6 GB of free space on the harddrive. If you do not have this kind of space don't get discouraged, because I'll be writing a guide on how to do DivX on a small harddrive.
Before you start you must install the DivX 3.11, DivX 4.12, and or DivX 5.02 and the Radium codecs, even if you have another version of DivX installed.
If you find any bad links please let me know!
To install DivX 3.11 you need to uzip it then right-click the "DivX setup information", (looks like a notepad file with a flower on it) and click on "install", or start the "run me first" exe, and to install the DivX 4.12, and 5.02 just double click the "exe" install file.
To install Radium codec you need to unzip it and the run the application, and follow the instructions.
VirtualDub Guide A guide on how to edit and fix your DivX movies.
Step 1: Getting the VOB-files from the DVD to your harddrive:
Getting the VOB-files from the DVD:
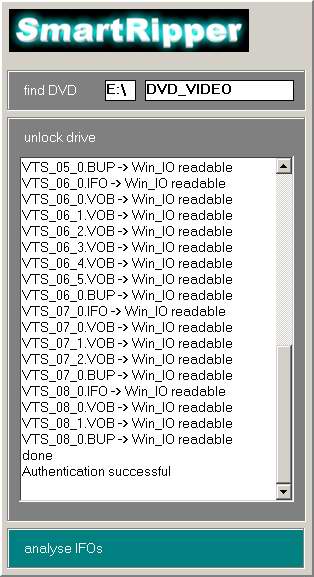
Now, go to the folder where you put Smart-ripper and start the program. The following screen will pop up to run its test: And then this pops up:
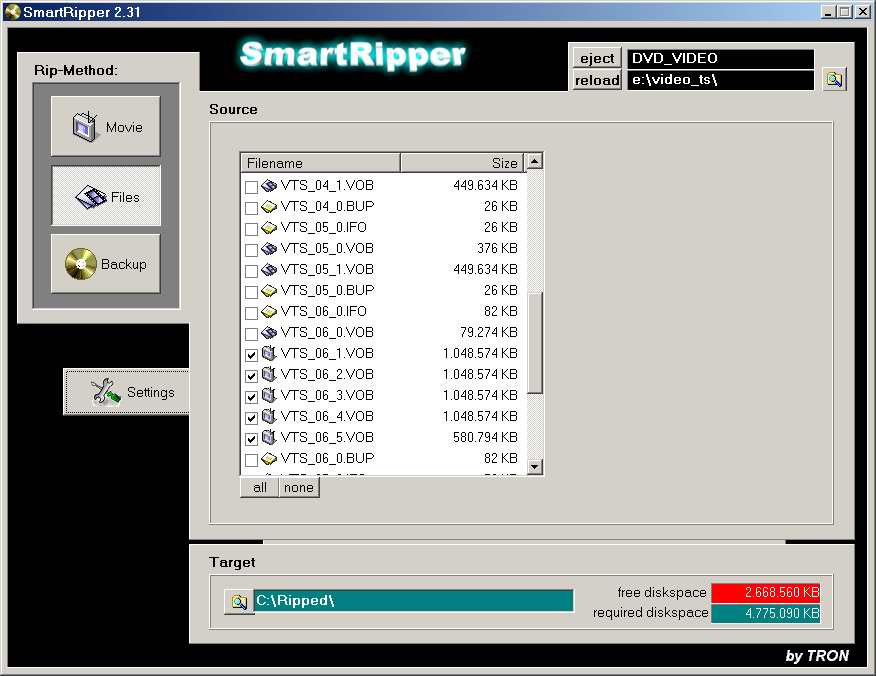
Now click “Files” on the left of the window:
As you can see, there is a series of “Vts_0X_X.vob” VOB-files checked that are about 1 GB in size, except maybe for the last one. These VOB's are your movie.
Now click the Target button at the bottom to choose where to save the VOB's. Now click Start and wait.
Step 2: Calculating the video bitrate
Calculating the bitrate:
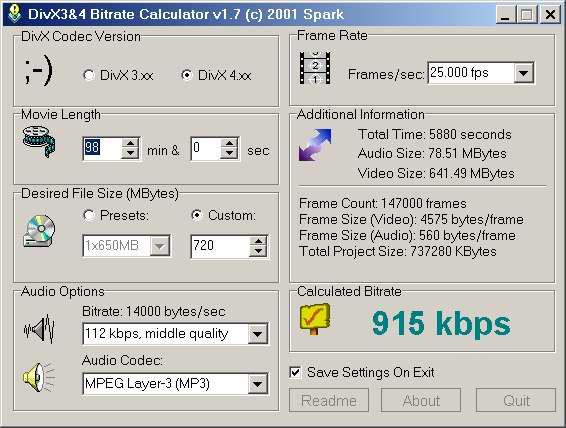
Go to the folder where you put DivX4 bitrate and run “DivX4bitrate.exe”. The following will pop up:
First enter the number of hours in the movie (check the cover to get it accurate), then enter the desired file size(I usually go 20mb over 700, and still be fine for 1 cd). Then enter the quality of sound you want.
I have answered all questions and the program tells me that: The caculated bitrate is 915 kbps”.
The final DivX won't be exact (+ or - 20mb, depending on the movie).
90% of my DivX Movies are around 640mb - 700mb and they look great.
Step 3: Converting the video to DivX
About this step:
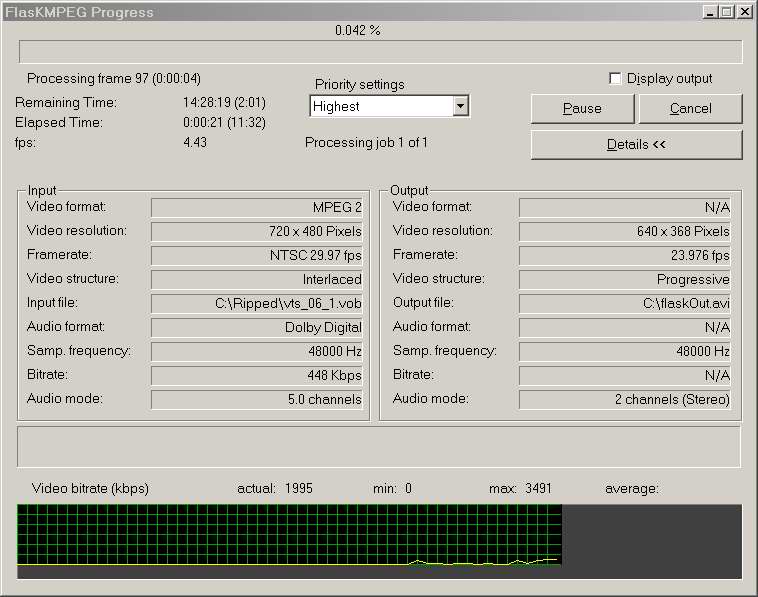
OK, this is the major step in the ripping process. It takes a long time to do (up to 20 hours, depending on movie length, FlasK settings, and processor speed). I suggest that you start this process before you go to sleep and let it run overnight. FlasK MPEG has an option that will shut down the computer once it is done, but it does'nt work for me.
Converting the video to DivX:
The first thing you should do is restart your computer and close as many memory-resident programs and windows as possible!
The second thing you is start FlasKMPEG.exe and this screen will pop up:
If it is not in english it has a option in the options tab to change the language.
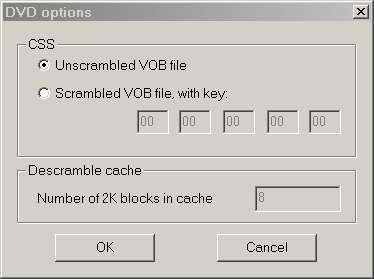
Click “File” and then “Open Media”. Doing so will bring up a browsing box. Use it to find your VOB files. Then select the first VOB-file in the series, that is the one ending with “_1.vob”. In my case it is “Vts_06_1.vob”. After selecting the first file and clicking “open”, select Unscrambled VOB file and click OK (if nessessary).
A box will come up and a blue line will move across it. When that is done, sometimes you will get the following box:
(**)
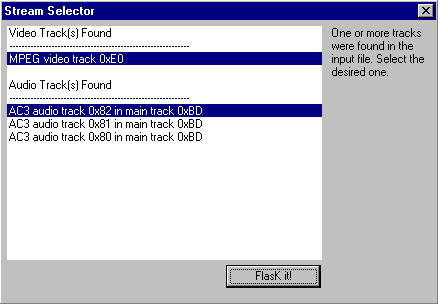
Select the first video track and the first audio track (select 0x80, or the first in the series of 0x8_) and press "flask it" and you'll get the below image numbered (1). If you want to make sure you got the right audio track go back to:
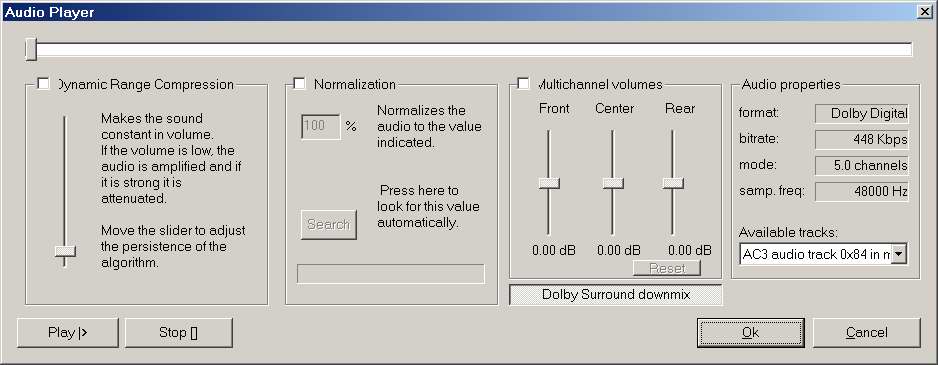
Click the audio player button, up pops this:
Press play and listen if it is the right one, if not change the audio track from the list on the right until you get the right track. Remember the track number, start flask over then choose the audio track from the list.
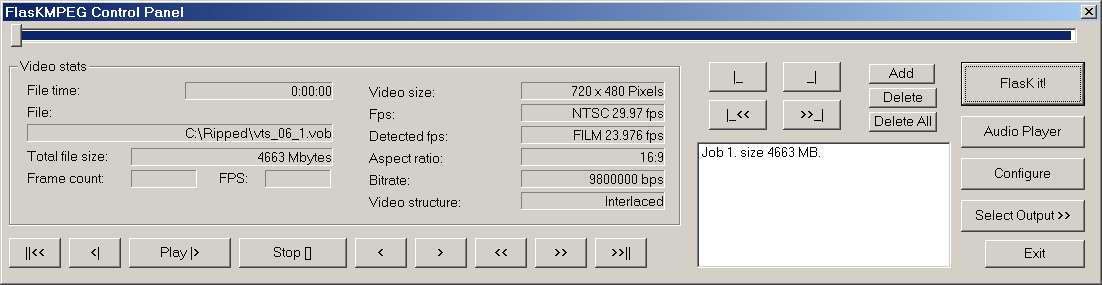
If the above (**) does'nt pop up after the blue bar goes across you will get this:
(1)
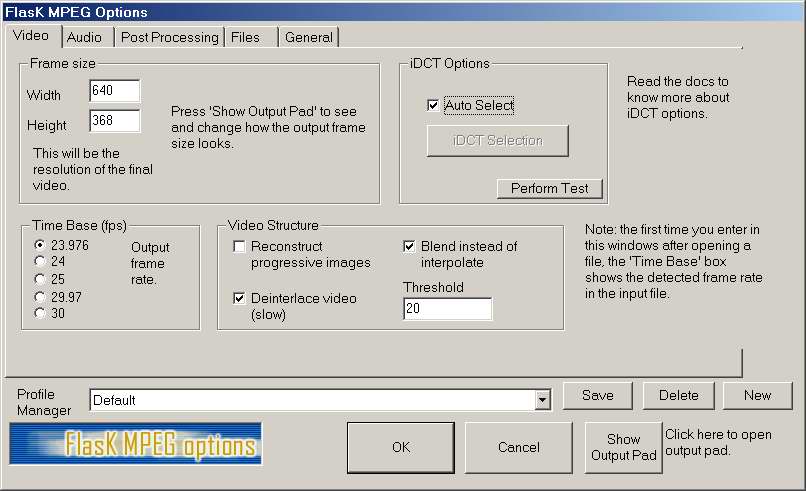
Next click the configure button and you'll get something simalar to this:
Click the Video Tab. People say to leave the setting as they are but I get the best results this way.
At the bottom where it says Profile Manager, I use "default".
Leave the Time Base [fps] as FlaskMPEG puts it. Under video structure check reconstruct progressive images if needed, and uncheck deinterlace video and blend with threshhold of 20, You can play around with these settings to see what you like, but I think you'll be satisfied with my settings. You can leave the settings as Flask puts them if you encounter problems, or encode a piece of your DVD with the different settings to see what one looks best.
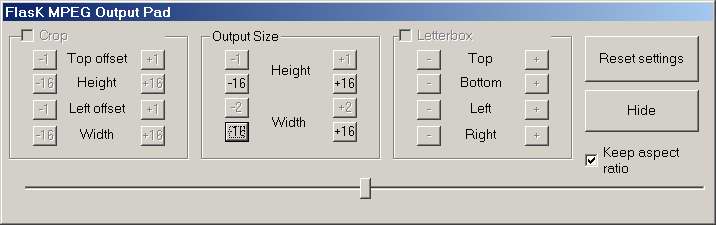
In the “iDCT Options” region, leave it on auto select, but you can play with these too. In the frame size I would never go higher than 640x480, I use frame sizes in between 480x256 and 352x192, but make sure the numbers are divisable by 16. I will explain this in my soon to come DivX quality guide. Next press the "show output pad" and you will get this:
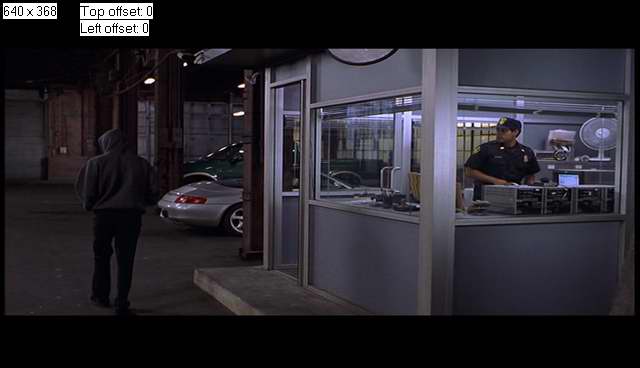
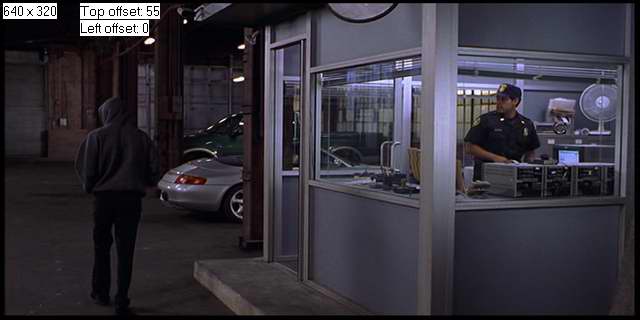
NOTE: If there are no black bars on your snapshot, then skip this section, unless you want to change the output size, or if there is cropping needed or you just want to, then go to the "post processing" tab, And mess around with the aspect ratio, and no crop bottons to be able to crop. To Crop do this"
Check the “Crop” box on the top of the window. Use the “Top offset” and “Height” + and – buttons to make the black widescreen bars on the top and bottom disappear. You can use the similar controls for the sides of the snapshot to, if needed.
If you can make the snapshot look something like the below, you’ve done it right. You might not be able to remove a small part of the bars, but that's alright. You might wonder why we are doing this. It is to save space. We don’t need the black bars to be a part of the movie, do we? Whatever player you will use will just add them back anyway, without them having to be “movie material” and take up space!
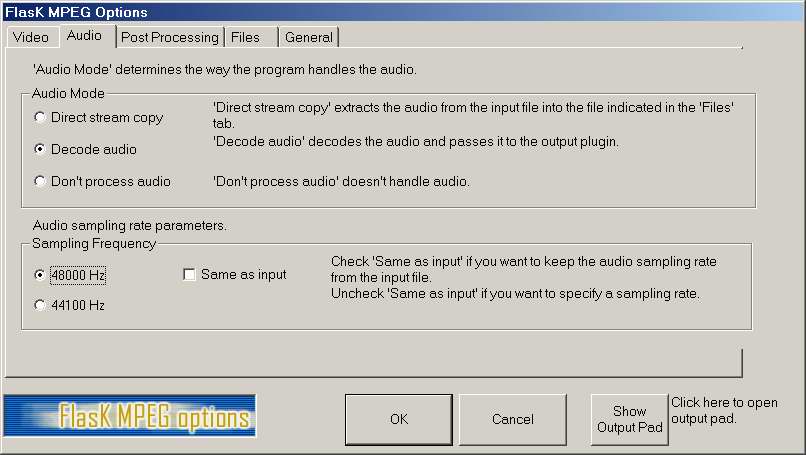
Now you can click “Hide” to go back. Click on the “Audio” tab. On to the Audio tab always select 'Decode audio' if you want sound. For DVD's un-check the 'same as input box' and select 48000 Hz (just to make sure you have the right setting). Never use 44100Hz with DVD's or you will get audio synchronization problems.
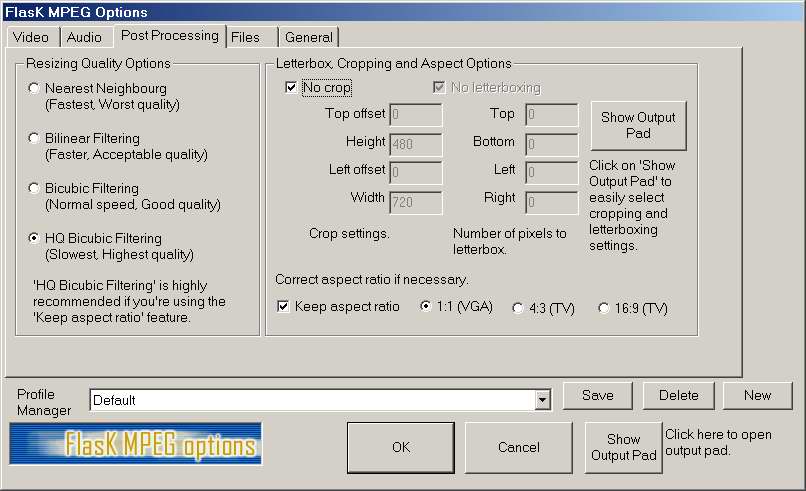
You can go to the next settings, click the “Post Processing” tab. These settings too are VERY simple to do, just do this:
Select “HQ Bicubic Filtering” and check “Keep aspect ratio”! Leave the rest as it is, like below.
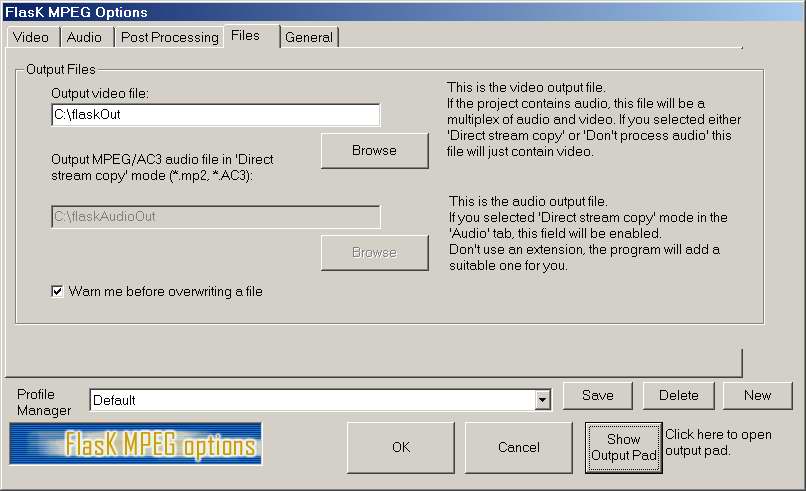
Click the "Files" tab. Choose where you want to save your final movie. The audio save option is grayed out because you are encoding the video with audio in it.
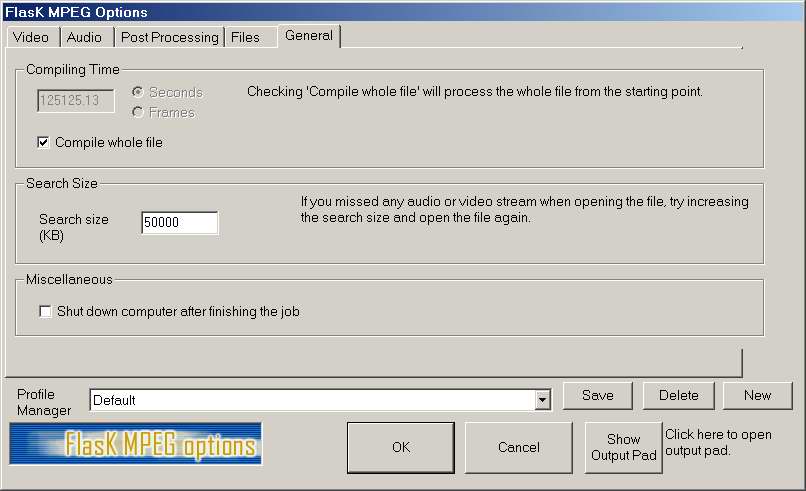
Now you click the “General” tab and the following comes up:
Set the settings as on the above image. Put the “Search Size” to 50 000 not 5000 (the default). You do not HAVE to use 50 000, but I recommend it. You may of course also check off “Shut down computer after finishing the job”.
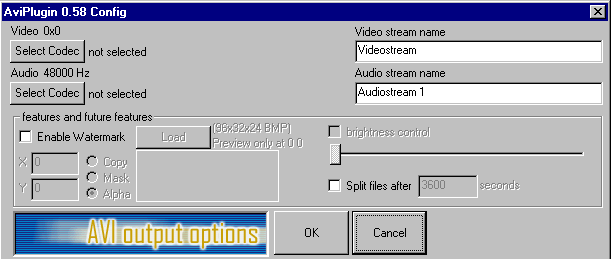
Now you are done with these settings and you can click “OK” to return to the FlasK MPEG opening window. Now click the "Select Output" button and check "AVI output", click "select output" button again and go to "configure output module".
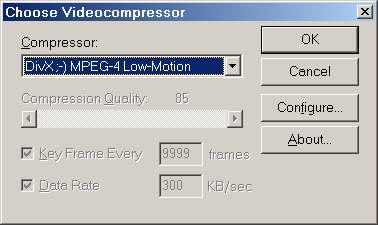
It is finally time to select the DivX Low-Motion, or the DivX 4.0beta codec as compression and also select the bitrate (given by the bitrate calculator). Click “Select Codec” under “Video”, that brings up a box where you can choose a video codec from the list.
If you want to use the new DivX 4.12 or 5.01 codec go here to learn how to use it, otherwise continue on with this page.
Scroll down until you find “DivX ;-) MPEG-4 Low-Motion”. Select it and click “Configure”. Up comes this:
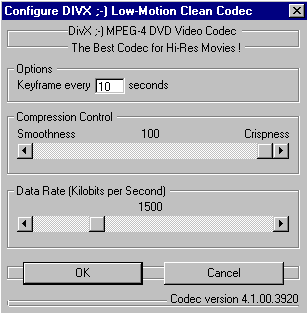
Drag the slider under “Data Rate” so that the bitrate is whatever DivX video bitrate CalcIT told you, 1291 like mine told me. Leave the rest of the settings as on the image above and click “OK”.
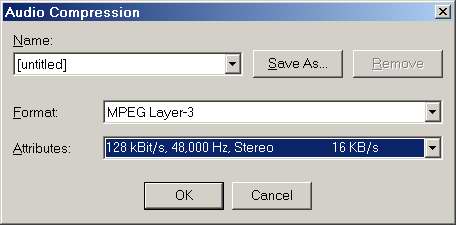
Ok. Back to our previous dialogue box. Press the bottom 'Select Codec' button under "Audio" to select the audio compression.
Up pops this box:
Select "MPEG Layer-3" at 128 kBit/s, 48,000Hz, stereo (if 128 is what you told the bitrate calculator). Press "OK' then "OK" again to get back here:
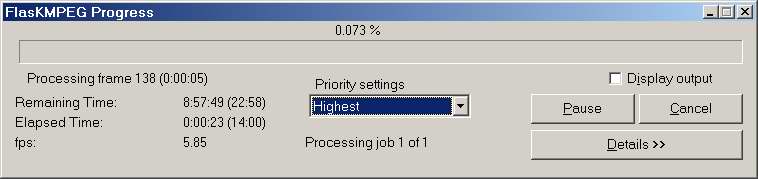
Press "Flask It", In the window that pops up you should as fast as you possibly can (to keep as much CPU power to FlasK as possible) change the settings to what they are on this image: (This image only shows the top-part of the window!) Which normally looks like:
Highest Priority, uncheck display out. Thats it, now just wait untill it is done, and try not to use the computer because it will slow the encoding down or cause it to crash.
If your final movie is to big to fit on a CD, within 20-50mb oversized, (if desired) email me an I'll tell you how to fix it in about 15 minutes, or if you have any other problems feel free to contact me.
I will have other guides in the future about DivX movies and related materials.
If you have any questions you can email mehere


 Since 02/12/02