For those of you who have a small hard drive this is an effective way to convert a DVD to DivX directly from the DVD. Its been made possible by a non-official "hacked" version of Flask Mpeg. Its called FlasKMpeg Decss 0.594h1
IMPORTANT NOTE!!: There have been reports about DVD drives overheating when forced to read at a much slower pace than single-speed DVD. Flask DeCSS has been tested on a few DVD-Rom's without problem. And I've never heard first hand of a drive being damaged in this way, but you might want to keep an eye on your drive the first time you transfer straight from a DVD-ROM. If you decide to try this program it is your own choice, I take no responsability for any damage you may do to your hardware by using this program! You have been warned! I do it all the time and I have'nt had any problems. I use a Toshiba 10X DVD Drive.
First you need to AUTHENTICATE THE DVD.
To do so just play the DVD or open SmartRipper but don't try and rip anything with SmartRipper, just run it and hit the minamize button. After you authenticate it stop playing or exit smartripper. You can get Smartripper from my DivX Guide.
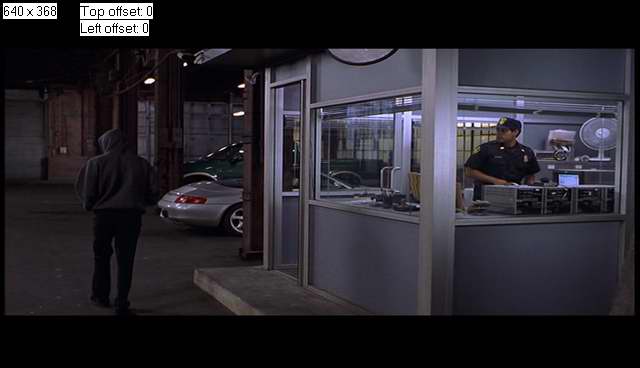
Some of the images might look as yours does. Flask Mpeg has two modes:
Open File: This will open any mpeg file and try to convert it to whatever you want.
Open DVD: This is the mode that reads a DVD in the same way a DVD player would. Choose this option.
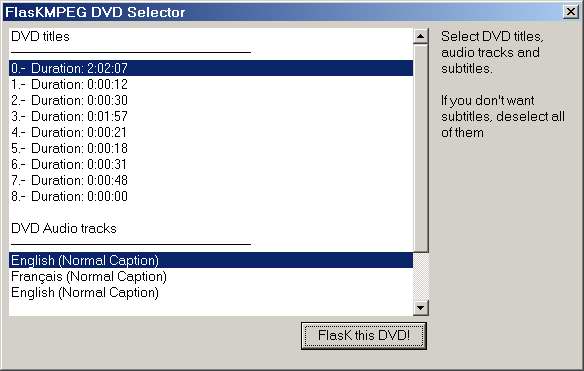
Select 'Open DVD' and find the .IFO file for your movie in the video ts folder of the DVD.
Keep checking the .IFO files until you get the one with the right video length.
Now Press FlasK this DVD!
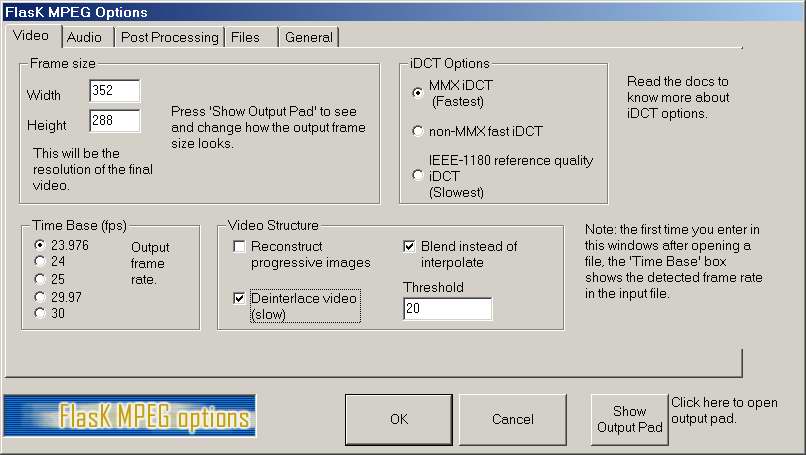
Now clict the "Options" tab then Global Project Options up pops this:
Click the Video Tab. People say to leave the setting as they are but I get the best results this way.
Leave the Time Base [fps] as FlaskMPEG puts it. Under video structure check reconstruct progressive images if needed, and uncheck deinterlace video and blend with threshhold of 20, You can play around with these settings to see what you like, but I think you'll be satisfied with my settings. You can leave the settings as Flask puts them if you encounter problems, or encode a piece of your DVD with the different settings to see what one looks best.
In the “iDCT Options” region, select MMX, but you can play with these too. In the frame size I would never go higher than 640x480, I use frame sizes inbetween 480x384 and 352x288. I will explain this in my soon to come DivX quality guide. Next press the "show output pad" and you will get this:
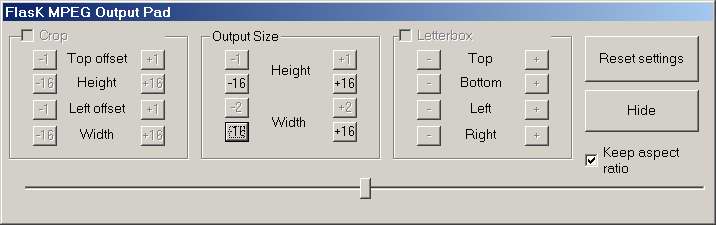
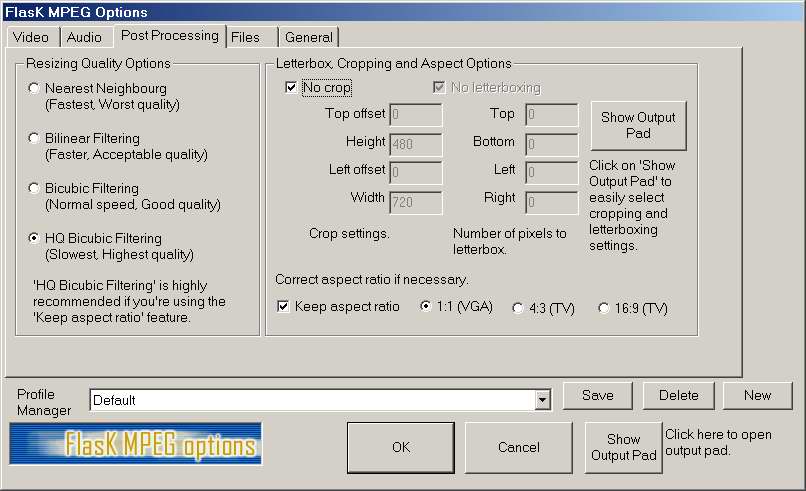
NOTE: If there are no black bars on your snapshot, then skip this section, unless you want to change the output size, or if there is cropping needed or you just want to, then go to the "post processing" tab, And mess around with the aspect ratio, and no crop bottons to be able to crop. To Crop do this"
Check the “Crop” box on the top of the window. Use the “Top offset” and “Height” + and – buttons to make the black widescreen bars on the top and bottom disappear. You can use the similar controls for the sides of the snapshot to, if needed.
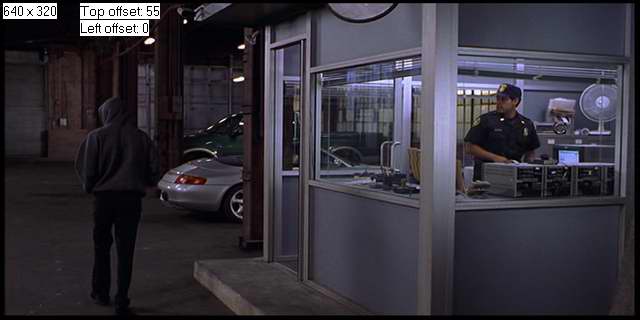
If you can make the snapshot look something like the below, you’ve done it right. You might not be able to remove a small part of the bars, but that's alright. You might wonder why we are doing this. It is to save space. We don’t need the black bars to be a part of the movie, do we? Whatever player you will use will just add them back anyway, without them having to be “movie material” and take up space!
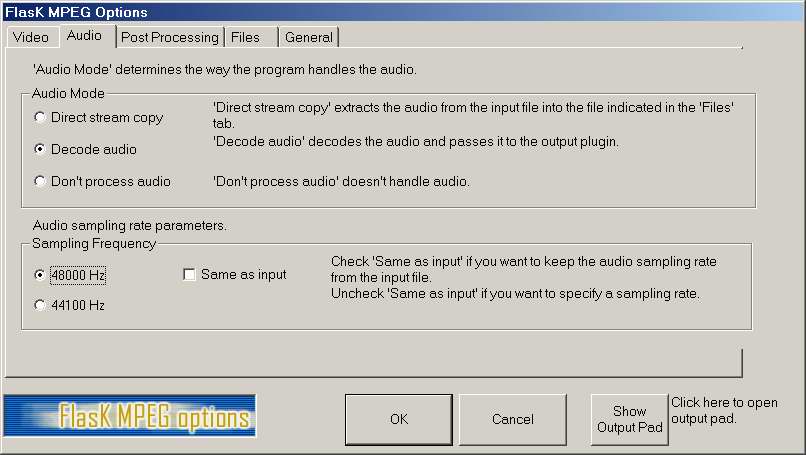
Now you can click “Hide” to go back. Click on the “Audio” tab. On to the Audio tab always select 'Decode audio' if you want sound. For DVD's un-check the 'same as input box' and select 48000 Hz (just to make sure you have the right setting). Never use 44100Hz with DVD's or you will get audio synchronization problems.
You can go to the next settings, click the “Post Processing” tab. These settings too are VERY simple to do, just do this:
Select “HQ Bicubic Filtering” and check “Keep aspect ratio”! Leave the rest as it is, like below.
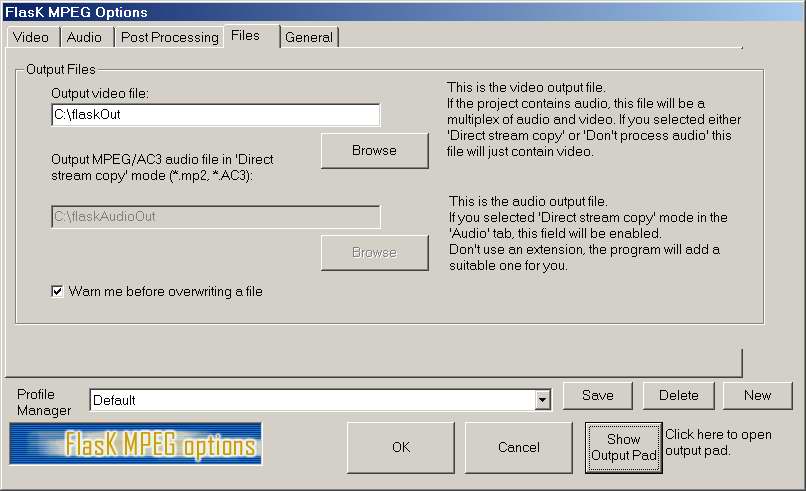
Click the "Files" tab. Choose where you want to save your final movie. The audio save option is grayed out because you are encoding the video with audio in it.
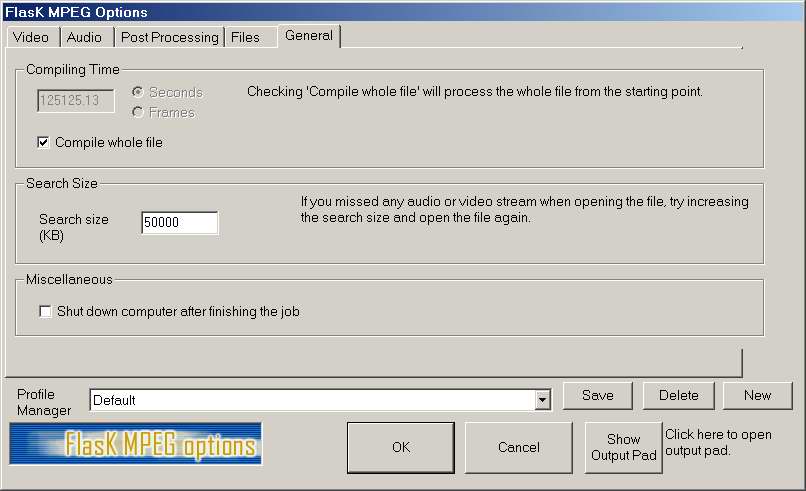
Now you click the “General” tab and the following comes up:
Set the settings as on the above image. Put the “Search Size” to 50 000 not 5000 (the default). You do not HAVE to use 50 000, but I recommend it. You may of course also check off “Shut down computer after finishing the job”. Now press OK.
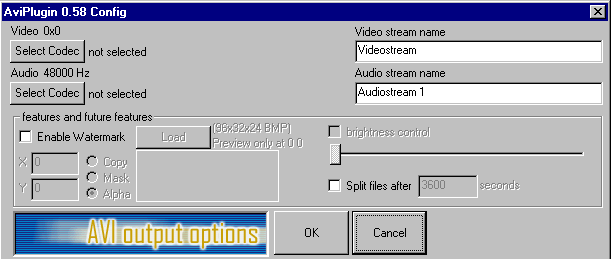
Click the "Options" tab again then Output Format Options to get this:
It is finally time to select the DivX Low-Motion, or the DivX 4.0beta codec as compression and also select the bitrate (given by the bitrate calculator). Click “Select Codec” under “Video”, that brings up a box where you can choose a video codec from the list.
If you want to use the new DivX 4.0beta codec go here to learn how to use it, otherwise continue on with this page.
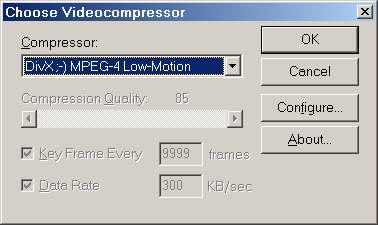
Scroll down until you find “DivX ;-) MPEG-4 Low-Motion”. Select it and click “Configure”. Up comes this:
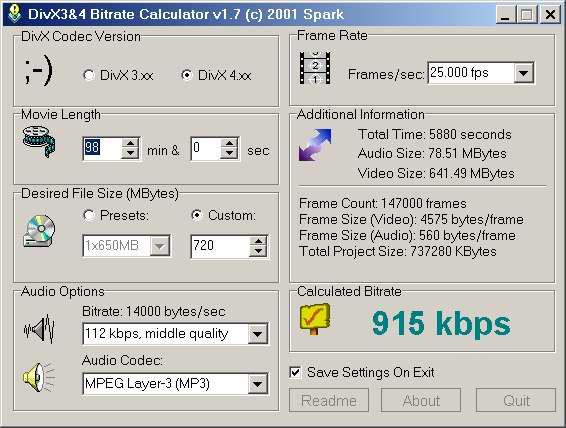
Go to the folder where you put DivX3&4 bitrate and run “DivX4bitrate.exe”. The following will pop up:
First enter the number of hours in the movie (check the cover to get it accurate), then enter the desired file size(I usually go 20mb over 700, and still be fine for 1 cd). Then enter the quality of sound you want.
The program tells me that: “calculated video bitrate is 915 kbps”.
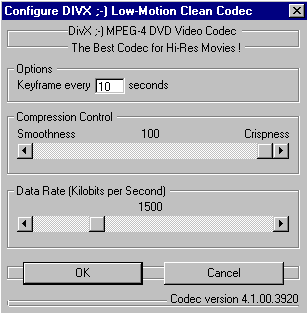
90% of my DivX Movies are around 700mb and they look great. Drag the slider under “Data Rate” so that the bitrate is whatever DivX video bitrate CalcIT told you, 720 like mine told me. Leave the rest of the settings as on the image above and click “OK”.
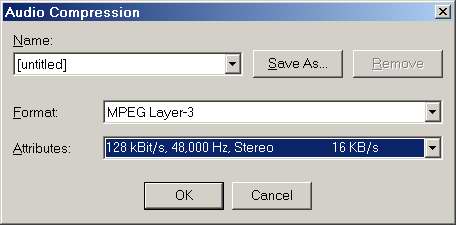
Ok. Back to our previous dialogue box. Press the bottom 'Select Codec' button under "Audio" to select the audio compression.
Up pops this box:
Select "MPEG Layer-3" at 128 kBit/s, 48,000Hz, stereo (if 128 is what you told the bitrate calculator) and press OK. Once you have finished setting up your movie just go to Run then Start Conversion.
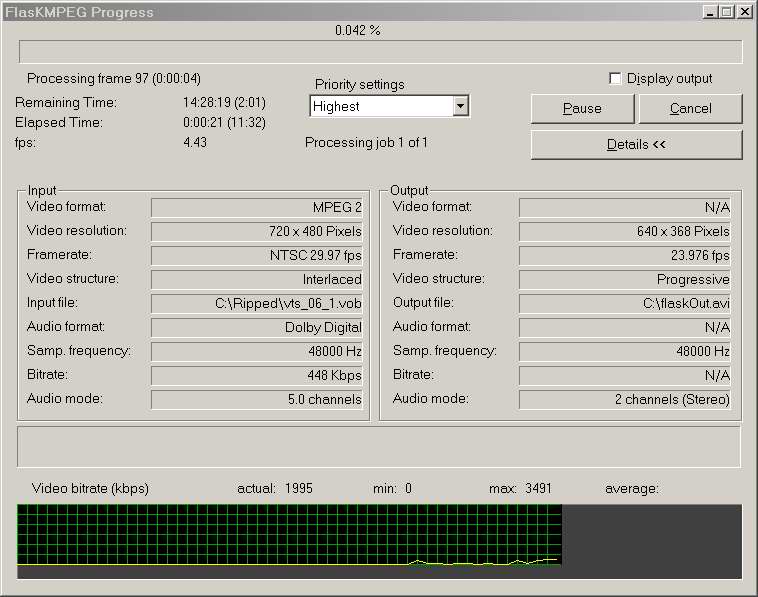
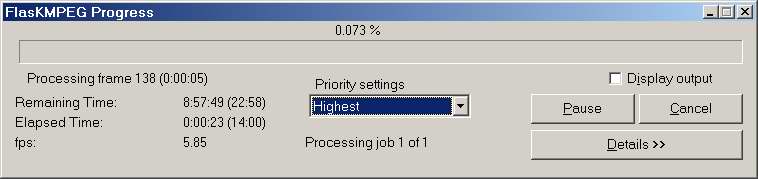
In the window that pops up you should as fast as you possibly can (to keep as much CPU power to FlasK as possible) change the settings to what they are on this image: (This image only shows the top-part of the window!) Which normally looks like:
Highest Priority, uncheck display out. Thats it, now just wait untill it is done, and try not to use the computer because it will slow the encoding down or cause it to crash.