Software you will need: VirtualDub CDex Movies that are to big:
First if your divx movies comes out to big to fit on one CD no problem. There are two was to fix this: if you care for end credits follow these directions, if not go to the bottom of this page. Open up VirtualDub and you should get this:
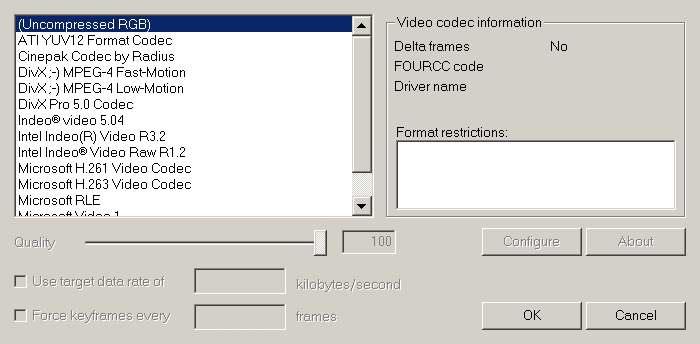
Go to File, then Open video file, and open the divx movie you want to recompess. Then go Video, and select Fast Recompress. Next go back to Video and select Compression, you should get this:
In the list of codecs, select the one you encoded your movie in. Then click the configure button. Whatever codec you used, you need to make sure that all the settings are the same as when you first encoded the movie, except the divx bitrate, which you will lower. Depending on how much your movie went over your desired size, you'll have to play around with the divx bitrate.
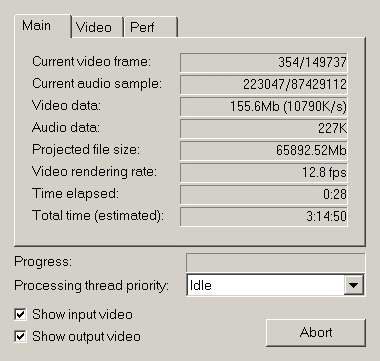
Now go to Audio, and select AVI audio, and direct stream copy. Next go to File, then save as, and name your divx and hit enter. You should get this:
Make sure Processing thread priority is set to highest, and that show input and output are unchecked.
Thats it you movie should be smaller. If it is still not small enough lower the bitrate some more and repeat untill happy with movie size.
Splitting a DivX Avi so that it fits on 2 CDs:
Start VirtualDub, go to File, Open video file, and open your movie. Go to Video, select Direct stream copy, and do the same under Audio as well. Now, look at the lower section of the main window:
Click the 7th button from the left, now look where it says Frame (eg: 100000) . Take that number (100000) and divide it by two = (50000). Now take the slider to the middle and then match the Frame number to the number that you got when you divided it in two (eg: 50000).
OK, once you have found the right spot, click on the little button with a key and a triangle pointing right on it. Read off the number after Frame and write it down! Now click the 4th button from the left, it will put the slider back to the start. You are now done with these controls. Just click File and then Save segmented AVI. In the box that pops up, type a filename (for example split). Use ONLY a name (no .avi or numbers)!
Then check off Limit number of video frames per segment to . and next to it you type in the number you just wrote down. Check that File segment size limit is 2000 MB.
Click Save and wait a few minutes as the processing goes on.
Now you should have to files called something.00 and something.01 (for example: split.00 and split.01).
These files are the movie in two parts! Check that they play fine, then you can burn them to each their CD and of course rename them.
Putting the audio in your movie:
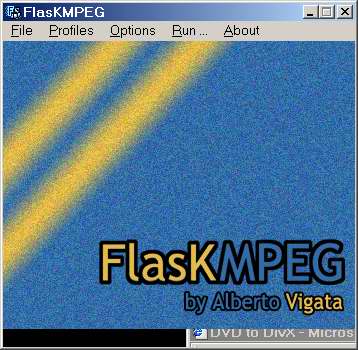
Open FlaskMPEG
Go to File, then Open media, then click the first .vob in the series. Now go to Run, then to Extract audio to wav. Then wait.
Now there are two ways to get the audio in the video.
First way is: Open VirtualDub, Now, click File and then Open video file. In the browsing box you find the AVI-file you made with FlasK. Open that file.
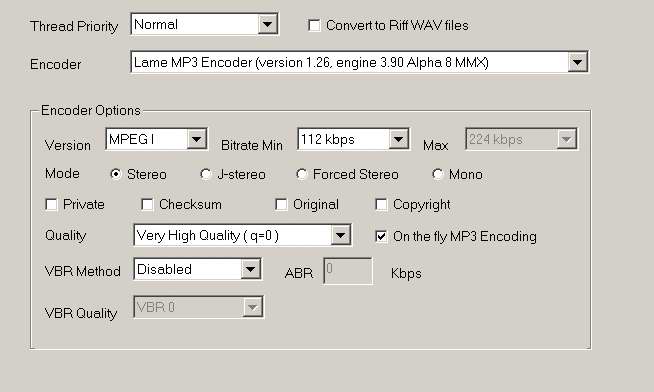
Click Video, then Direct stream copy. Click Audio, then Wav Audio. In the browser box find your wav file you made. Click Audio again, then Full processing mode. Click Audio yet again, then Compression. You might get this screen or something different.
Select MPEG Layer-3 (as on the above image). The white field to the right is filled with crazy stuff. Now, remember what audio bitrate you chose. Click it, at 48 000 Hz if your sound card supports it. Remember to look at kBit/s and NOT Kb/s. After selecting audio bitrate, click OK.
Back on the main screen, click Audio again, and then Interleaving. In the box that pops up set the settings as follows:
My recommendation is to set the settings as on the picture above. If not, set it to around 200-250. This is one of those steps you might have to do some tweaking with.
Now, back on the main screen, click Video, then Frame Rate. That pops up this box, just set the settings as on the picture:
(This is another one of those tweaking steps! You might want to try to set to No change at the top if the audio and video are de-synced).
Click OK and you are ALMOST DONE. Back in the main window, click File and then Save AVI. In the box you go to the folder where you want to put the rip and type in what you want to call it (you must end the name with .avi). Click Save and the process will begin! As fast as you can, just like with FlasK, set these options:
The process takes a few hours. When it is done, try playing the new AVI file. As the video-only file, it will be skippy in the beginning and it will also have up to 30 seconds of audio-video desynchronzation when you first start playing it. If the audio and video remains desynchronized, you have to repeat this step and tweak some settings. The most effective thing is to tweak the Audio/Video Interleaving Options.
Second and eaiser way is:
Open FlaskMPEG
Go to File, then Open media, then click the first .vob in the series. Now go to Run, then to Extract audio to wav. Then wait.
Now if you have some other audio encoder (a encoder that will transfer .wav's into .mp3's) like CDex use it. Open the encoder, I will use CDex:
Click the Setup button at the bottom right:
Make sure that the audio bitrate is set at the bitrate you chose. Click OK
Click the WAV to MP3 button on the right middle. Find the wav file select it and check the normalize box. Click encode.
Now open up VirtualDub. Go to File, Open video file, select your movie. Click Video, select Direct stream copy. Now go to Audio, select direct stream copy, and mp3 audio. Select the mp3 file of your movie.
Back on the main screen, click Audio again, and then Interleaving. In the box that pops up set the settings as follows:
My recommendation is to set the settings as on the picture above. If not, set it to around 200-250. This is one of those steps you might have to do some tweaking with.
Now, back on the main screen, click Video, then Frame Rate. That pops up this box, just set the settings as on the picture:
(This is another one of those tweaking steps! You might want to try to set to No change at the top if the audio and video are de-synced).
Click OK and you are ALMOST DONE. Back in the main window, click File and then Save AVI. In the box you go to the folder where you want to put the rip and type in what you want to call it (you must end the name with .avi). Click Save and the process will begin! As fast as you can, just like with FlasK, set these options:
Thats it, wait a few minutes. When it is done, try playing the new AVI file. As the video-only file, it will be skippy in the beginning and it will also have up to 30 seconds of audio-video desynchronzation when you first start playing it. If the audio and video remains desynchronized, you have to repeat this step and tweak some settings. The most effective thing is to tweak the Audio/Video Interleaving Options.
Cutting a movie that is too big to fit on a CD.
Open up VirtualDub and you should get this: Go to File, then Open video file, and open the divx movie you want
to make smaller. Then go Video, and select Direct Stream Copy.
Use the slider button labled (A) to move the movie to around where the end credits start. Now use the (B), or (C) button to get as close to the beggining of the end credits as possible. Once you found that point press the (D) button, then slide the slider button (A) to the very end and press the (E) button, then hit the delete button on your keyboard.
Now go to File, then select Save AVI As, and name your movie.
This process can take from +/- 20-50mb off yor movie.