Construction
Due to the weather, all of the construction had to
be done in short, quick stages.
Stage 1) Patch the existing roof with the painted subfloor board
to ensure the water lines and pump do not freeze
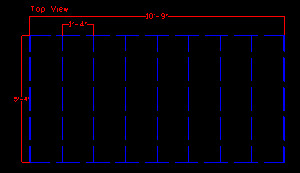
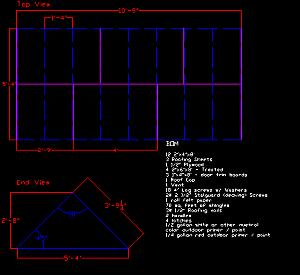
Stage 2) Measure, draw up a BOM, then pick up the materials
needed
Stage 3) Cut all materials to size and drill all bolt holes
-This was done in several outings, starting with the base frame,
then moving onto the trusses. At this time, some hot
chocolate was consumed, then the roofing board was cut.
Stage 4) Assemble the roof frame and the trusses
-With everything pre-cut and drilled, this was a breeze. Thanks
to good planning, everything fit together well and all parts
were easily portable.
|
Stage 5) Move the existing roof off the foundation, place a
small electric heater inside, and cover the pump pit with a tarp
-At this point, we disassembled the roof and discovered a wealth
of usable, treated 2x4. It was decided that we would use the
outside frame as a height booster to be placed under the new
roof frame.
Stage 6) Attach the old 2x4 frame to the new 2x6 frame using
Stalguard®coated screws every 8 inches. Use the
hot dipped galvanized lag screws to attach the trusses to the
new frame. Attach the roofing boards to the trusses and secure
roofing paper to the roof, then tarp it.
-This was the end of the Construction for about three weeks because
the snow and the sleet and rain made it difficult to apply roofing
paper and shingles.
Stage 7) Continue onto the Fuse Box
|