 |
|
|
|
|
|
|
|
|
|
|
|
|
|
|
|
|
|
|
|
|
|
|
|
|
|
|
|
|
|
|
|
|
|
|
|
|
|
|
|
|
|
|
|
|
|
|
|
|
|
|
|
|
|
|
|
|
|
|
|
|
|
|
|
|
 |
|
|
 |
|
 |
|
|
|
|
|
|
|
|
|
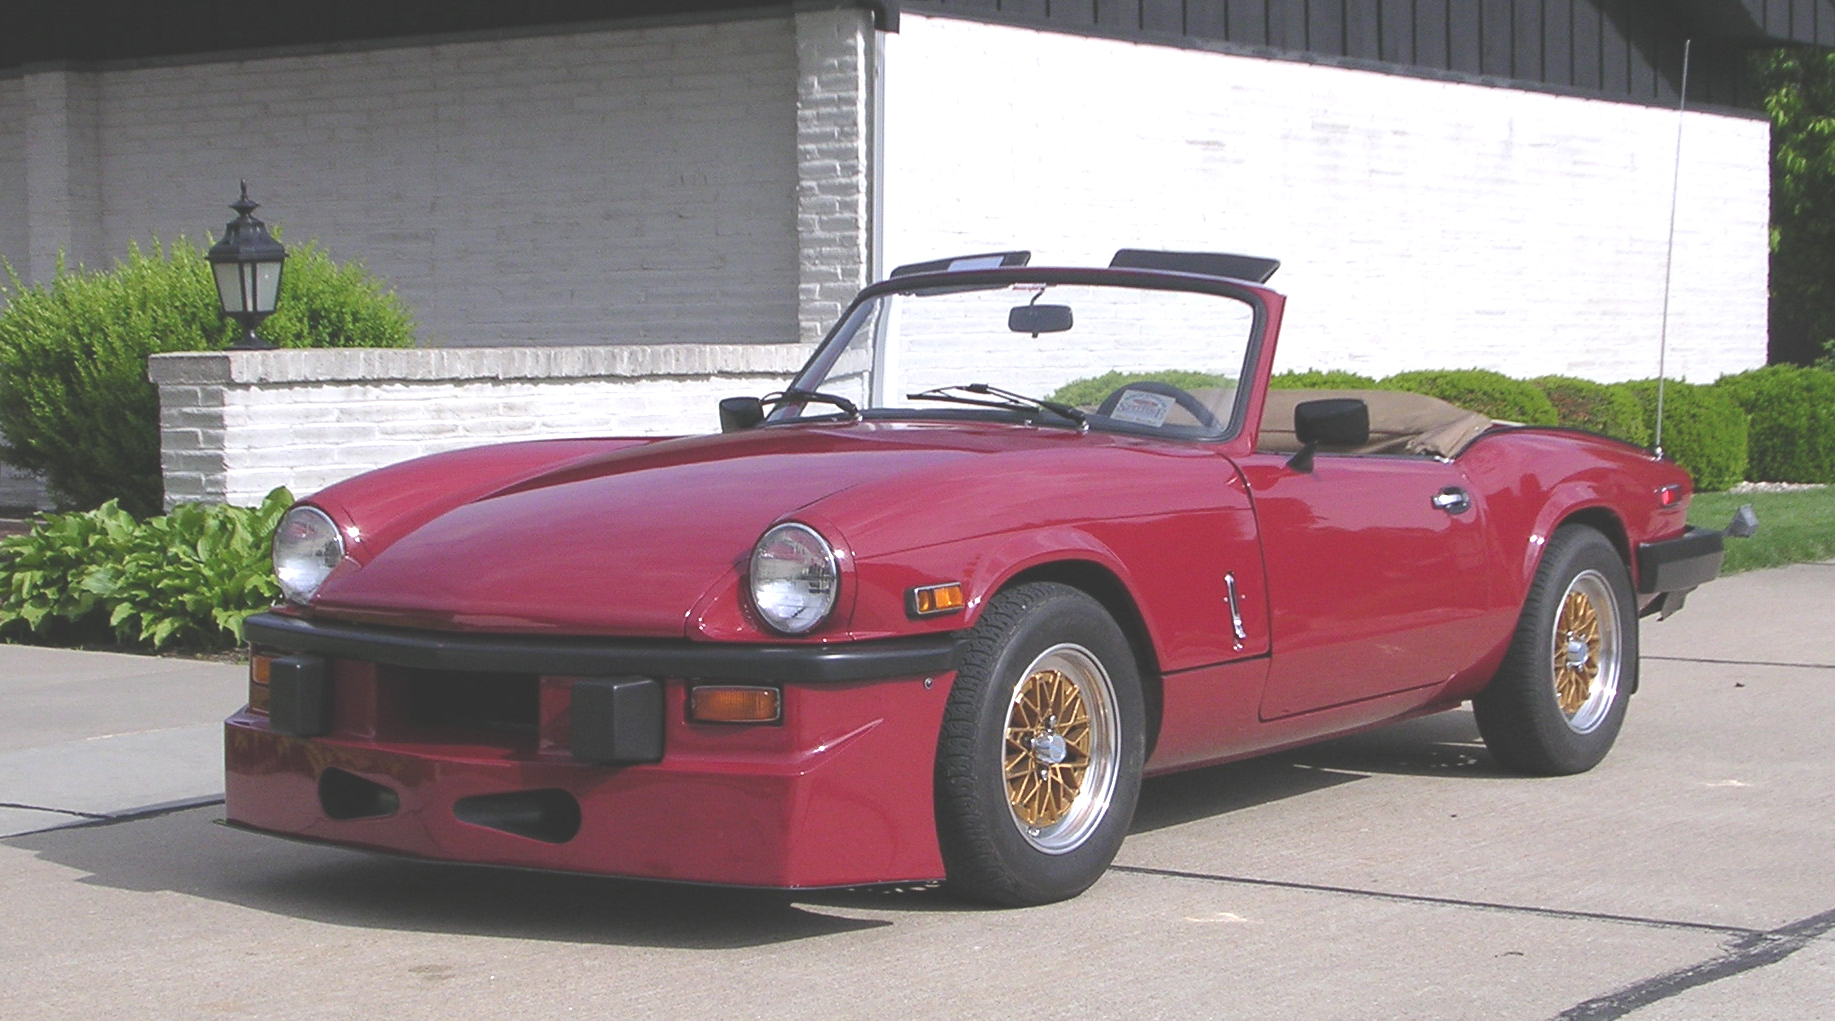
Fiberglass Air Dam |
|
Joe Guinan
Email me at:
[email protected] |
|
|
|
|
|
 |
|
|
|
|
|
|
|
|
|
|
 |
|
|
|
 |
|
 |
|
|
|
|
|
|
|
|
|
|
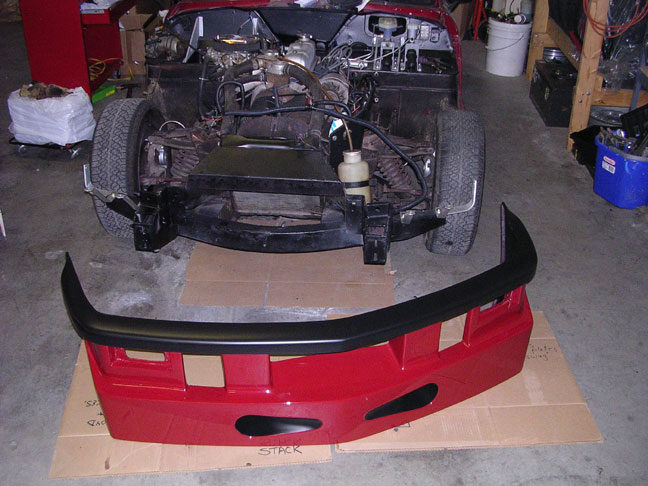
PRI Air Dam Installation...
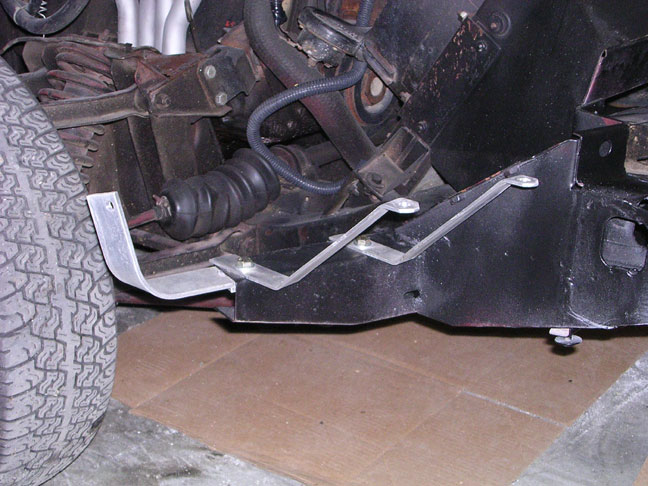
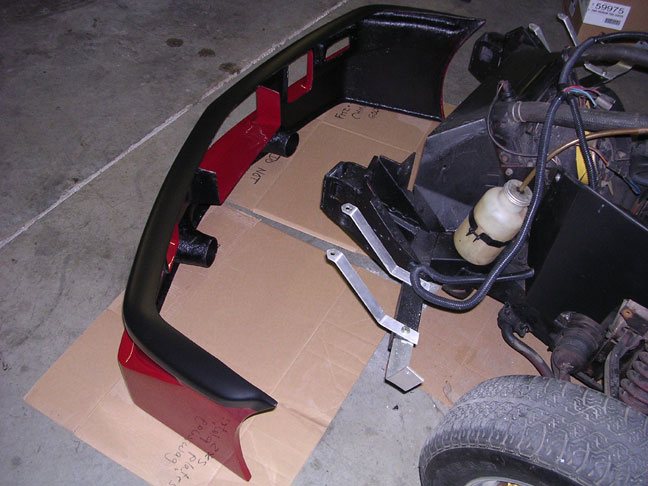
The brackets are shown mounted to the front "frame outrigger" at left. All the brackets are made from a good quality aluminum and are shaped to fit the locations quite nicely. The brackets going toward the front are bolted to the air dam through the top of the opening for the turn signals. The side bracket helps locate the side of the air dam and is slotted to allow you to "push" or "pull" it to fit different tires. |
|
|
|
|
I had the air dam painted to match my car color, and elected to go with a "Satin Black" on the "bumper" that is molded into the air dam. Lord, I hope I don't run into any more Crown Victorias... A Chrome rear bumper is being refinished in the same color right now. No more BURBS! (Big Ugly Rubber Bumpers)
The body shop used more of the bed-liner material on the back of the air dam to cover the somewhat raw looking fiberglass. |
|
|
|
|
|
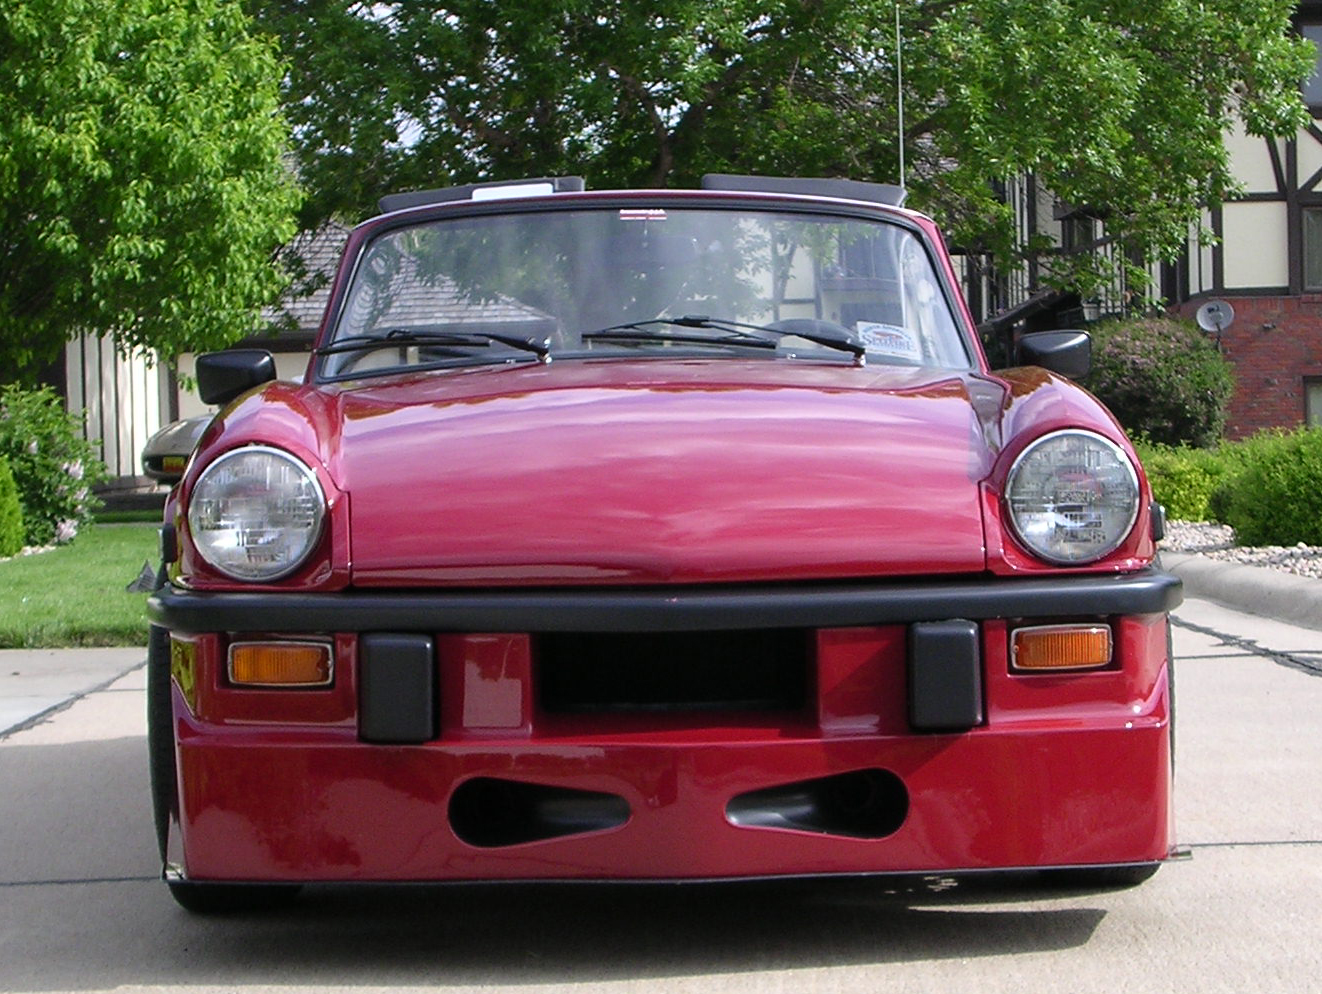
This angle shows the satin black used on the "bumper" and in the "nostrils". The nostrils are functional brake cooling ducts, and will be routed to the front brake rotor area. You might notice that I had the round "ram air" opening on the right side of the radiator opening filled so it matches the other side. Take a look at the PRI web site to see what was changed. I'm now ready to mount the "belly pan" air splitter. |
|
|
|
|
|
|
|
|
|
The (almost) Finished Installation |
|
|
|
|
|
 |
|
|
|
 |
|
|
|
|
|
|
|
|
|
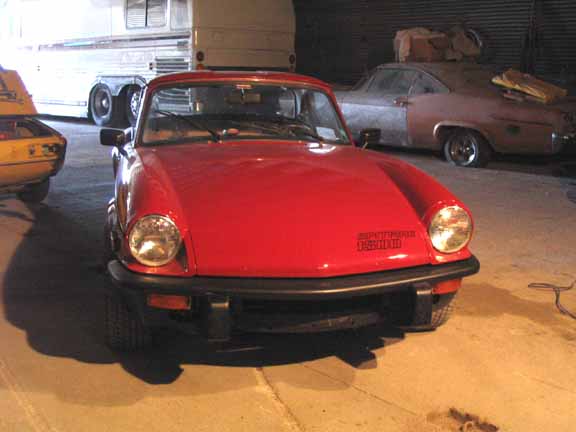
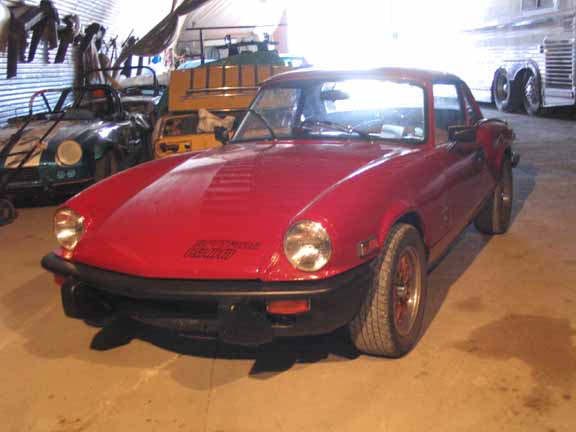
OK - I have to admit it... I fell in love with the PRI Air Dam the first time I saw it. However, living with it was a pain in the butt. Aesthetically, it was too large and too bulky looking for the Spitfire - especially after I took off the big rubber bumper on the rear. The squarish lines of the air dam don't complement the rounded lines on the Spitfire. The bottom of the air dam was too low for daily driving. I could not drive the car onto any of the trailers I occasionally use, and the belly pan under the air dam covered the tie-down points on the front of the frame, making it impossible to tie the car down on a trailer correctly. After these photos were taken, I installed coil spring lifts that give me about a 3/4 inch more height for clearance on curbs and speed bumps. This raised the front end height of my car more than I would like for handling purposes, but helped keep me from damaging the air dam. The car got a LOT more looks from people. "Rice Boys" especially seem to give the car a good once over when it goes by. I did get a ticket for not displaying a front license plate, so I had to add a mount for that. It covered up part of the "nostrils" but looked OK when finished. After everything was said and done, I just wasn't happy with the air dam. So I went with a stock front bumper painted satin black, and small "Euro" under-riders with the stock early 1500 plastic chin spoiler. Photos below... Air dam for sale... |
|
|
|
 |
|
|
|
|
 |
|
 |
|
|
|
|
|
|
 |
|
|
|
|
|
|
|
|
|
|
The metal bumpers are stock for earlier Spitfires, but were roughed up with steel wool and then primed with an acid etching primer. This "bites" into the metal enough that it sticks to the chrome. Finish coat is satin black bumper paint, and holds up to abuse and the elements quite well. The air dam and grill from the earlier 1500 Spits fit perfectly around and between the small under-riders. This change probably took over 50 pounds off the car. |
|
|
|
|
|
|
|
|
|
|
|
|
|
|
|
|
|
|
|
|
|
|
|
Wreck Repairs |
|
|
Home |
|
Fixed! |
|
Wheels |
|
Header |
|
Wreck |
|
|
Firewall |
|
|
|
|
|
|
|
|
|
Dellortos |
|
Roll Bar |
|
|
|
|
|
|
|
|
|
|
|
|
|