The large drive pulley initially gave me trouble. After turning it for some time, the pulley began to freeze, probably due to the pulley digging into the threads of the mounting bolt. I solved this problem by coating the exposed threads of the bolt with five minute epoxy. After the epoxy had set, I filed away the excess until the bolt would again slide into the hole of the pulley. I have by now rotated the Dirod thousands of times without further problems.
I also found that the plastic tube supplied for the handle on the pulley was too small in diameter to use comfortably for long periods of time. I replaced the plastic tube with a piece of 3/4 inch dowel, through which I had drilled a hole of the proper size.
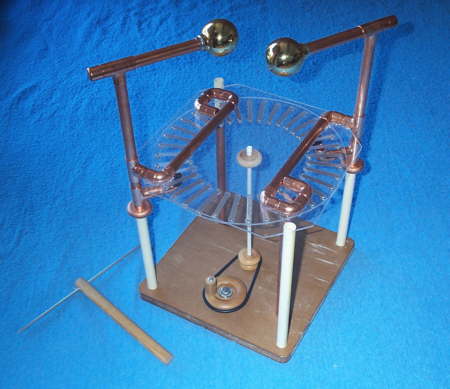
The two metal spheres of the spark gap, and the associated pipe are not included in the kit. I followed Dunn's suggestion and bought a non-locking door set, then cut off the spherical door knbs. I wrapped bare copper wire around the outside of two pipe end caps. At this point they were only slightly smaller than the holes in the knobs, and I was able to solder the caps to the knobs.
The metal rod with the wooden handle is a good grounding rod. I use it to short between the collectors when I am changing the spacing between the two spheres.