
1.HOW TO MAKE LOVE ORIGAMI
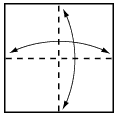
1. Start with your paper white side up.
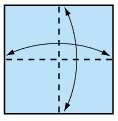
Fold in half and unfold. Then fold in half the opposite way and unfold.
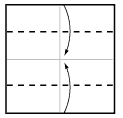
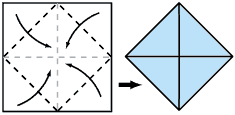
2. Fold the top and the bottom edges into the centre line
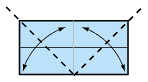
3. Fold the two bottom corners up to the top centre point and unfold
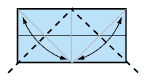
4. Now fold the 2 top corners down to the bottom centre point
and unfold.
and unfold.
5. Fold the outside edges in to the points shown and unfold.
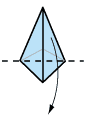
6. Fold all four corners in to the creases just made.
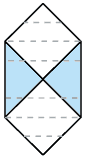
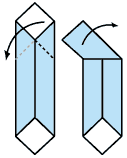
7. Now we are going to form the heart.
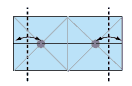
Hold the model by the corners, as shown, and bring these corners together.
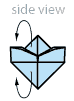
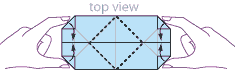
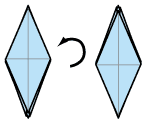
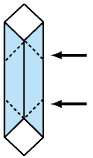
8. Still holding the model together, bring the outside edges toward each other.

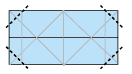
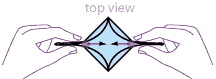
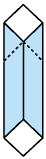
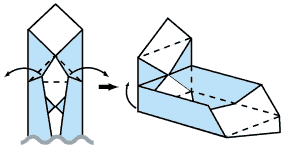
9. The model should now look something like this. Push the two triangles together underneath the model.

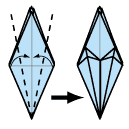
10. Lay flat on the table. Fold the two top corners down to the crease shown and unfold.

11. Use these creases to inside reverse fold these corners, so the model now looks like this.

12. Fold the uppermost flaps down. Then fold the tips inward

13. Fold the triangles back up.
Finished Heart!


2.HOW TO MAKE A LILY ORIGAMI
1. Start with your paper coloured side up.
Fold in half, then in half again, as shown. Crease well, then open out again.
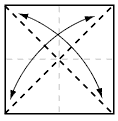
2. Turn the paper over and fold in half diagonally and in both directions. Crease well and open out once again.
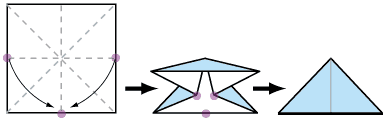
3. Holding the points shown, bring them both down to the centre point
on the bottom line. Flatten model. This is called a waterbomb base.
4. Fold the top triangle into the centre and unfold. Using this crease, open out the triangle and flatten.

5. You'll need to repeat step 4 on all four of the flaps of the waterbomb base. The model will now look like this.
6. On the uppermost diamond, fold the outside corners into the centre line, crease well then open.

7. Fold the whole model in half and open.
8. Using the creases made in step 6 and 7, lift the bottom point of the
model (the uppermost layer only) up to the top point, bringing in the
sides of the model at the same time, as shown.
9. Repeat steps 6, 7 and 8 on each if the four sides. The model should now look like this.
10. Now fold down each of these triangles, on all four sides.
11. Rotate model upside down, so the open part is at the top.
12. Fold the outer flaps toward the centre and flatten.

13. Repeat step 12 on all four sides of the model. The model should now look like this.

14. Fold down all petals, opening the flower as you go.
Completed Lily!
3.HOW TO MAKE A ORIGAMI BOX
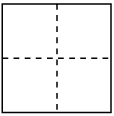
1.Start with a square piece of paper. Fold the paper in half horizontally and then verically, so the creases look like this.
2. Fold the four corners of the paper toward the center point

3. Fold the top and bottom of this square into the center and open out again to create these creases.
4. Open out the top and bottom triangular flaps.
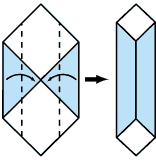
5. Fold the sides of the model into the centre, creasing well.
6. Fold down top corner of model and then open out again.
7. Fold down model in the other direction
You should now have 2 new diagonal creases like this.
8. Repeat step 6 & 7 at the other end of the model, so you have the new creases at both ends.
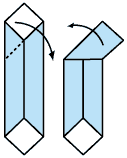
9. At one end of the model,Open out model along the creases you just
made. This will raise the top portion of the model vertically.
10. Fold top of model over into the box. Its taking shape!
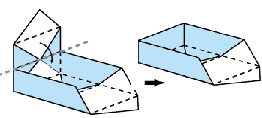
11. Repeat Step 9 and 10 at the other end of the box... and its finished!
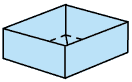
To make a lid, just make another box, but start with a slightly bigger piece of paper.