A compact and weather proof incubator that is portable and will retain the correct humidity.
The small incubator is very easy to disinfect. The incubators shell has no sharp edges or corners that may harbor bacteria.
The small portable incubator will maintain a constant temperature and humidity.
The incubator is compact and very economical to operate.The compact incubator will operate on a transformer or battery*.
It has an impact resistant shell with full insulation ensuring a long and economical operating life.
Humidity is created by heating an individual water tanks built within the incubators casing.
Humidity for an incubator
The incubators water tank will not let its contents escape if the small incubator is accidentally knocked over.
The incubator can be safely picked up and continue operations without being turned off.
Incubators and bacteria
Bacteria and other unwanted growth is severely restricted or completely eliminated.
The incubators heater will continue to operate until all of the moisture has been removed from the empty water tanks leaving the chambers dry and relatively sterile.
The outer shell of the small incubator will never reach a hot temperature due to a unique combination of lamination and insulation to the incubators shell.
An automatic thermostat will prevent the incubator from over heating.
The compact incubator is weather proof and will operate in the harshest of conditions.
It has been constructed of light weight molded thermo panels that interlock to produce an extremely strong casing that will operate under severe conditions.
Incubator humidifier and bacteria
The temperature of the outer shell will only reach a warm temperature regardless of the water level within tank.
The price of the portable incubator is $34
Plans for a bird egg incubator
The plan to build a birds egg incubator is free for your personal use.
Building the egg incubator requires basic tools and skill. The egg incubator plans can be modified to suit different egg incubation methods
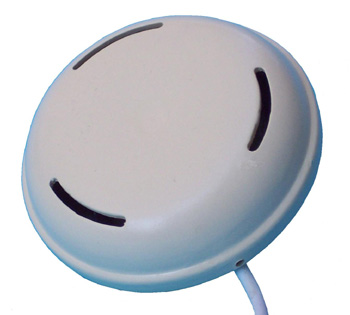
Heaters and humidifiers that are suitable for the incubator can be found on this web site. The heater can be built into the incubator during construction or used free standing.
The bird egg incubator plans base is the first piece of plywood for the egg incubator that is cut to size.
The base is the main template for all other incubator measurements. The measurements used for the incubator base will be decided by the number of eggs that are required to be hatched in one egg incubation period.
When the size of the incubator has been determined transfer the length and width measurements to the base of the incubator and the base template becomes the guide to all the remaining measurements of the bird egg incubator.
Egg incubator plan
The sides and the roof of the egg incubator plan should be made from the same plywood panel that the base is made from if the incubator is to have a varnished finish.
When building the egg incubator to the free plans supplied modifications can be made at almost any point of the egg incubator plans.
A1/A2 measurements of the egg incubator are equal but both are larger than A5/A6 by approx 20%
A3/A4 measurements of the incubator are equal but both are larger than A7/A8 by approx 40%
A5/A6 are equal measurements
A7/A8 are equal measurements
B1 This is the minimum height required for the incubator plus approximately 20%
B2 This is the height of B1 plus approximately 20%
B3 Draw a connecting line between B1 and B2 after putting in the B4 measurement.
B4 These are equal measurements to A7/A8
Bird egg incubator
When purchasing plywood panels to build the bird egg incubator superior heat insulation can be obtained with heavier plywood panels.
A thicker grade of plywood will increase the insulation the the bird egg incubator and reduce operating cost.
The side B1/B2/B3/B4 of the free incubator plan is the first panel cut and this incubator side is used as a template to mark out the second side B5/B6/B7/B8. If the plywood you are using has different textures on either side ensure that the template is marked on the same surface as the previous panel. The bird egg incubator will then have matching finished surfaces when painted
C1/C2 Equal measurements to A5 plus twice the thickness of the plywood being used for the side. This will give the egg incubator plywood edges that are flush.
C3/C4 Equal measurements to B1/B5
C5/C6 Equal measurements of the bird egg incubator to A5 plus twice the thickness of the plywood being used for the side of the egg incubator.
C7/C8 Equal measurements to B2/B6
Egg incubator
When selecting the plywood for the egg incubator the grade of plywood must be of an exterior grade quality. This is a grade of plywood that is water and rot resistant. The plywood for the egg incubator must not contain any chemicals that may produce fumes in the heated interior of the finished egg incubator.
A1+A2=The ends of the bird egg incubators roof
A3+A4=The sides of the egg incubators roof
A5+A6=The ends of the incubator base
A7+A8=The sides of the incubators base
B1+B2=The ends of the egg incubator side 1
B3+B4=The sides of the bird egg incubators side 1
B5+B6=The ends of the egg incubators side 2
B7+B8=The sides of the incubators side 2
C1+C2=The ends of the incubator back
C3+C4=The sides of the bird egg incubator back
C5+C6=The ends of the egg incubator front
C7+C8=The sides of the incubator front
Building a bird egg incubator
Use framing timber that is approximately two inches square ( 50 millimeters ). This is suitable for building a large bird egg incubator.
Smaller box incubators can have framing material of 1 inch ( 25mm ) square. A small heater can be installed into the incubator and preset to supply a regular and controlled source of heat. Heaters that are suitable for an incubator can be found at this heating site. The heaters can be built into the incubator or left free standing.
The timber framing required for building a bird egg incubator should be of sufficient quantity to border the inside of the base sides and the four corners of the incubator. Modifications to the framing can be made when building a egg incubator using the bird egg incubator plans. Guides to position the roof of the egg incubator, plus the runners that are placed under the floor to keep the incubator off the ground are also required.
Plans for a bird egg incubator
When building the bird egg incubator a viewing panel can be left out if it is not required.
The plans for a bird egg incubator has a perspex window but safety glass can be used as a substitute.
Wood glue, galvanized nails and screws are used for joining the plywood and framing.
The roof for the plan for a bird egg incubator can be made from clear perspex sheeting or glass. Perspex is the better selection as it will help in insulating the egg incubator. The perspex panel can have the positioning runners fixed with screws or nails. A glass roof will require positioning runners that are glued to the surface.
Do not use any paint that contains lead in it. An oil base paint or acrylic exterior paint is suitable.
Plans for a egg incubator
The plans for a egg incubator assembly will begin with the base of the egg incubator. To start building the bird egg incubator line the outer edges of the base with the framing timber. All the joints and framing of the incubator should be glued and nailed or screwed.
Fix the sides of the incubator to the base keeping the plywood side flush with the bottom underside of the egg incubator base.
Next the upright corner pieces are placed in position to the side edges.
The back of the bird egg incubator is the next panel to be fitted. This panel will bring rigidity to the whole structure.
Ensure that the back plywood sits flush to the outside of the plywood sides and flush to the base underside.
Bird egg incubator
The next step is to fit the front of the bird egg incubator with the edges flush to the sides and base underside.
Flush edges for joining panels allows extra edging to be used at a later date. This will provide superior heat insulation.
Now place the incubators roof in a position that is suitable for the bird egg incubator and fit the roof guides to the underside of the incubator for bird eggs roof.
Use any timber left over as runners under the floor to prevent the incubator from resting on the ground and loosing heat.
When you are happy with the structural strength of the incubator fill any nail or screw holes and coat with a suitable covering.
Egg incubator
To insulate an egg incubator the incubator must be of sound construction. Insulating a incubator for bird eggs that has been poorly constructed will not provide a reduction in operating cost or improve reliability.
A properly constructed egg incubator for birds that is suitable for insulation should not be to large for the amount of eggs that are to be incubated.
Painting the incubator with an undercoat and then an exterior grade top coat will prevent moisture from penetrating any egg incubator that is made of plywood. The choice of color to paint the incubator can help in the insulation of the egg incubator.
If the bird egg incubator needs to be insulated against heat then a light colored paint should be used. The reverse is true if the incubator for eggs needs insulation to retain heat.A dark colored paint should be used for retaining heat. If the incubator for eggs has been exposed to weathering, the surfaces of the egg incubator will need to be sanded back. Fill up any splits or cracks in the incubator for bird eggs surface and allow these to dry. Sand back the filler to a smooth finish and give the incubator a heavy coat of undercoat and top coat of paint.
Position the bird egg incubator out of any prevailing winds. This will help in insulating the bird egg incubator against heat loss and maintaining an even internal temperature.
Raising the incubator for birds eggs above the ground will stop moisture from entering through the floor or incubator walls. This will also help to prevent rot and mildew from attacking the floor or sides of the incubator.

 B3+B4=The sides of the bird egg incubators side 1
 The plans for a egg incubator assembly will begin with the base of the egg incubator. To start building the bird egg incubator line the outer edges of the base with the framing timber. All the joints and framing of the incubator should be glued and nailed or screwed.