
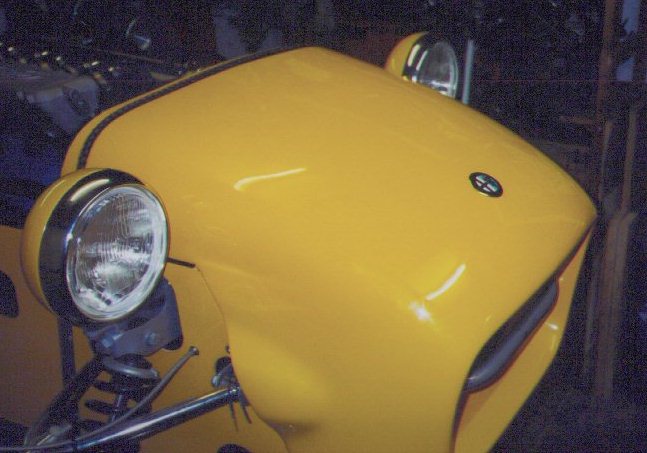
Voor mij ook geen DAX-embleem maar natuurlijk een Alfa embleem. Of ze het bij DAX en Alfa Romeo leuk vinden of niet, zal mij een worst zijn. Het embleem ligt trouwens verzonken in de neus.

Back to part 6
To part 8

| Bouwfoto's deel 7. | ||||||||||||||||||||||||||||||||||||||||||||||||
|
|
||||||||||||||||||||||||||||||||||||||||||||||||
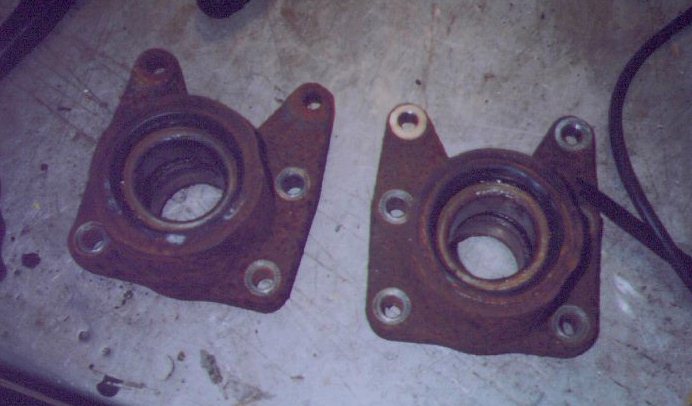
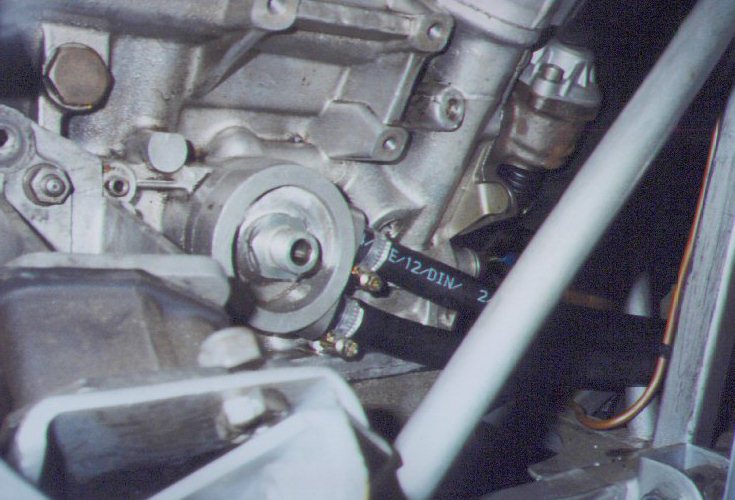
| Omdat de achteras een mengelmoesje is van Ford Sierra Cosworth en Scorpio bleken de achterfusee's te groot te zijn. De remklauw ston te ver van de schijf waardoor de remblokjes niet over het hele oppervlak aangrepen. De remschijven waren van een scorpio en de klauwen en fusee's van een Sierra Cosworth. Oplossing: montage van Scorpio fusee's. Deze zijn precies 1 cm kleiner. Was wel even stug sleutelwerk. | ||||||||||||||||||||||||||||||||||||||||||||||||
|
||||||||||||||||||||||||||||||||||||||||||||||||
| Because the rear axle is a combination of Sierra Cosworth and Scorpio the breakcaliper was to far away from the brake disc. The uprights were from a Sierra Cosworth and the brake discs from a Scorpio. Solution: installation from Scorpio uprights. A few hours of work but that didn't matter. | ||||||||||||||||||||||||||||||||||||||||||||||||
|
||||||||||||||||||||||||||||||||||||||||||||||||
| Neusje en koplampen. De ronde exemplaren. DAX is een van de weinigen zoniet de enige die ook vierkante koplampen levert. Deze staan wat agressiever. Vindt ik niet zo mooi. Maar ieder z'n smaak. Voor mij ook geen DAX-embleem maar natuurlijk een Alfa embleem. Of ze het bij DAX en Alfa Romeo leuk vinden of niet, zal mij een worst zijn. Het embleem ligt trouwens verzonken in de neus. |
||||||||||||||||||||||||||||||||||||||||||||||||
| The nose coin and headlamps. I've chosen for the round ones. The rectangles are much to agressive for me. The emblem is from Alfa Romeo and not from DAX. I don't think either of them will like it but I don't care. This is the way I like it. | ||||||||||||||||||||||||||||||||||||||||||||||||
|
|
|||||||||||||||||||||||||||||||||||||||||||||||
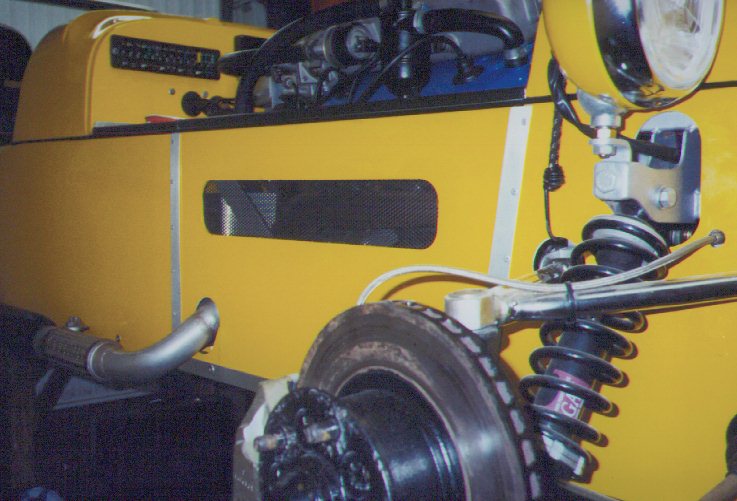
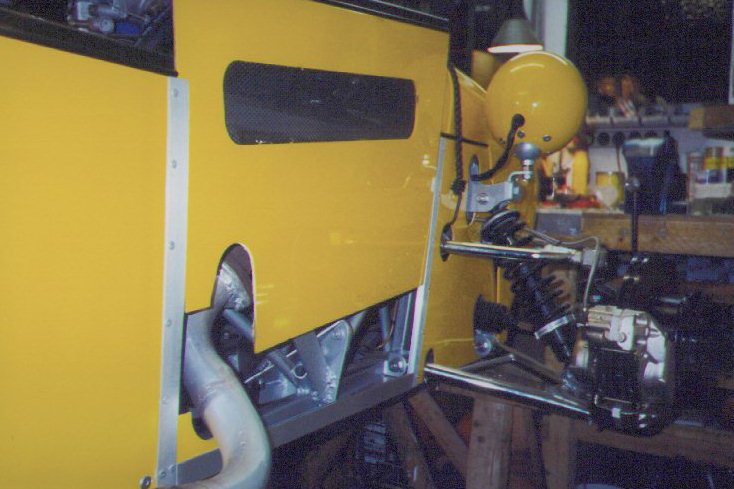
| Een toch wel leuk detail is het uitneembare zijpaneel. Het bleek namelijk zo te zijn dat wanneer ik het complete paneel zou monteren er bijvoorbleed geen mogelijkheid zou zijn het oliefilter te vervangen. Dat kan natuurlijk niet. Bovendien vind ik 't geen fijn idee als ik niet bij de motor kan komen. Misschien wat minder charmant maar wel erg functioneel zijn de aluminium afwerkstrips. Het paneel schuift hier perfect in. Het rooster is bedoeld om de hitte van het uitlaatspruitstuk kwijt te raken. Helaas bleek uit een proefneming dat de bevestigingsmethode (met epoxyhars) van het rooster tegen het paneel niet 100% is. Popnagels en aluminium strips zullen waarschijnlijk de oplossing bieden (zie deel 8). | ||||||||||||||||||||||||||||||||||||||||||||||||
| A rather funny detail is the removeable sidepanel. Because it would be inpossible to exchange the oilfilter after installaing the complet sidepanel. This is off course unacceptable. Maybe not so beautifull but very functional is the aluminium finishing. These profiles are perfect to slide the sidepanel in. The black grate is to suck out the hot air from the outletmanifolds. Unfortunately the heat is to much for the way I put the grade to the sidepanel (with epoxy). Rivets should give the solution for this problem (see part 8). | ||||||||||||||||||||||||||||||||||||||||||||||||
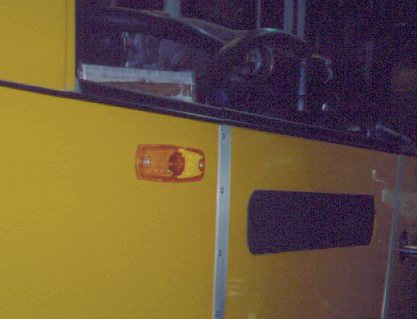
| De zij knipperlichten, althans.... eentje dan. | ||||||||||||||||||||||||||||||||||||||||||||||||
|
||||||||||||||||||||||||||||||||||||||||||||||||
|
||||||||||||||||||||||||||||||||||||||||||||||||
| The side indicators, well.... at least one of them. | ||||||||||||||||||||||||||||||||||||||||||||||||
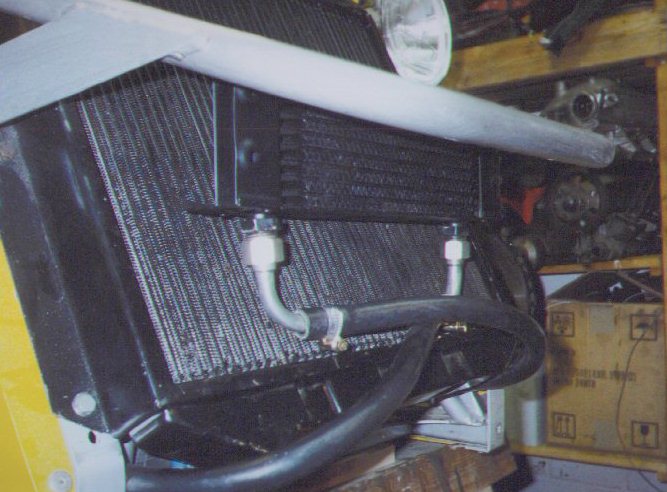
| Omdat de carterpan te dicht bij de weg zou komen (bodemvrijheid zo'n 5 tot 6 cm) moest deze vermaakt worden. Dat is nog niet klaar. Maar om de koelende werking van de olie te compenseren is er een oliekoeler gemonteerd. Inderdaad met rubber slangen. Maar deze zijn tot 6.5 bar gegarandeerd dus voldoende. | ||||||||||||||||||||||||||||||||||||||||||||||||
| Because the dump would be to low to the road this will be modified. The sump isn't ready yet. But to compensate the cooling capacity an oilcooler is installed. Yes, with rubber hoses. These can have a pressure from 6.5 bar. This must be enough. | ||||||||||||||||||||||||||||||||||||||||||||||||
|
||||||||||||||||||||||||||||||||||||||||||||||||
|
||||||||||||||||||||||||||||||||||||||||||||||||
|
||||||||||||||||||||||||||||||||||||||||||||||||
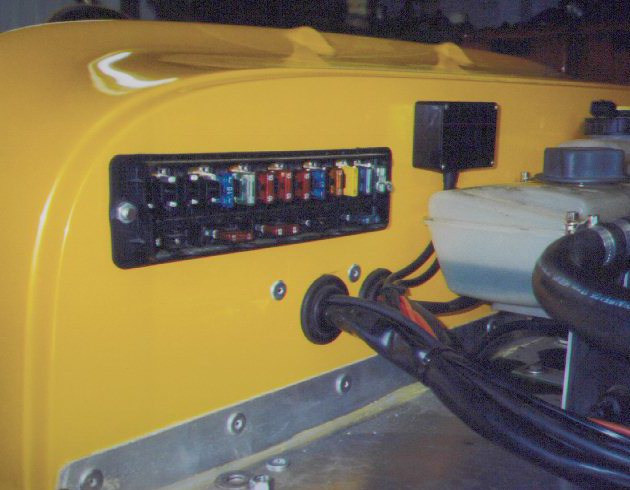
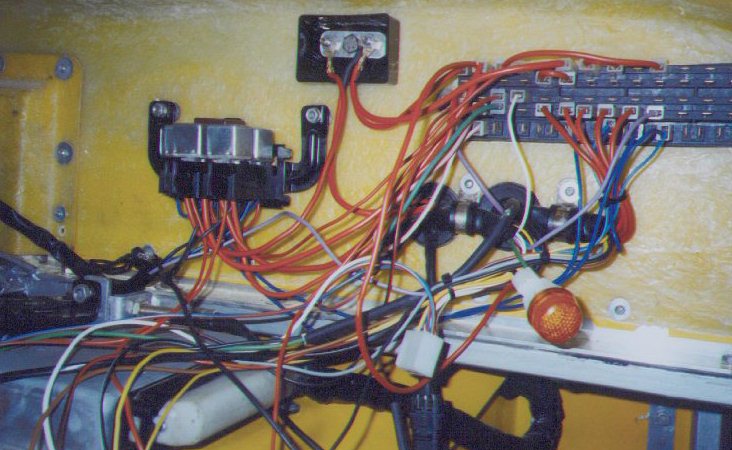
| De zekeringkast en het begin van de elektrische bedrading achter het dashboard. Meer over de elektriciteit later. | ||||||||||||||||||||||||||||||||||||||||||||||||
| The fuse box and the beginning of the electrical system behind the dashboard. More about the electrical system later. | ||||||||||||||||||||||||||||||||||||||||||||||||
|
||||||||||||||||||||||||||||||||||||||||||||||||
| Terug naar deel 6 Back to part 6 |
||||||||||||||||||||||||||||||||||||||||||||||||
| Naar deel 8 To part 8 |
||||||||||||||||||||||||||||||||||||||||||||||||
|
||||||||||||||||||||||||||||||||||||||||||||||||