|
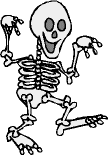
Border Background Lets create a border background using some of the features in PSP6. For this part of the lesson, you will need to save this picture of Syd the Skeleton to your hard drive.
Use the magic wand button to
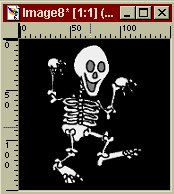
select Syd. Remember to hold down shift as you select all the areas of white around Syd. Your image should now look like this:
Click Invert, or go to "selections" then "invert". Syd should now be outlined with marching ants.
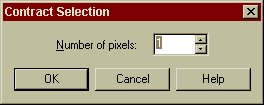
Now, remember how Pete had a little bit of white left around him? Well we don't want that to happen with Syd, so we need to contract our selection. We do this by going to "Selection" then "Modify" then "Contract". In the pop up box, make sure it says 1, for the number of pixels.
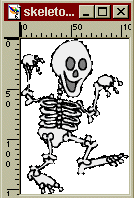
Click ok. Your selection will have contracted by one pixel. It might be hard to tell that it has though. Now copy Syd, by clicking on "Copy" or going to "edit" then "copy". Now we want to past Syd into the black image as a new layer. Make sure your black image is the selected image by clicking on its title bar, then click on "paste as new layer" or go to "edit" then "past" then "paste as new layer". Your image, and layer palette will now look something like this:
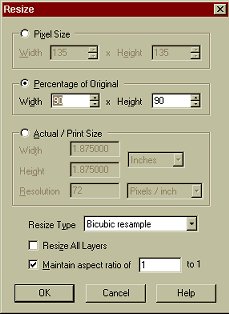
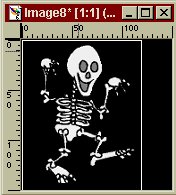
Notice that Syd's head and foot are overlapping the edge a little? Lets fix that. Click on "resize" or go to "image" then "resize" A dialogue box will appear:
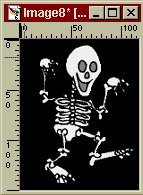
We only need to resize Syd a little, so lets make him 90% of his original size. And we'll resize him using Bicubic resample too. Sometimes using resize makes the image a little blurry, and this option leaves it the least blurry. Make sure your resize box looks like the one above. Make sure that the "resize all layers" option is UNCHECKED. We only want to resize Syd, not the whole image! Click ok. Wow! Now you can see all of Syd.
Lets move Syd to the left a little. Because he is on a
separate layer, we can move him around. Use the mover tool
Merge all your layers, like you did for the tiled
background. Now we can crop the image. Use the crop tool
Now double click inside the selection. Syd should now be cropped. You can save your image now if you wish.
Lets finish making our Syd image into a background. Make sure that black is your background color in your
color palette:
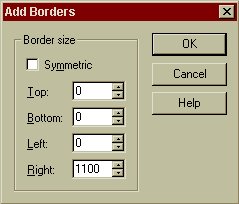
Uncheck the Symmetric box, and put in a size of 1100 in the "Right" box. This might seem big, but if you were to only to put in say 800, then someone who is looking at your page, who has a screen resolution of 1024x768 would see your background repeated. So if you put in a large number like this, then your background won't repeat for anyone. Click on ok. Hey! You just made another background! Save it as a gif file. If you would like to see what the background should look like, click here. So now you how to make a tiled background, and a border background. Assignment: Do the lesson
again, but this time place syd on a different colored background, and when
you add the border, make sure the same color is the background color in
you color palette. This Page © Area52 University 2003 |