| SCALLYWAG PROJECTS |
| Project: New Bimini Top |
| Back to my Lancer Home page: |
| Links to other projects: |
| Page 1 Page 2 Page 3 Page 4 Page 6 |
| (Page Five) |
 |
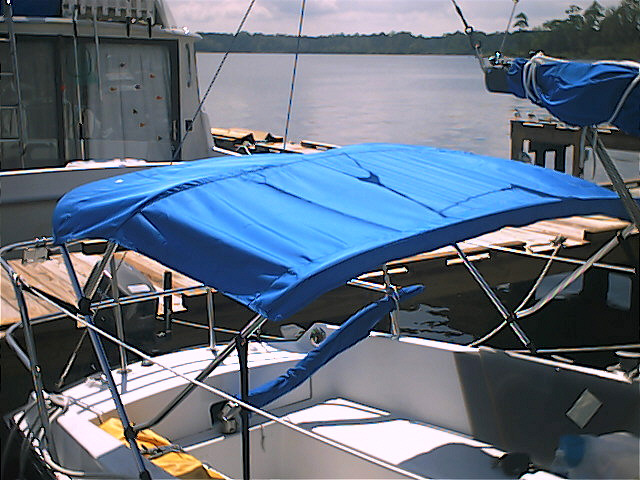
| Material List One Stainless Steel Boom Bail (2 1/4 inch) Two SS Screws (12 x one inch) One Bimini Top (36"H x 70"W x 60"L) Tools Drill Phillips Screwdriver Pair Plyers |
| Project: Woodwork |
| I like to use the colder months to do interior work. So, I did two woodworking projects to maximize space in the boat To the right is the shelf above the V-berth to store small items like an alarm clock, small candle, etc. The second project was a shelf along the port side (above the settee). Picture coming soon. |
| If your Lancer 28 is set up per the manufacture specs, your dimensions for the bimini are: 36"H x 70"W x 48"L. That's the only length that will fit between the split back-stay and the mainsheet. My personal preference was for a longer bimini which would provide some protection/cover for my companionway. So, I chose a 60"L model. My concern was that it mandated moving the mainsheet forward on the boom by 8 inches. Putting up the bimini was easy. Be careful to mount the brackets where they won't interfere with the winches, jib sheets, or cleats. Then, I connected the main sheet to the traveller, held up the top block, and moved it forward until the sheet no longer touched the bimini. That was where I mounted the new bail to the boom. Now, I can sail with shade or some protection from light rain. |
 |
 |
 |
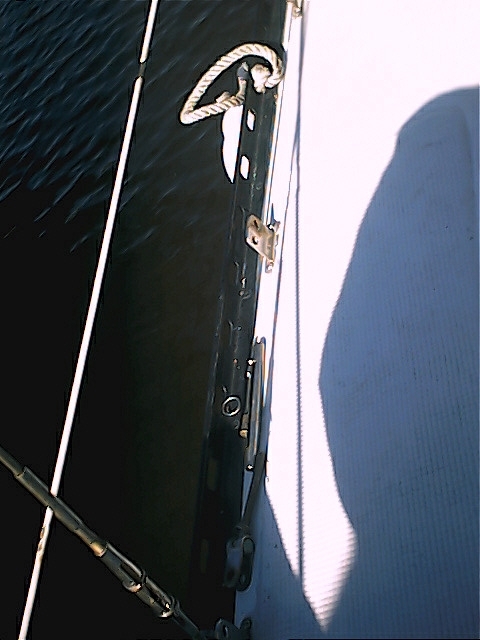
| Project: Resealing the Chain Plates |
| The previous owner sealed all of the topside leaks with a cheap silicone. So, one year later, they're beginning to leak again. I'm doing it correctly with 4200. After checking the area around the plates, both inside and out, I proceeded by removing the shround from the turnbuckle. DO NOT loosen them all at the same time. Reseal one plate at a time!!!! Once the shroud was disconnected, a friend held the nut inside, and I unscrewed the top retaining bolts. The old silicone, which was peeling, needed to be thoroughly scrubbed and removed. Once all of the old sealant was cleaned away, I placed a 1/4 inch bead of 4200 around the entire opening on the deck. To insure a good seal, I also placed a 1/4 bead of 4200 all the way around the base of the chain plate inside. |
 |
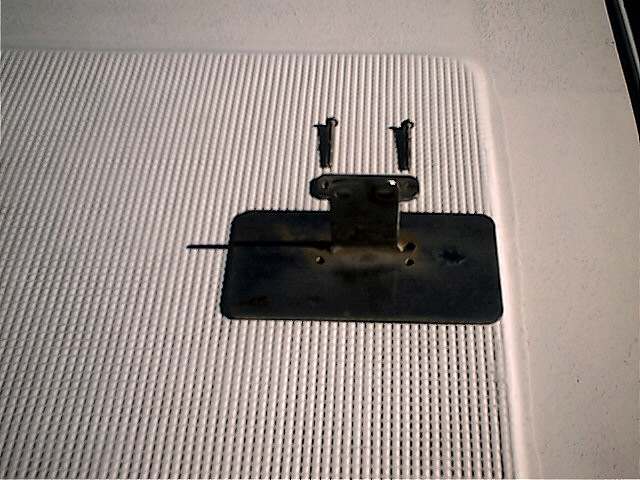 |
| The picture to the right is of the entire assembly removed. It is very simple, consisting of the chain plate itself, two bolts w/ nuts, and a topside retaining plate. The chain plate is inserted from the bottom up. The top plate is placed on, and the bolts screwed tight. EASY job! |