Equipment                                                                            Astro_Odds_Icon


   equipment_icon   project_button   gallery_button   imaging_button   technical_button   links_button

Click the Astro Odds logo to go back to the home page

My equipment

Meade ETX125EC
William Optics SD66Z
Meade Deep Space Imager
Canon EOS350 DSLR


Meade ETX125EC

My main telescope is a Meade ETX125EC that I bought second hand with a case, electric focuser and a Voyager Field tripod with an adapter plate for the ETX. The scope is shown here carrying with the Meade DSI and my custom extension bracket fitted to the finder scope.
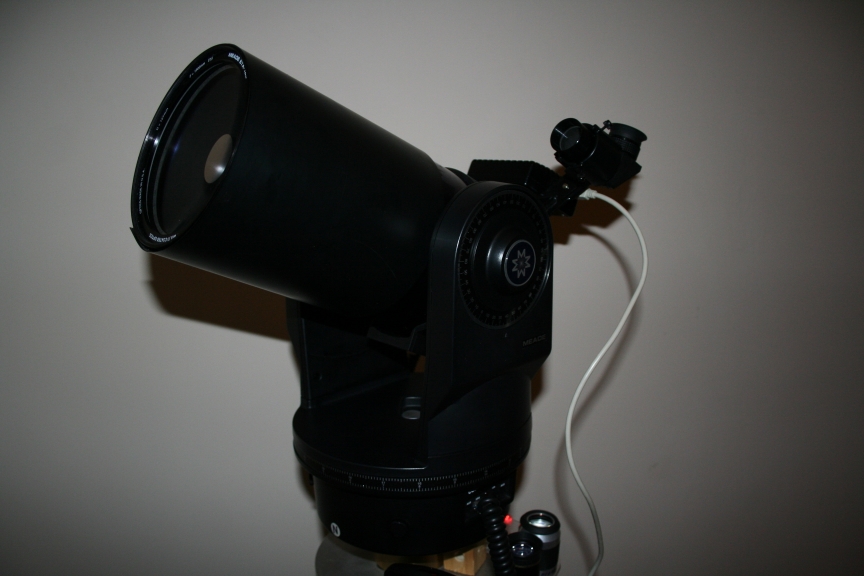
ETX125_Setup

First time out with the scope, it took me some time to learn how to align the scope but once I did, the guided tour took me to the Ring Nebular and I was able to resolve it as a ring. It was a great start but I soon concluded that optically it is a nice scope but the mechanics and construction present some challenges.

The first problem I faced was that the clutch on the declination drive was slipping. It's a friction clutch and you should only just meet resistance before it holds. Before I bought the scope I searched the web for images taken with the 125 and found Mike Weasner's Mighty ETX site. This is one of the most useful sites I have ever found and under the technical tips pages I found all the information I needed to strip the scope down and repair it. First I had to procure a complete set of imperial hex keys in order to take it apart. Hex keys with "ball ends"  are best because the keys can be inserted at an angle.

Once, inside the ETX I discovered a number of problems....
  1. Grease had leaked from the declination arms onto the friction plate of the clutch.
  2. The plastic gears had been greased and the optical sensors that measure the movement of the gears were partly obscured.
  3. Worst of all, some of the plastic pillars that mount the declination motor drive had broken. 
I took the scope to my step Father's workshop and we fixed 1 and 2 by stripping every thing down and cleaning it. Plastic gears do not need grease, we added a small amount of clock oil to keep everything running smooth. We fixed 3 by running long bolts through to the outside of the fork arm. The heads are small and do not interfere with the dial that tightens the clutch plate. We also roughened the surface of the friction clutch using wet-and-dry on a perfectly flat surface. I strip the friction clutch down and degrease it at least once a year

I would not recommend any of the above to anyone whose scope is still in warranty.

I then acquired several second hand eyepieces from the UK Astro Buy-Sell site. At this point I also decided to start making some accessories. One of the first was the illuminated eyepiece tray shown in the photograph above.

Having spent the Summer observing I then started to think about photography and bought the Meade Deep Space Imager on the basis that I could guide and capture images simultaneously. When I tried to use the DSI I immediately found a problem. To get the DSI in the proper orientation the USB cable fouled on the finder scope. The scope wasn't tracking well enough that I could align the scope and then remove it and simply stay on the target. Therefore I made the extension bracket shown in the picture above, to move the finder away from the USB lead.

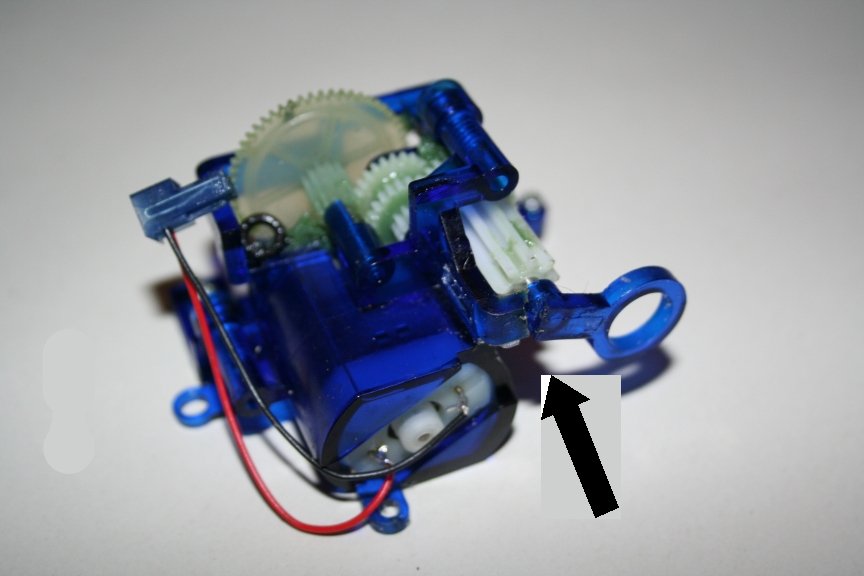
However, my worries were not over! The software proved difficult to master and before I could really get to grips with it, the right ascension drive failed when part of the plastic linkage on the motor assembly snapped while I was observing Saturn in -2degC temperatures.


failed_dec_gear

I was lucky enough to pick up an ETX125 base where the fork arms broke in a fall and the owner resused the OTA on a new mount. This was a more recent build and Meade appear to have strengthened the plastic at the point where mine snapped.

Once repaired I went back to the DSI and used the Moon to practice focussing and took some one-shot images. Having found focus I then went back to Saturn and managed to capture my first decent image with 50 frames stacked over 5 minutes.

I was not happy with the tracking and researched a number of ways of improving the performance and came up with a number of measures:-

  1. Levelling the scope as accurately as possible. 
  2. Calibrating the motors and training the drives
  3. Update the Autostar software
  4. Upgrade the laptop to USB2.0
I have covered 1 and 2 in my Technical Information page.  While updating the Autostar I discovered the Meade 4M program which apart from providing the software updates is another great resource for news and information. I also came across the AutoStarSuite.Net forum where I picked up some tips and tutorials on imaging with the DSI.

Just when I thought I was all set,  the tag broke off the RJ45 plug that connects the Meade 497 controller to the ETX base. I found several cables to replace the lead during an office clear out. I checked the first two with a meter and the pin out was the same as the ETX cable. The scope was working but was jumpy and did not move smoothly. So I picked the third and shortest cable, plugged it in and killed the hand-controller. The pin connectors were cross wired! I found a virtually new replacement hand-conroller on AstroBuySell for a reasonable price. A stupid mistake lead to what has proved to be a great investment. My scope tracks better, objects are always in the eyepiece and the drives are much quieter. The DSI tracking is also vastly improved. and I just managed to track comet 
17P Holmes for over 10 minutes, capturing 100 frames.

 
William Optics SD66Z

Although I can set up the ETX in less than 20 minutes I wanted a grab-and-go scope that would fit in a rucksack, fit in the overhead locker of an aircraft, be carried by a lightweight tripod and would attach to my Canon DSLR or the Meade DSI. The most cost effective scope that met the bill was the William Optics SD66Z.
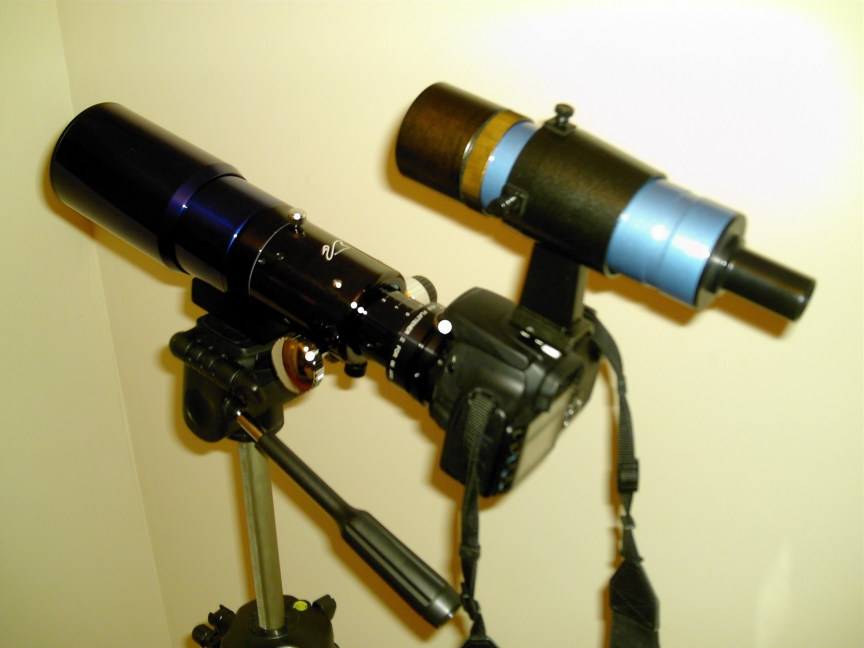
SD66Z_setup
In the picture the scope is set up for photography with the William Optics focal reducer attached via a T-mount to my Canon EOS 350 DSLR. The tripod is a photographic tripod that came with a carrying case and has a hook on the central column to hang a bag of rocks to stabilize and weight the tripod down. The focal reducer ensures that the image covers the CCD chip of the camera and prevents vignetting.  The thread on the camera T-mount does not match very well with the focal reducer but I have a set of M42 extension rings that I use to bring the Meade DSI to focus when using it with camera lenses. I use the smallest ring to cleanly attach the T-mount to the focal reducer.  I also have an M42 2x converter that I can use to get more magnification. 

My first time out with the scope was the lunar eclipse on 6 March 2007 and I was pleased with the performance both visually and photographically. With a 26mm eyepiece I could clearly see Saturn's rings and Titan despite light pollution from a rising Moon and the Pleiades revealed the Seven Sisters extended family. The climax of the evening was the eclipse and I was very pleased to capture the image of the Moon at totality, surrounded by the major stars of Leo that is in my gallery.

Although it is easy to focus the camera on bright stars it is not easy to see faint objects so I needed a finder scope. Since I also needed the finder for wide field photography, I decided to find a way of fitting the finder to the flash gun bracket on the camera as in the photo. The camera and finder scope added a significant amount of weight to the draw tube and I had to tighten the tension to stop the focus from slipping. This was easily done with the SD66 and a couple of turns with an hex key did the trick.

Meade Deep Space Imager.

I bought the Meade DSI due to it's ability to guide the ETX125 and guide at the same time. The first project was the 
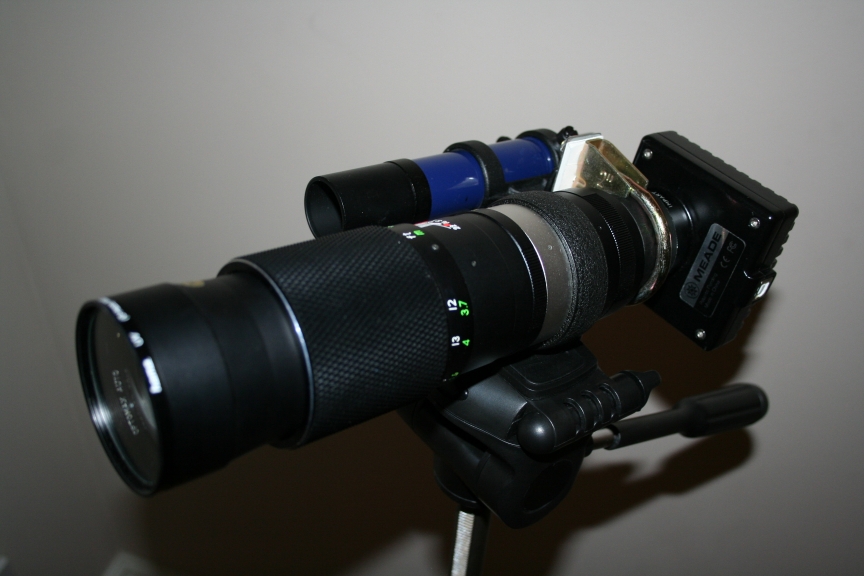
extension bracket for the finder scope, in order to allow the USB cable to clear the finder and keep the DSI in the right orientation. The nose piece of the DSI has a 42mm thread which I use it with T-mount to put my Canon EOS 350 DSLR. at the prime focus of the ETX125.  I realized that I could also use a camera lens with an M42 mount to use the DSI for widefield imaging. It was easy to pick up lenses on Ebay and the best buy was a 50mm lens for a pound because the aperture ring is stuck. I needed to buy a set of M42 extension rings in order to bring the DSI to focus.  In order to target objects quickly I needed to attach a finderscope to the DSI which is shown in the photo below and details of the "exhaust clamp finder" is in the projects section.
DSI_setup.jpg
With a 300mm lens and 2x converter the DSI can resolve the Gallilean Moons of Jupiter and it's possible to capture for 90 seconds unguided mounted on a tripod. I tried a number of lenses down to 50mm and 35mm but so far I have only the experimental images in the gallery and I haven't refined the technique yet. I hope to get back to this project and refine the capture settings on the DSI. 

Canon EOS350 DSLR.


My Canon DSLR has a 18-50mm lens and I use it for widefield images of constellations, the Milky Way, comets and capturing meteor trails. The camera has to be focussed manually and the exposure time set manually. Most of the time a finder scope is not necessary but for imaging comets and deep sky objects I use the finder mounted on the flash gun bracket shown in the SD66Z set up above.

For any exposure over 1/60th second camera shake becomes an issue. At first I used the cameras built in timer delay to let the camera settle after pressing the shutter release. I then started looking for a cable release that
would allow me to trigger the shutter and hold it open as long as the switch is depressed. The EOS350 camera release is a 2mm stereo jack socket and after some research on the web I found the connections and built my cable release shown in the Projects section.

While looking for the cable release I found the software and connection diagrams to control the camera from a Palm Pilot. I had an unused Palm Pilot and a USB charging cable that I could modify to build a cable. This program is great for taking multiple exposures for stacking or leaving the camera snapping away to capture meteors. The construction of the cable is in the Projects section and its usage covered in the Technical Information section.

Counter Visitors since 17th Nov 2007
Hosted by www.Geocities.ws

1