1978
Mustang II Ghia Rebuild Project - by Norm Jones
Phase II: The Build Up
Home
With it all stripped down, it was time to bring it to the machinist
to get it dipped, reboared and painted.
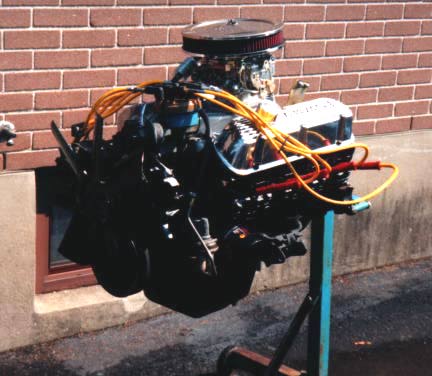
Here is the block with its new muscle ready to be transplanted. In
the pile you will find a dyno matched Edelbrock Performer Package. I thought
about the RPM package but since I don't race it that often and it's an
automatic, I didn't think I would get the RPMs up to the point where the
parts would make a difference.
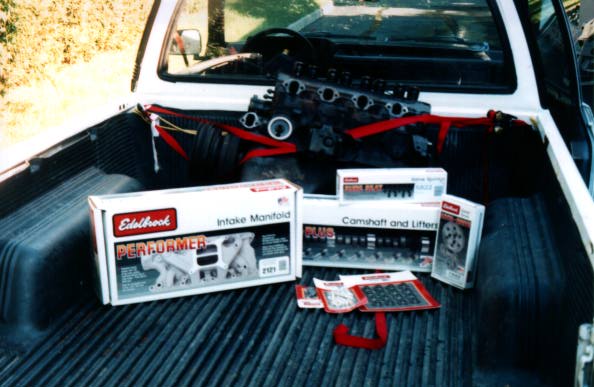
Ready to get dipped
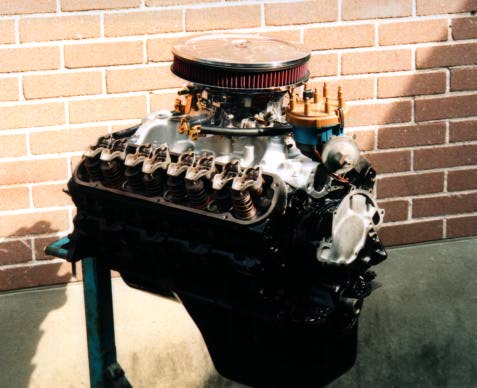
After about a week and $1,300 parts and labour, she was ready to start
the build up. Already installed here is the Edelbrock Performer Intake
Manifold, and dyno matched cam, lifters, and springs. The block was boared
.30 over. WARNING for Ford owners*** if you get the crank case reboared,
as I did -.10 the crank slides a bit forward. If you want to put
in a gear drive, forget about it. There's no room, if you reboar.

Start to rebuild
After a few days I started to put on the big parts. I started
with the carburetor. A 600 cfm Edlebrock Performer Carburetor. Part of
the dyno matched package. I also started to install the distrbutor with
a new Accel cap and rotor with a Crane gear for the distributor to replace
the original one missing three teeth. Also seen here is the K&M air
filter 10" by 2" for clearance on the hood.
Carb and air filter
Next, I looked through the Ford Motorsport catalogue for some valve
covers. I found some nice aluminum ones that say "Mustang - Power
by Ford" like they used to way back when. At the same time, I picked up
a billet oil/air cleaner. I also placed in the distributor knowing
that later I would have to pull it out to prime the oil pump. I also put
on the fuel pump.
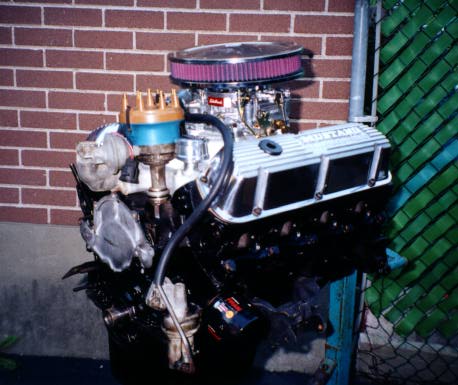
Valve covers and distributor
I plugged all the front together (alternator, water pump, fan, harmonic
balancer) and stuck the spark plug wires on to make me feel like I was
actually getting somewhere.
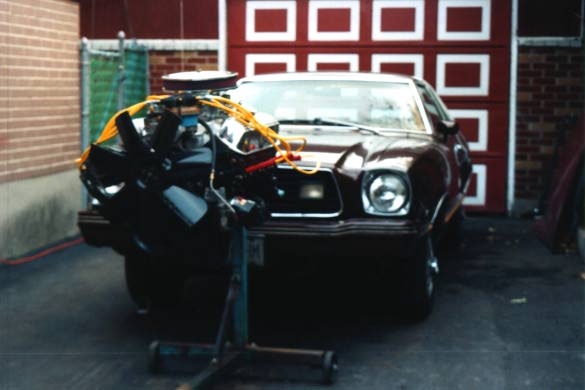
Looks like an engine
Here's the side angle to show that I did put the alternator on. Too
bad I chopped the top of the air filter in the photo.
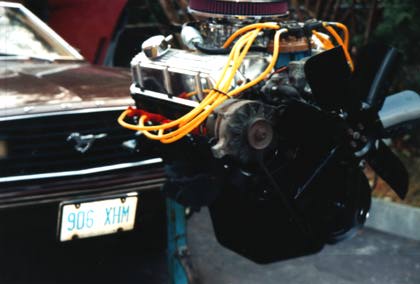
Alternator
Then winter came! As many may have heard, we in Ottawa, Canada
had the worst ice storm in a hundred years. This is what my baby looked
like when it ended. an inch thick of ice and a tree stuck to it.
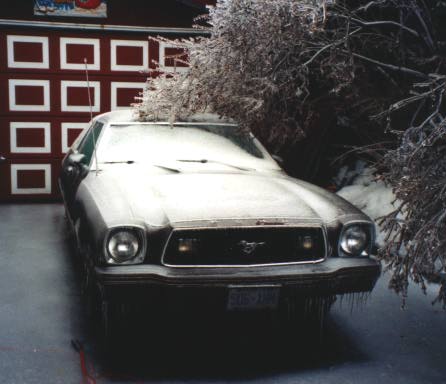
Ice Storm '98
Ah! Spring at last. This was the first warm day of spring.
There was still ice on the driveway. This is how she looked when
I pulled her out of the garage.
Spring
Then while in a hurry. I unbolted the oil pan, thinking I could just
replace it with the new one I bought. Then I tried to put on the
starter. No such luck. In that process I got dirt in the starter and it
seized later. I couldn't have found out now. It would have been too
easy to replace. On close up, you can see the new internal parts.

Oil Pan
Homepage
Part I: The Stripdown
Part III: The engine in
Part IV: The road to completion
Part V: Summary of the Changes
Part VI: Links