1953 Corvette Gasser
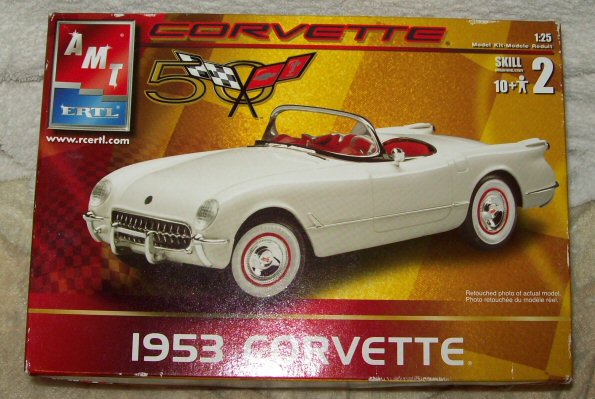
This is the model I started building for the Corvette Gasser build on one of the forums I belong to. I was originally going to rebuild an old built up 1984 Corvette Coupe for it, but the model looked like it was a practice car for a monster truck when I dug the it out of the box it had been stored in.
Unfortunately I didn't get the chance to finish it within the timeline for the forum build.
This
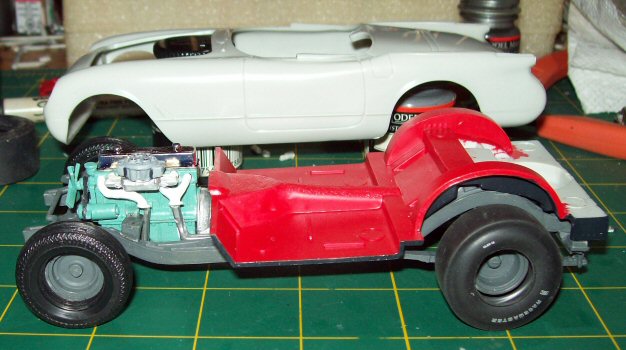
one is going to be a little different than the usual gassers you see
being built. I'm not going to be running a V8 in it! I'm also not going
to be running a straight axle under it like most gassers were running.
A few of the race cars that ran in the Gas Class used the stock front
suspension, and this is the look I am going for.
What I am trying to do with this model is make a veteran of the 60's gasser wars that has been mildly updated to stay legal with the Drag Racing sanctioning bodies.
These are my personal findings with this particular kit only and may not represent any other kit due to variances in the manufacturing process and updates made by the manufacturer during the life of the kit.
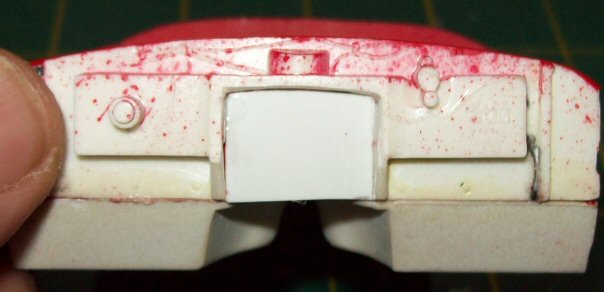
1. Don't even think about painting the body parts before assembly. The front and rear valance DO NOT FIT CORRECTLY and will need to be fit to the body once they are glued on! I have heard this complaint from several individuals about this kit.
2. The engine mounts are difficult to locate the proper position on the frame and the instructions aren't much help in locating them. Set the engine in place with the drive shaft connected to the rear end to find the correct placement of the engine mounts on the frame.
3. Once the engine is properly placed, the interior hit the transmission tail shaft. I cut the tail shaft down since the frame and interior covers it. Now the interior fits correctly and doesn't hold the body up.

4. The firewall needed recessed due to the custom valve cover I used. If I had used the stock,low profile valve cover, everything would have fit correctly. It was easier for me to just cut everything out and make a boxed in section than to try and modify a small section. The car is a drag car, so factory appearance isn't as critical with this build.
5. If you use larger rear tires than what is supplied in the kit, the rear wheel wells will need to be radiused. If you don't do this, you will need to extend the spring risers supplied in the kit or the body will physically hit the tires and cause fitment issues.
6. Plan on doing some seam filling and mold line removal in some tight areas. The separate tail light fins that need to be glued on and molded in are one area that will require careful sanding to keep the details crisp.
What I am trying to do with this model is make a veteran of the 60's gasser wars that has been mildly updated to stay legal with the Drag Racing sanctioning bodies.
General Data:
These are my personal findings with this particular kit only and may not represent any other kit due to variances in the manufacturing process and updates made by the manufacturer during the life of the kit.
1. Don't even think about painting the body parts before assembly. The front and rear valance DO NOT FIT CORRECTLY and will need to be fit to the body once they are glued on! I have heard this complaint from several individuals about this kit.
2. The engine mounts are difficult to locate the proper position on the frame and the instructions aren't much help in locating them. Set the engine in place with the drive shaft connected to the rear end to find the correct placement of the engine mounts on the frame.
3. Once the engine is properly placed, the interior hit the transmission tail shaft. I cut the tail shaft down since the frame and interior covers it. Now the interior fits correctly and doesn't hold the body up.
4. The firewall needed recessed due to the custom valve cover I used. If I had used the stock,low profile valve cover, everything would have fit correctly. It was easier for me to just cut everything out and make a boxed in section than to try and modify a small section. The car is a drag car, so factory appearance isn't as critical with this build.
5. If you use larger rear tires than what is supplied in the kit, the rear wheel wells will need to be radiused. If you don't do this, you will need to extend the spring risers supplied in the kit or the body will physically hit the tires and cause fitment issues.
6. Plan on doing some seam filling and mold line removal in some tight areas. The separate tail light fins that need to be glued on and molded in are one area that will require careful sanding to keep the details crisp.