In this lesson you continue to work with Alias' Advanced Surfacing Tools. From a series of provided character line curves, you can construct some of the surfaces of a child's toy truck using the Square, Birail, Swept, and Round surface tools. In particular, Square, Birail and Round let you construct surfaces that maintain continuity with adjacent surfaces. As well, you are introduced to the Stage Editor, which helps you manage the different parts of your model.
From the File menu, select Open. In the File lister, click on Show List, then double-click on the wire file L29_TruckCurves from the CourseWare project.
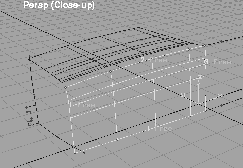
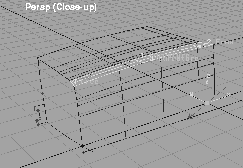
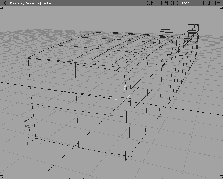
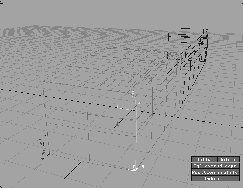
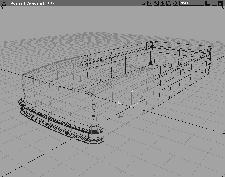
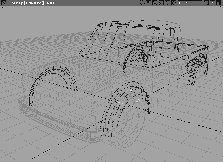
The retrieved curves form the basic curves of the major body panels. These curves are known as character lines or profile curves because they define the character of the final surfaces you are modeling. Try picking one or two of the curves and notice that they form the boundaries of more than one four-sided region.
Notice that in most cases, where curves meet, they intersect each other exactly. It is these intersections that define the limits of the regions in which you build surfaces. The use of full-length character lines and the need for exact intersections are the crucial differences between modeling with the basic tools and with the Advanced Surface Tools.
Note that the curves comprise one half of the truck. This is done deliberately to take advantage of the symmetry of the form. You should try to take advantage of this type of symmetry whenever possible in your work, as it saves time and lets you concentrate on the minimum amount of geometry.
In general, the best way to get curves that intersect is to impose the intersection when you construct the initial curves. You may use the magnet snap, grid snap or curve snap functions to achieve this. As well, you may wish to ensure that key curves are tangent to their intersecting neighbors if continuity has to be maintained further along in the project. For these conditions to be met you may possibly use the Project tangent, Align or Curve Editor tools to attain these conditions. In Lesson 30, you'll create intersecting curves using curve snapping and the Project tangent function. The focus of this lesson is on creating surfaces.
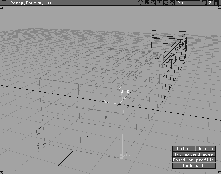
First, you build the hood of the truck using a Birail surface.
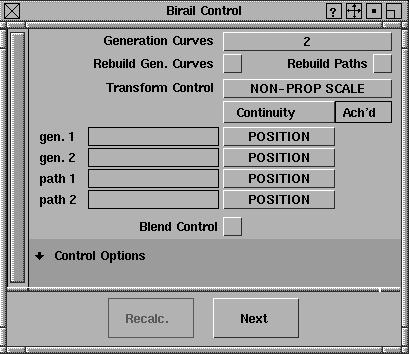
 Select Surfaces
  Swept surfaces Birail-
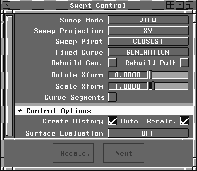
 and set the number of
 Generation Curves to 2. Click off Rebuild Paths and Rebuild Gen. Curves. Set the Transform Control to NON-PROP SCALE. All other options, except for the ones found under Control Options, should be turned off.
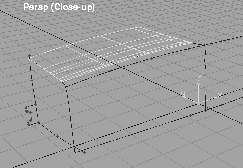
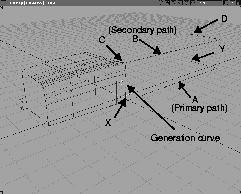
With Generation Curves set to 2, you are blending between the two curves at the windshield and grill, running them along the two curves (the path curves) down the side of the hood. The path curves will not be rebuilt but will be used exactly as they have been provided.
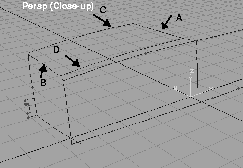
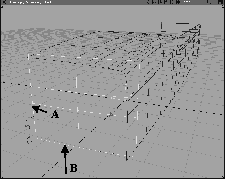
Select generation curve. First, click on the curve at the windshield, marked A in the figure below, followed by the second generation curve at the grill, marked B.
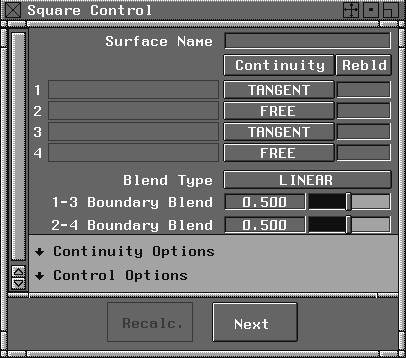
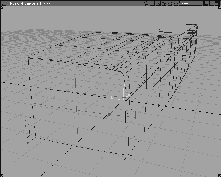
Birail Control window.
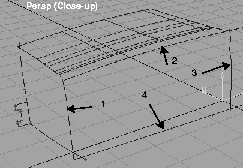
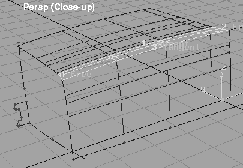
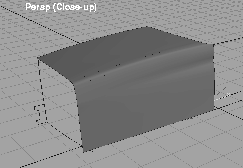
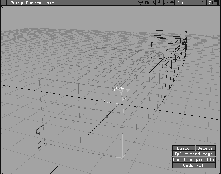
Now you can build the surface that forms the fender using the Square surface tool. In the first surface, you used Birail to create a surface blend between the two generation curves, using the path curves as guides. In the case of a square surface, the blend occurs between opposing sides for all four sides. For this use of Square, each curve has an equal influence on the development of the final surface. Each of these functions produces a different form, and you have control over what shape you want to produce.
 Select Surfaces Boundary surfaces Square.
Note: Although 3 of the four boundaries extend beyond the square region, the surface is only built in the defined area. Also note that each boundary is labeled free, indicating that no continuity constraints were placed on it. |
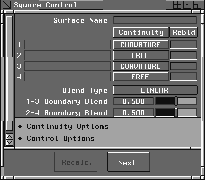
Next, you build the surface that links the hood to the fender. This is a four-sided region, and you again use square surface. You must, however, ensure that this new surface is continuous with the hood and the fender, otherwise, the blend between the surfaces won't be smooth and continuous. In this example, some of the continuity options in the square tools are used to ensure that the created surface is curvature continuous with its neighbors.
 Select Surfaces Boundary surfaces Square- to open the
 Square Control window.
Next. The tool de-selects the previous surface and prepares itself for our new square surface.
Continuity Control options, change the options from FREE to TANGENT for boundary edges 1 and 3 only.
| Note: This may take a few moments, as the system calculates tangent continuity with edges 1 and 3. Note again, that the surface is labeled on each boundary with the continuity type that was asked for. |
Square Control window.
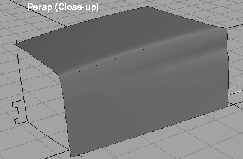
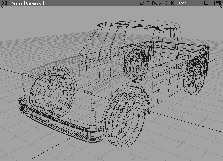
Nothing. From the Render menu, select Quick render. Notice that the blend between all three surfaces is smooth.
As with many of the surfacing tools found within Alias, Square has Construction History. Construction History allows the surfaces to remember the relationships that were established from the original construction curves as well as any options that may have been set for the tool. This provides a wealth of flexibility to the Alias user in that they can modify the underlying curves and have the surfaces automatically update. In this section you take advantage of the construction history inherent in the Square tool to make adjustments to the continuity along the transitional surface that was constructed in the previous section.
 Select Pick Object and click on the hood/fender transitional surface.
 Select Surfaces Boundary surfaces Square-.
Note: The Square Control window is displaying information about the active square surface. The window lists the four curves or surfaces that comprise the boundaries of the square surface, as well as the type of continuity that you imposed earlier along those four boundaries. Construction History retains this information and lets you change it if needed. |
TANGENT to CURVATURE. You do not need to make any continuity changes along boundaries 2 and 4 as there are no surfaces along those boundaries to be continuous with. (It may take a moment for the surface to update this change in continuity.)
 Close the
 Square Control window and select Pick Nothing.
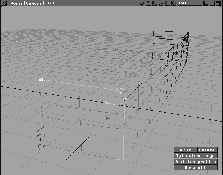
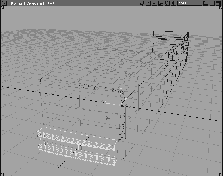
Now you build the rear portion of the truck. Because this surface remains constant along its entire length, it can be constructed using one cross section. As a result, there is only one generation curve for this surface, and that is the vertical edge of the fender surface. You want to drive this section along the two paths that define the form of the rear of the truck.
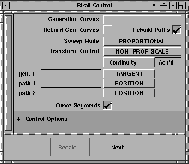
 Select Surfaces Swept surfaces Birail- and set the
 Generation Curves to 1 (there is only one generation curve). Click off Rebuild Gen. Curves and click on Rebuild Paths. Set the Sweep Mode to PROPORTIONAL, the Transform Control to NON-PROP SCALE and the gen.1 Continuity to TANGENT. Set the Curve Segments to ON, as indicated by a check mark. These settings make sure that the resulting surface is tangent continuous with the fender.
Since the two path curves extend the full length of the truck, you only need the section from the fender to the rear. The Curve Segments option lets you choose to use only that segment.
The resulting surface smoothly blends into the fender and forms round to the rear of the truck.
 Close the
 Birail Control window and Select Pick Nothing.
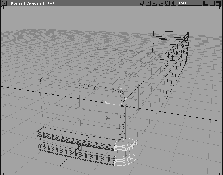
The next surface to build is the front end of the truck. For this, you use the Swept surface tool and the Round surface tool.
Swept is similar to the Extrude tool, except that it provides much more control over the sweep method and resultant surface orientation. There are two curves defining the shape of the front end of the truck. The vertical curve is swept along the horizontal curve to build the surface.
In the end, the resultant surface is too large, requiring you to trim it back. You will use the Round surface tool to produce a variable radius or "rolling ball" fillet along the surface edges.
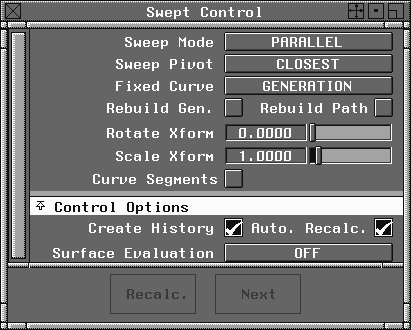
 Select Surfaces Swept surfaces Swept- and set
 Sweep Mode to PARALLEL, the Sweep Pivot to CLOSEST, and the Fixed Curve to GENERATION. All other options except for the ones found under Control options, should be set to OFF.
Swept Control window.
Next, you need to intersect and trim the swept surface with the three other surfaces. This lets you trim back all of the surfaces to their intersection points. You do this by first intersecting the swept surface with the 3 other intersecting surfaces. This places curves on surface geometry on all surfaces, which subsequently lets you trim back all four surfaces to their intersection points.
 If the swept surface is not active, select it using Pick Object.
 Select Surface Edit CreateCurves OnSurface Intersect-, and ensure that the
 Create Curves on Surface option is set to create curves On Both Surfaces. This ensures that all four surfaces can be trimmed back after the intersect operation. Click Go.
With the curves on surface geometry placed on the four surfaces, as a result of the intersection, you can trim each surface back, in turn, to its intersection points.
 Select Surface Edit Trim Trim. Alias prompts you to
 Select a target surface to trim.
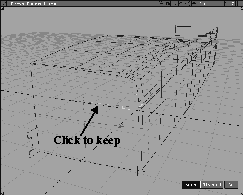
Select the REGIONS of the surface to KEEP, the discard button to switch.
Keep/Discard button is set to KEEP, select Go. This trims the front end swept surface back to where the curves on surface were created.
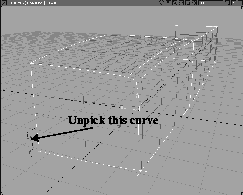
 Select Pick Component - . Make sure that only the
 Curve component item is checked on. Click Go.
Yes to delete the construction history.
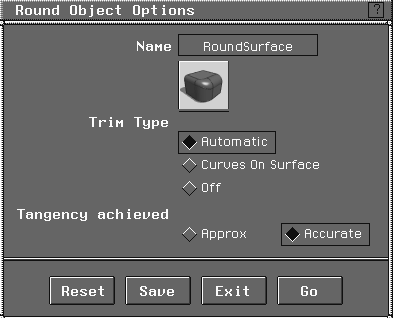
To finish the front end surface of the truck, the Round surface tool is used to construct a variable radius fillet between the front end surface and the three other surfaces.
 Select Surfaces Fillet surfaces Round-, and ensure that the
 Trim Type is set to AUTOMATIC, and that the Tangency Achieved is set to ACCURATE.
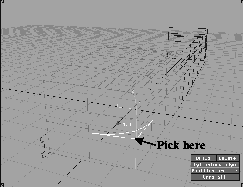
Select a pair of surface edges. Pick the edges that are shared between the front surface of the truck and the front side surface (the front fender). A radius locator is displayed at the picked location.
0.15, and note that the locator shrinks to reflect the new size.
Position Profile button and entering a value of 0. The round should move to the bottom of the edge. If it doesn't, enter 1. (You need to enter 0 or 1 depending on whether you selected the Square construction curves in a clockwise or counter-clockwise direction.) The round should now be at the bottom of the edge.
Since you want to vary the radius along this edge, you need to enter a second value for the opposite edge of the surface.
0.05.
Position Profile button and enter either 0 or 1 to position the profile at the upper end of the surface, as shown below.
0.05 and click the Position Profile button. Enter 1 to place the profile at the right end of the edge line. If it appears at the left end, enter 0.
0.04. Click the Position profile button and enter 0 (or 1) to place the profile at the left end of the line.
0.04 and click the Position Profile button.
1 to place the profile at the right end of the edge line.
0.1.
0 to place the profile at the left end of the edge line.
Build button. It may take a little while for the round tool to construct the surfaces, because it is constructing fillets, curve on surface geometry, and finally trimming the resultant surfaces back.
To build the bumper, you once again use a Swept surface. This time, however, you ensure that the bumper cross section follows the curve of the truck front around to the fender.
 Select Surfaces Swept surfaces Swept- and change the
 Sweep Mode to VIEW, the Sweep Projection to XY, the Sweep Pivot to CLOSEST, and the Fixed Curve to GENERATION. All other options (except for the ones found under Control options) should be turned off.
Tip: The View Sweep Mode is set in order to maintain the angular relationship that exists between the GENERATION CURVE and the PATH CURVE, as seen from the Sweep Projection view. In this example, if you look in the XY view (the top window), there is a 90 degree angle between the bumper cross section and the curve at the base of the grill. This angle is maintained throughout the surface as you sweep the section along the base of the grill. |
Note how the vertical isoparms in the resulting surface are at 90 degrees to the grill.
Swept Control window.
 With Nothing picked, select Pick Component. Make sure only the Curve component icon is switched on.
 Select Pick Object and click-drag a pick-box around the whole model.
. In the option box, click
Select Pick Object and click-drag a pick-box around the whole model.
. In the option box, click Reset, then enter a Y scale factor of -1.
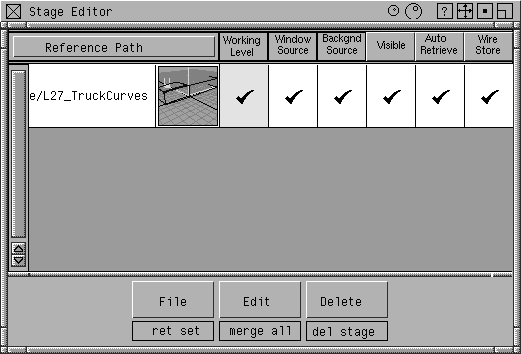
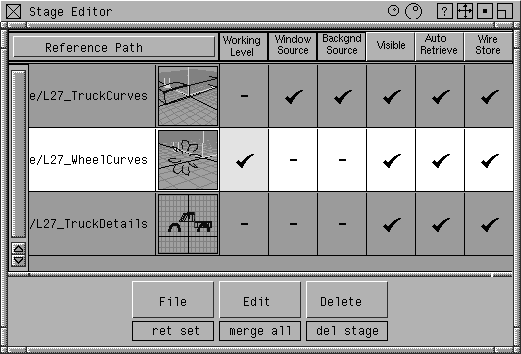
Stages provide you with a useful tool for organizing and economizing work flow during the development of a project. Stages let you retrieve several wire files into one working session, yet deal with them in discrete layers. This helps you work interactively as if no more than one of the files were loaded at a time. Geometry can be worked with separately in each layer or merged later into one layer.
Stages... to open the Stage Editor. At the moment, the Reference Path of the curves file is shown along with the file's icon. The Working Level, Visibility, Window Source, and Background Source are all turned on, letting us view the whole model.
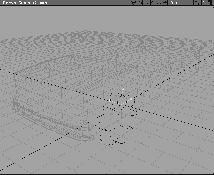
From the File Browser, select L29_WheelCurves and click Retrieve New Stage.
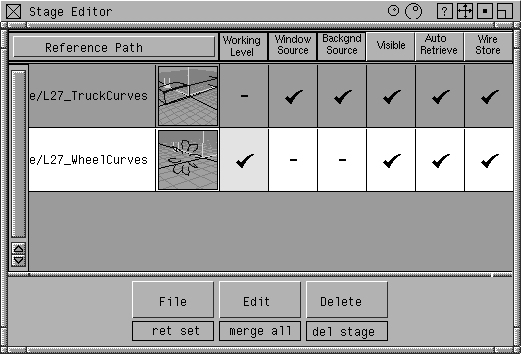
The file enters the scene, and the Stage Editor automatically templates the truck surfaces. You are left with only the wheel curves. The Stage Editor shows the new Stage as the working level.
Stage Editor window, you now have a new stage created with the same name as the retrieved file.
The retrieved curves are clearly viewed; however, the truck body created earlier, which belongs to another stage, is light green. You can still see it and work around it, but you cannot directly work on it, since it is templated.
 Select Surfaces Skin-. Change the
 Topology to CLOSED and click Go.
Shift key as you pick the remaining curves of the wheel. As the curves are selected, the skin surface is constructed.
 Next, select Pick Object and click-drag a pick-box around the new wheel. The new surface is unpicked and the curves are now picked.
Stage Editor, select Open Stage.
In the File lister, double-click on the file L29_TruckDetails to retrieve it. The remainder of the truck is retrieved into a new active stage.
Stage Editor, click the Working level box, next to L29_WheelCurves, and notice that you can go back to this level to continue working.
 Select Pick Object, and click the wheel.
. Click
Select Pick Object, and click the wheel.
. Click Reset, then enter an X translation value of 7.7.
 Select Pick Object, and click on the first wheel so that both wheels are picked.
. Click on
Select Pick Object, and click on the first wheel so that both wheels are picked.
. Click on Reset and enter a Y Scale of -1.
to mirror copy the wheels.
Stage Editor menu, select Edit Merge all. Notice that now all surfaces are visible and editable in one stage.
| Note: If you are not ready to lose the stages from your work, you can also save the stage set and it will automatically load all the referenced stages. |
Stage Editor window.
This completes the modeling exercise for the Toy Truck. If you have completed all of the steps you should be well versed with some of the most powerful 3D modeling tools available. In this lesson, you have learned how to: