The purpose of this lesson is to learn how to texture polygon models. You learn how to add texture to a game character using a variety of methods and you also assign textures to parts of the polyset. At the end of the lesson, you prelight the model to prepare color per vertex information for a video game environment. You can also export the finished model to VRML.
This tutorial is beneficial to gamers, VRML producers, and people who want to texture imported polygonal geometry.
The lesson begins by opening an existing file so that you can concentrate on the mapping.
From the File menu, select Open. From the File lister, select the file named L27_polydwarf. Click Open.
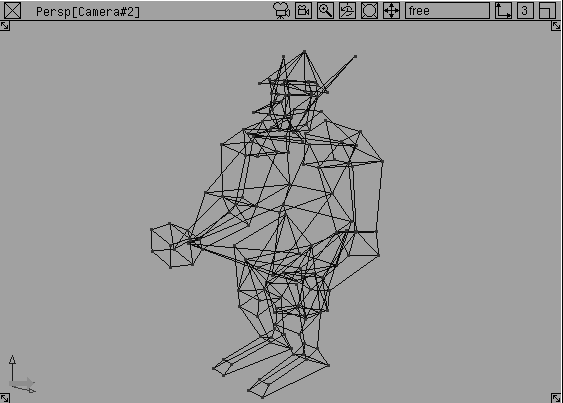
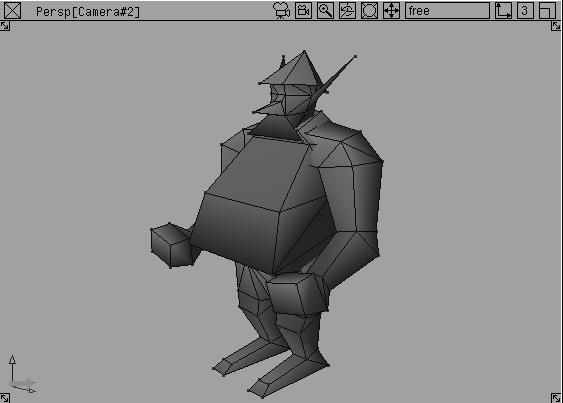
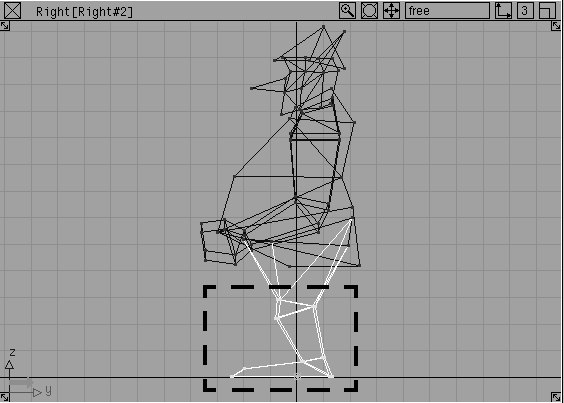
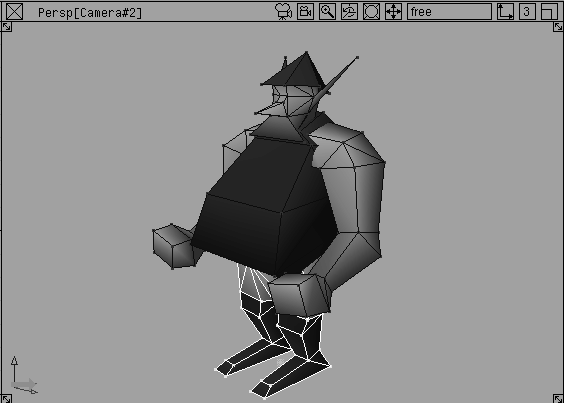
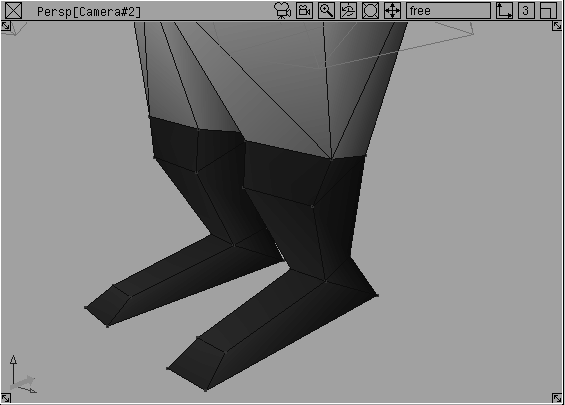
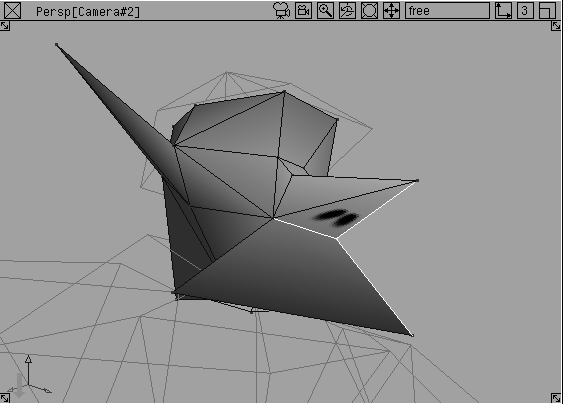
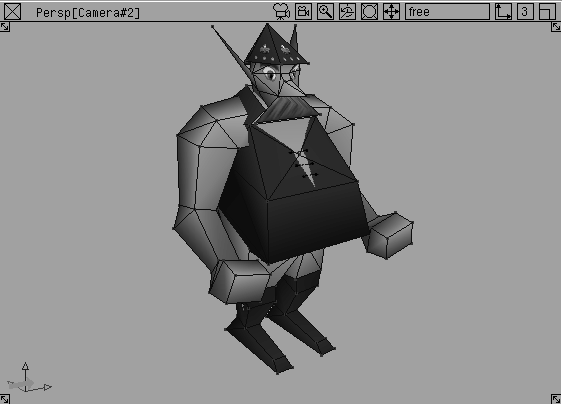
A model of a polygonal dwarf opens. The dwarf is built in seven pieces. The model consists of two arms, two legs, a body, head, and helmet.
The Shade mode lets you tumble and dolly the camera and move the shaded geometry. It works very well for setting up polygon textures because you can always see the shader applied to a specific polygon. It also makes selecting polygons easier because you only see the polygons on the surface facing you.
 . Set
. Set Windows to Current. This will shade only the current window. Turn Fast Options off. This option shows us the proper lighting and ensures that you can view textures later. Turn Interruptible off. This option sets the shade mode to prevent switching to wire frame mode while tumbling.
A polyset is the equivalent of a NURBS surface. You can shade polysets in the same way you shade NURBS surfaces.
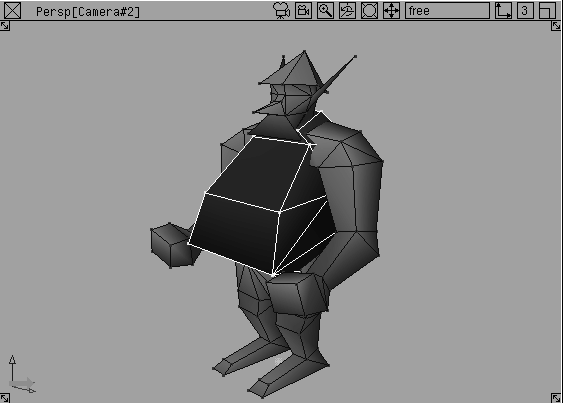
 Select Pick
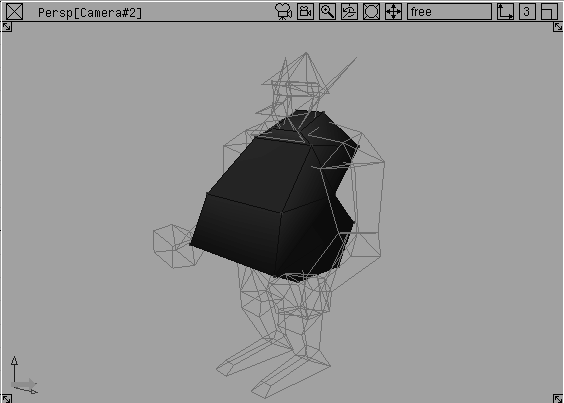
  Object. Click on the polyset that represents the body to make it active.
Shaders....
Object. Click on the polyset that represents the body to make it active.
Shaders....
At this point in the lesson, all the complete polysets have been assigned shaders. You can also assign shaders to individual polygons within a larger polyset.
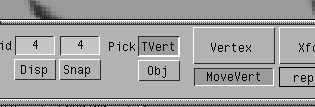
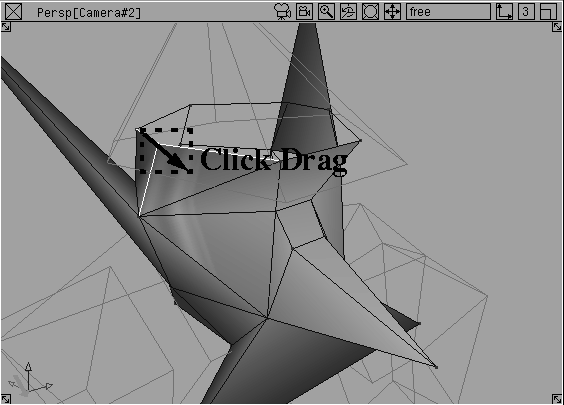
 Select Polygon Edit Pick Vertex. In the Right window, click-drag a pick box using the middle mouse button to pick the vertices that define the boots.
| Note: You can pick a polygon by picking all of the vertices belonging to a polygon. If you miss one of the vertices, the polygon remains unselected and you can't assign it a shader. |
boots to make it active. From the Multi-lister's Shading menu select Assign Shader.
The model updates in the window and the boots are now colored brown. The leg polysets now have two shaders assigned.
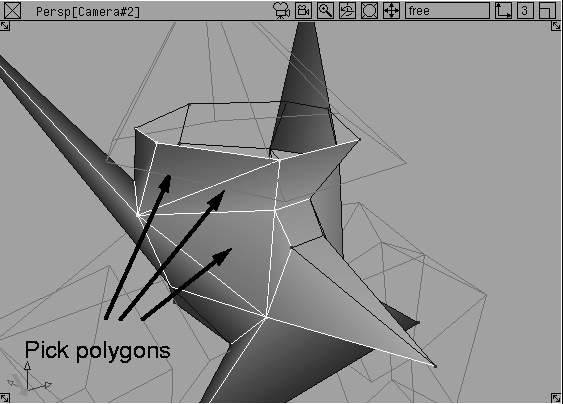
In the previous step, you picked a series of polygons by selecting surrounding vertices. You can also pick polygons by holding the Shift key and clicking on the polygon.
To make this task easier, you should template some geometry. Templating geometry lets you reference the geometry on your polyset.
 Select Pick Object. Pick all pieces of geometry except for the body.
 Select Polygon Edit Pick Vertex. Press the
 Shift key. Click on the square polygon that is the base of the neck. While still holding the Shift key, click on the polygon right below it (the one which connects to the chest).
skin shader to make it active.
 Select Pick Object. Click on the dwarf's body.
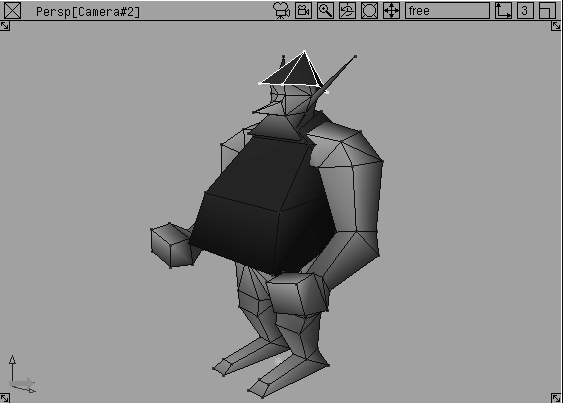
 Select Pick Template. Click on the dwarf's head.
Assigning shaders to polygons works very well but you can achieve greater detail by using a texture map. Polygons, by default, do not have UV surface definition like NURBS surfaces; therefore the maps won't fit onto the surface in a logical way. The standard for polygon mapping is ST. By using a projection map you can map a polygon like you would map a NURBS surface.
You will use a projection map to map a logo on the dwarf's boots.
 Select Pick Object. Click on the dwarf's head.
 Select Pick Template. Click on the legs.
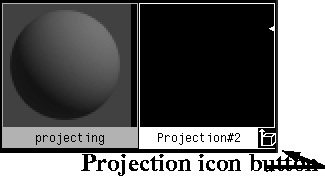
New Shader. Rename it Projecting. This shader is going to be used to set up the UV coordinates on the boot polygons.
Select Pick Template. Click on the legs.
New Shader. Rename it Projecting. This shader is going to be used to set up the UV coordinates on the boot polygons.
Shader editor. Click on the Map... button next to Color. The texture library window will open.
| Note: It is not necessary to use an actual texture file to complete these steps. |
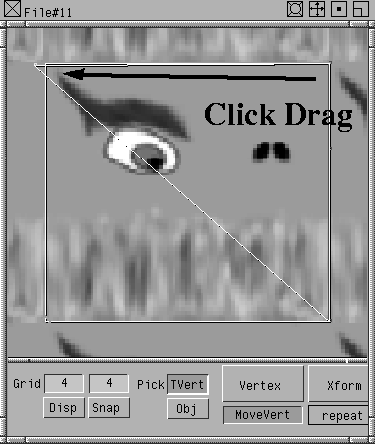
Projection Texture editor, under 3D Placement, set Wrap to OFF. Turning Wrap off isolates the texture on the upper portion of the boot rather than repeating or tiling it.
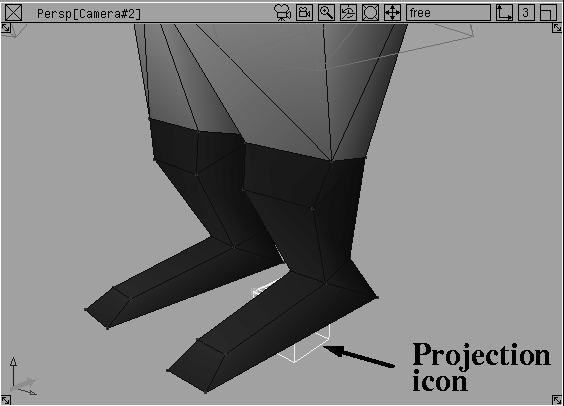
 Select Pick Object and pick the projection icon in the Perspective window. The icon becomes bright yellow to indicate that it is selected.
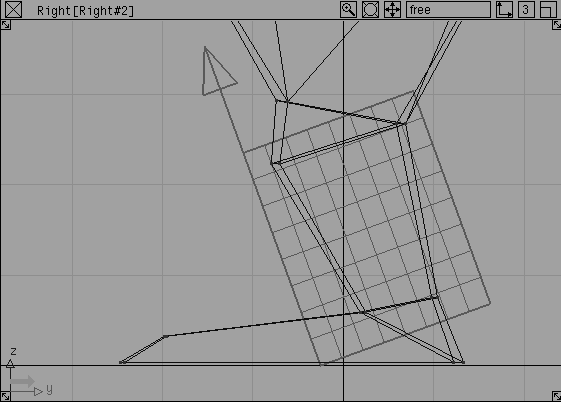
 Select Xform Rotate. Enter
 90 -20 90. You have rotated the icon so that it projects from left to right from the side of the dwarf.
 Select Xform Move. Enter
 2.5 -0.25 0 at the prompt line. This will move the icon to the top of the boot.
 Select Xform Nonp scale. Enter
 2 2.5 5 at the prompt line. This scales the icon to include both boots' side polygons.
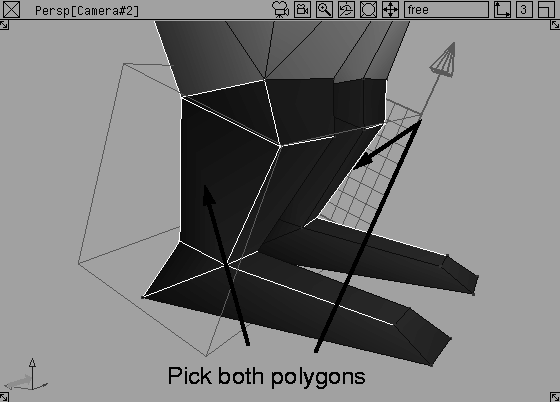
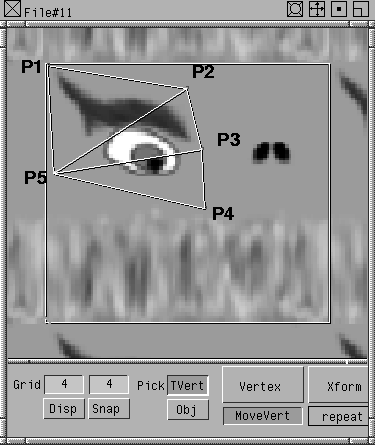
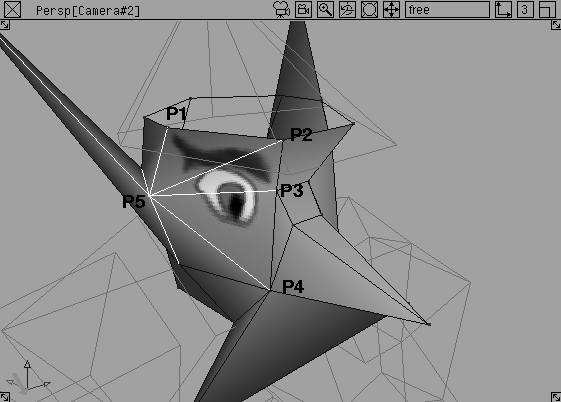
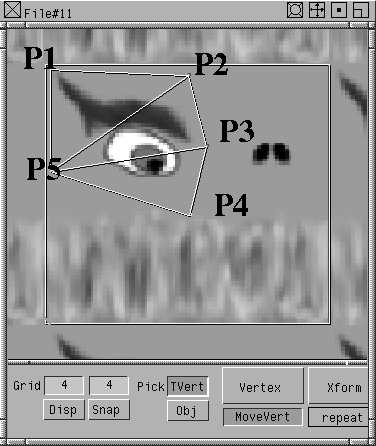
You must include the vertices of the boot polygons to ensure that they receive mapping coordinates. Anything outside the placement cube will not get mapping coordinates.
 Select Polygon Edit Pick Vertex. Press the
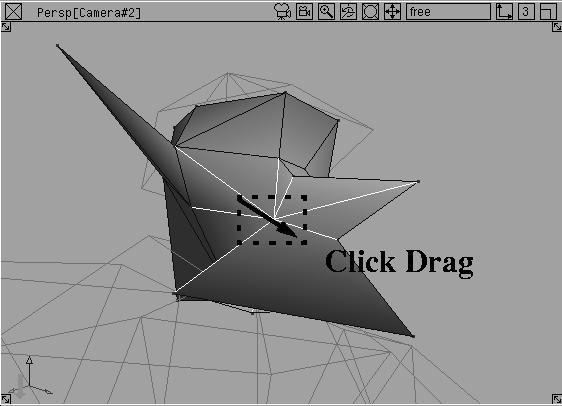
 Shift key and select the polygons that define the outer sides of the boots. You will need to tumble the view to pick both polygons.
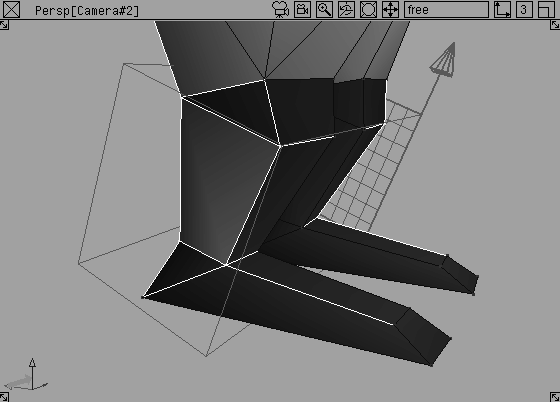
You are applying this shader so that you can edit the mapping of the two polygons.
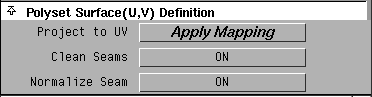
Projection Texture editor, go to the Polyset Surface (U,V) Definition section and turn Clean Seams to ON and Normalize Seam to ON.
Project to UV. This option makes polygons behave like NURBS surfaces. Projection mapping effects the UV setup of the polygon.
boots shader. From the Multi-lister's Edit menu, select Copy.
boots_logo.
Shader Editor, click on the Map button next to Color, then choose Surface File from the Texture window.
Browse button next to Image. In the File lister, choose the texture called L27_boots, located in the pix directory.
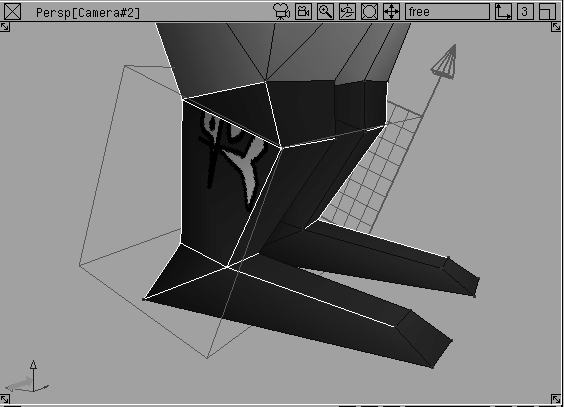
boots_logo shader active, go to the Multi-lister's Shading menu and select Assign Shader. You will see the logo placed on the boot polygons.
Note: If the textures do not appear, make sure that Fast Options is turned off in the Shade options under the DisplayTgls menu. |
Now that the polygons have a UV type of mapping, you can adjust the shader's mapping parameters.
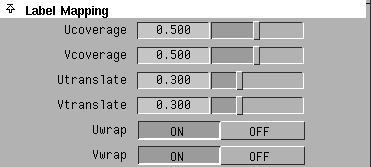
L27_boots file texture icon to open its editor. Under Label Mapping, change U and V coverage to 0.5 and U and V translate to 0.3.
The texture is updated in the shaded Perspective window. If required, change these values to position the texture.
The map behaves as if it were applied to a NURBS surface.
Blur section and turn the Blurmult to 0. Next, go to the File Texture Parameters section and choose Off from the Filter menu.
With the Filter option on, you may get a misleading perception of the final output in a VRML or game box scenario. If you plan to render this model in Alias instead of exporting to a gaming environment, you can leave these features on.
When texturing for a gaming environment, one of the ultimate goals is to make sure that the number and size of your textures stays small. One way of accomplishing this goal is to create decal textures where a few elements can be applied on different parts of the model.
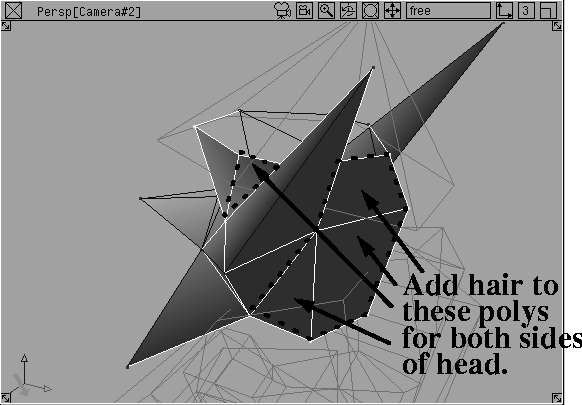
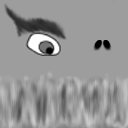
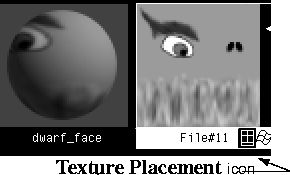
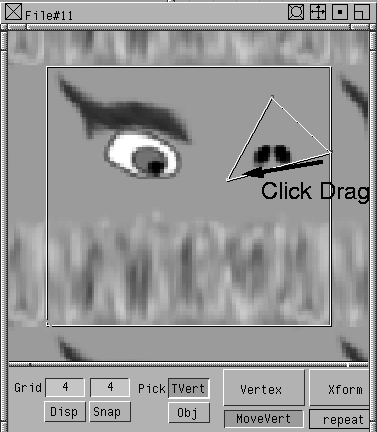
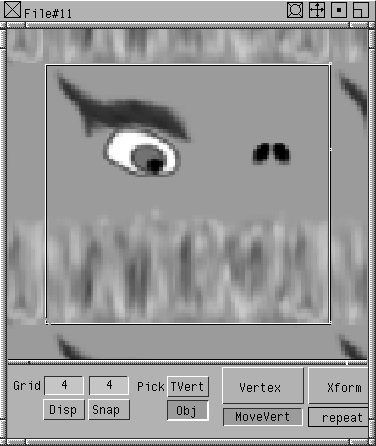
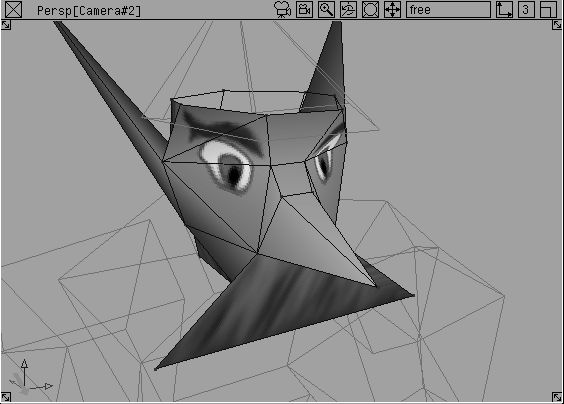
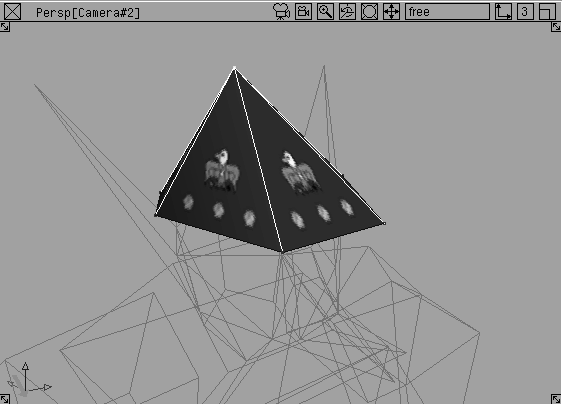
For the dwarf's face, you will use a decal texture to map the eyes, nostrils, and moustache. As you can see, the texture shows only one eye, the nostrils and the hair. You need to apply this texture to various pieces on the dwarf's head then set the UV mapping by hand to ensure that the texture is used efficiently.
Another solution for mapping polygons is the Texture Placement Window. This window lets you look at your polygons roadkill-style. That is, the texture is flat and the polygon vertices are laid flat on the texture so that you can pull and stretch to line up your textures.
The Texture Placement Window applies most to specialized applications where a low polygon count is essential.
You will also use what is called a decal sheet. A decal sheet is a conglomeration of textures. By putting a number of images together into one image texture, memory requirements can be reduced (this is of greatest concern to low poly count applications - someone texturing a high poly count model should not worry about decal sheets).
Object and pick the legs.
Template. Click on the head.
dwarf_face.
Shader editor, click on the Map button next to Color, then choose Surface File from the Texture window.
Browse button next to Image. In the File lister, choose the texture called L27_face_decal, located in the pix directory. This texture is the decal texture.
 From Polygon Edit, select Pick Vertex. Press the
 Shift key and click on the polygon that makes up the underside of the nose.
dwarf_face shader to make it active. From the Multi-lister's Shading menu select Assign Shader. The model updates in the window but there appears to be no change to the nose texture. To fix this, you need to update the texture placement.
File Texture, select the Texture Placement Window icon at the bottom right corner. It looks like a square grid.
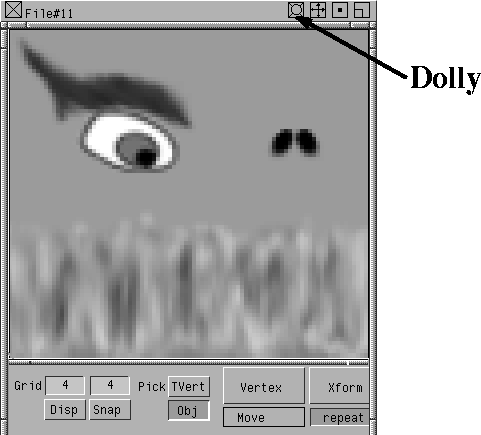
Texture Placement Window to dolly out and view the edge of the texture.
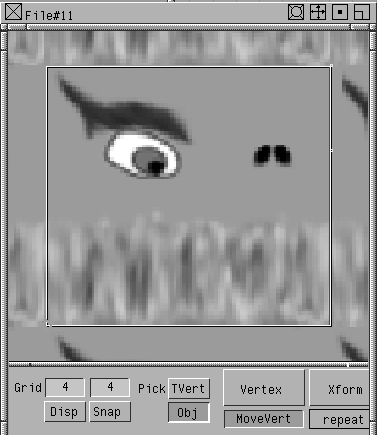
You will see a white border around the texture and two yellow dots in the top right. The yellow dots represent the vertices of the selected polygon. This can be confusing, because the nose polygon has three vertices, yet only two are displayed. However, since the UV mapping of the texture has not been set, two of the vertices overlap.
Texture Placement Window's Vertex menu, select Move. Click on the vertex in the top right. Drag the vertex within the texture window, until it lies just above the two nostrils.
By moving the vertices around in the texture window, you are choosing the part of the decal texture that you want to apply to the nose.
| Note: The selected vertex will be the only active vertex in the texture window and the modeling windows. In this case, it should be the vertex at the tip of the nose. |
Vertices can be separated by switching the pick mode of the Texture Placement Window from TVert to Obj and switching back and forth from the texture window to the modeling window.
Texture Placement Window, click on the other vertex. In the modeling windows, you can see that both vertices at the base of the nose are active. These are the overlapping vertices.
Pick mode. You can now pick vertices through the modeling windows.
| Note: By using the middle mouse button to replace the old selection, you are using standard pick options with polygons. The left button toggles geometry from active to inactive while the right button removes the chosen elements from the pick list. |
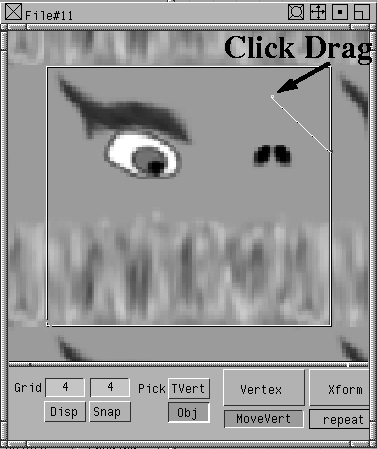
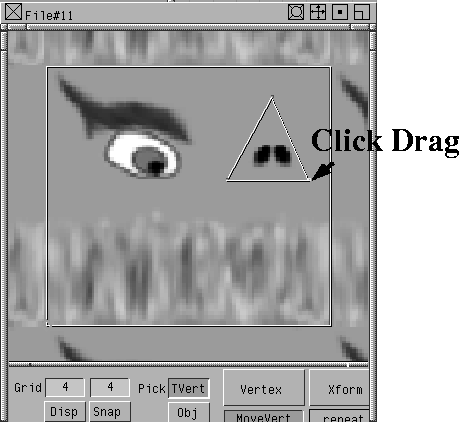
Texture Placement Window, drag the selected vertex to the left side of the nostrils.
The nose texture is starting to appear on the nose polygon in the perspective window.
Texture Placement Window, drag the third vertex to the right side of the nostrils.
| Note: To separate the third vertex from the second vertex, click-drag anywhere in the window. |
Adjust the other vertices as needed to map the nostrils properly.The nostrils should now be properly mapped onto the bottom of the nose.
You have used one portion of the decal sheet to texture this particular polygon.
Keep the Texture Placement Window and the Multi-lister open so that you can texture the eyes.
To map the eyes of the dwarf, you can use the same decal texture. Since the detail on the eyes need to be placed on multiple polygons, you will repeat the steps used to texture the nose in a more complex situation.
 Select Pick Nothing.
 From Polygon Edit, select Pick Vertex. Press the
 Shift key and click on the three polygons that make up the right side of the dwarf's face.
dwarf_face shader to make it active. From the Multi-lister's Shading menu, select Assign Shader. These polygons need to be updated in the texture placement.
Texture Placement Window, press the Obj button. This updates the selection to show the vertices of the newly selected polygons.
You can see the vertices on the right side of the texture. The vertices do not contain adequate UV information yet.
Texture Placement Window, drag the vertex to the left side of the eye.
Tip: If you can't see the selected vertex in the Texture Placement window, click-drag anywhere in the window. The selected vertex will become visible. |
Texture Placement Window.
You have used another portion of the decal sheet to texture the character's right eye.
Texture Placement Window to edit the mapping. You can use the same decal texture for both eyes.
| Note: By re-using the eye portion of the decal, you can use smaller textures with a larger amount of details. To make a texture map of the whole face, you would need either a larger texture or a texture map with less detail. The decal sheet method offers more control over texture size for important details. |
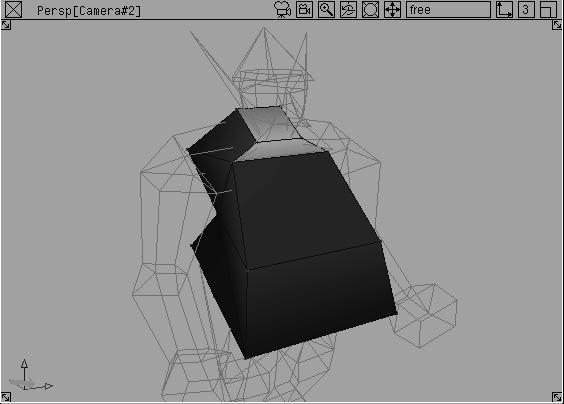
Now, you can add detail to the dwarf's chest. Using basic mapping techniques, you can apply a texture map to the chest polygon.
 Select Pick Object. Click on the dwarf's head.
 Select Pick Template. Click on the body polyset.
Vertex. Press the
Select Pick Template. Click on the body polyset.
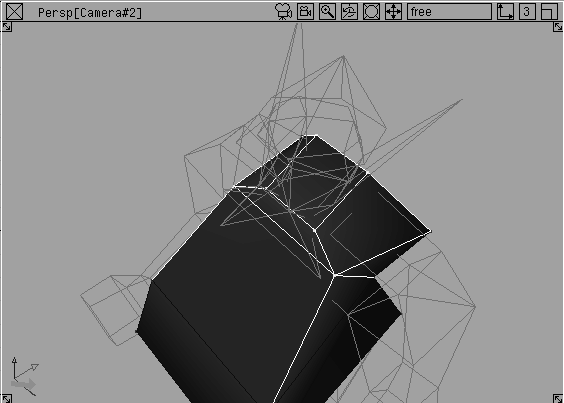
Vertex. Press the Shift key and click on the polygon that defines the dwarf's chest area.
shirt.
Shader editor, click on the Map button next to Color, then choose Surface File from the Texture window.
Browse button next to Image. In the File lister, choose the texture called L27_shirt, located in the pix directory.
shirt to make it active. From the Multi-lister's Shading menu select Assign Shader. The model updates in the window and the chest texture changes. The model needs to have its texture positioning updated.
L27_shirt file texture.
Note: You may need to close and open the Texture Placement Window to refresh its display. |
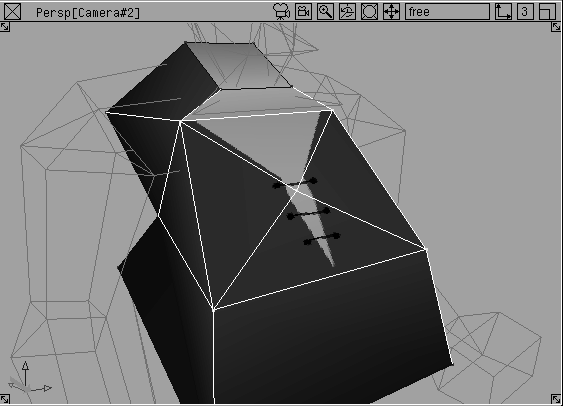
Something seems to be wrong! The texture appears skewed down the center. This needs to be fixed.
The texture on the dwarf's chest is skewed because quadrilateral polygons break into triangles when rendered. You can try to work around this obstacle using a couple of methods.
One option is to paint the texture to take advantage of the shearing of it. The other option is to add more polygons into the character. Changing the texture is more memory efficient for a game system while adding polygons is faster. For this example, you will add some polygons.
 Select Pick Nothing.
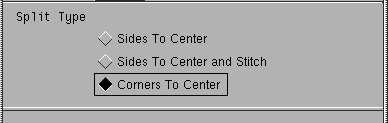
 Select Polygon Edit Split Polygon Split - . Set the
 Split Type to Corners To Center.
It is important to remember that polygon quadrilaterals render by splitting into triangles. This problem exists in most game rendering engines. It is a good idea to set up your model to work around the issue before exporting to your game environment.
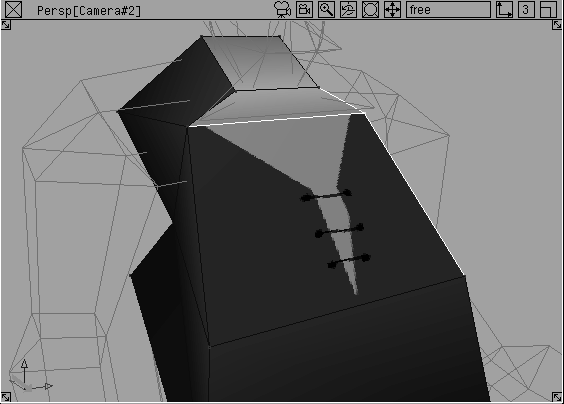
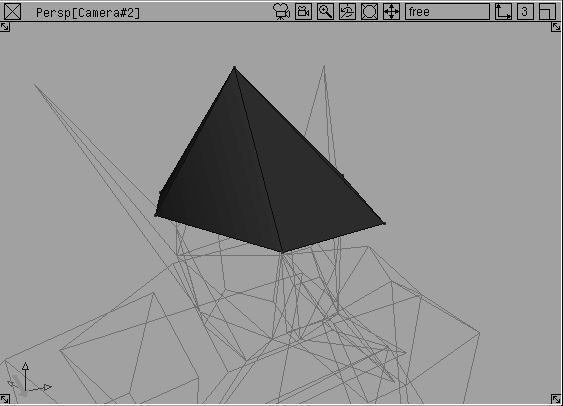
Force UV is a plug-in that maps multiple polygons simultaneously. In the case of the Dwarf's hat, you may want to set the UV mapping of all the facets so that a rivet texture can be applied.
| Note: Plug-ins are unsupported extra features that may help you solve a particular problem. Be sure to explore and use the many plug-ins available to you. |
force UV installed on Palette `Poly Shading'.
| Note: If a plug-in is not listed in the Plug-in Manager, you can use the Plug-in Browse button to look for it. You may also need to review the installation instructions for more information on installing and loading plug-ins. |
Note: When installing plug-ins you can check the installation by pressing the <> button at the left of the prompt line window. This will open the Promptline History window. |
 Select Pick Object and click on the body.
 Select Pick Template. Click on the hat.
Map button next to color, then choose Surface File from the Texture window.
Browse button next to Image. In the File lister, choose the texture called L27_hat_decal.
 Select Polygon Edit Pick Vertex. Make a pick box around the hat vertices to pick all the polygons.
 Select Poly Shading ForceUV. The options are not necessary in this case. The texture should map onto each polygon on the hat in the same way. The
 Force UV simply pushes the UV mapping to the corners of the texture. The result may need some editing.
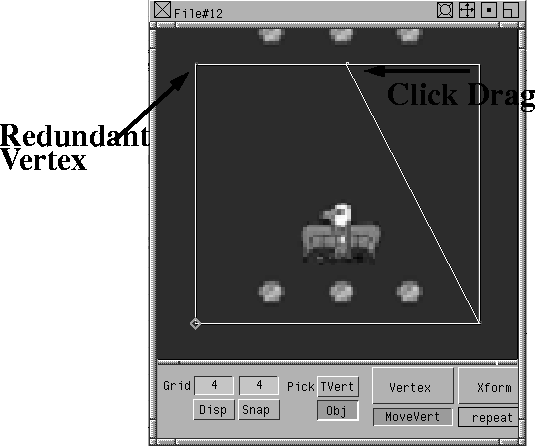
Texture Placement Window and move the vertices so that each surface of the hat polygon has the crest and the rivets.
Note: You should be seeing four vertices in the Texture Placement Window. Force UV works based on a UV mapping style which requires four points. One of the vertices will be redundant, so you can ignore it. |
 Select Pick Nothing then select Pick Template. Drag a selection box around all the geometry.
my_dwarf and click Save.
The dwarf has now been textured and is almost ready to output to a VRML file, or to a game environment.
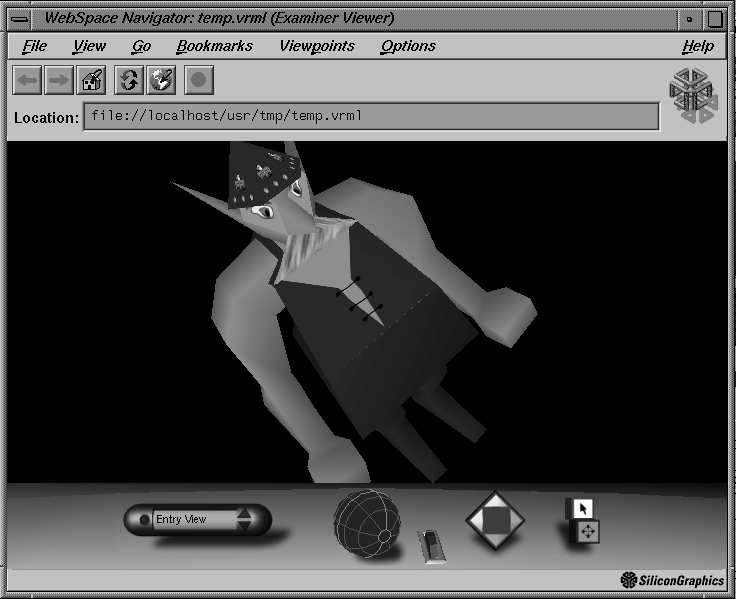
At this point you may want to export your work to the web. VRML output allows you to send polygonal models directly to WebSpace by going to the File menu and selecting Export VRML 2. Shown below is the textured dwarf imported into WebSpace.
In addition to the web, you may need to export your model to a game system. Before exporting, you may need to prelight your model. This gives the gaming environment important color per vertex information about the model. It also sets up a lighting condition that is baked into the model, thereby allowing the game system to not have to light the model interactively.
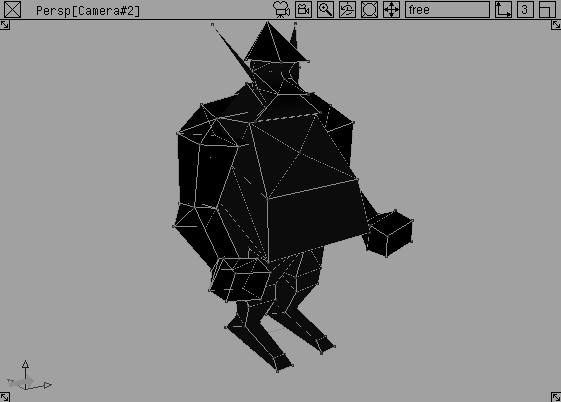
. In the Window Display Options section, set the Toggle Type to Current Window then turn Colored Display on. From the Display Style menu, select Filled.
The model is now displayed as filled polygons. The textures do not appear since only color per vertex information is shown.
The dwarf is now ready to export using one of the game export translators. The texturing information you have added in this lesson can give your polygon character life in a larger gaming environment.