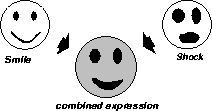
In Lesson 18, you used metamorphosis to animate a tumbler morphing into a wine glass. Using the Set key shape defaults, you were able to create this morph by animating positions of the CVs on the shape. ShapeShifter is a second Set key shape option that lets you link a base shape to various target shapes that all share a common topology and hierarchical structure. ShapeShifter creates control sliders that let you combine target shapes together onto the base object. Keyframes are then set on the sliders.
One of ShapeShifter's primary goals is to help you with facial animation, where you can set several target faces that show different expressions such as happiness or surprise. You start with a base shape showing a neutral expression and then let ShapeShifter link it to several target faces that show extreme expressions. ShapeShifter creates these links by adding clusters to the base shape and then uses Alias expressions to link the control sliders to the clusters. The resulting sliders can then create a variety of facial expressions by combining or interpolating between different extremes. You set keyframes on the sliders to animate the various facial positions.
ShapeShifter can also easily be used for other types of morphing, but setting facial expressions is its primary goal.
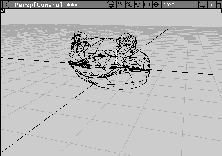
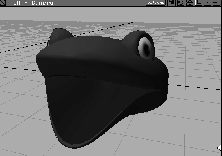
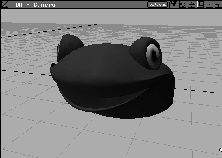
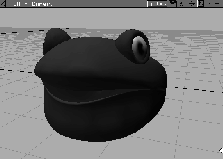
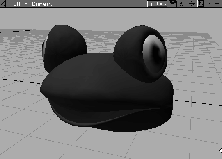
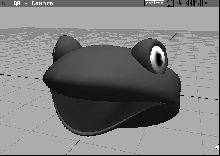
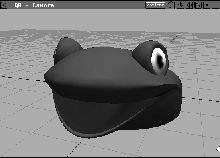
In this lesson, you animate the facial expressions of a frog. You set up extreme shapes that show the frog in several key positions, then use ShapeShifter to interpolate between them.
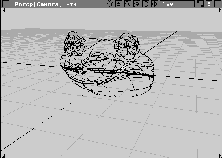
This lesson requires a file with a frog sitting on a lily pad.
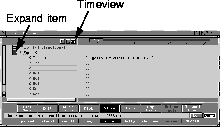
L24_ShapeShifter and click on Open.
Yes to delete all objects, shaders, views and actions.
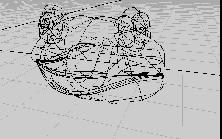
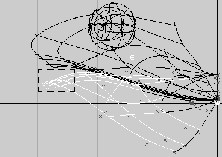
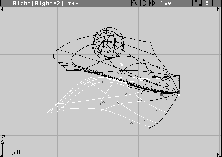
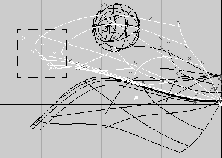
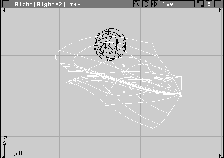
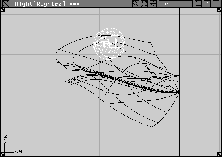
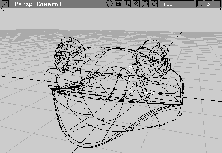
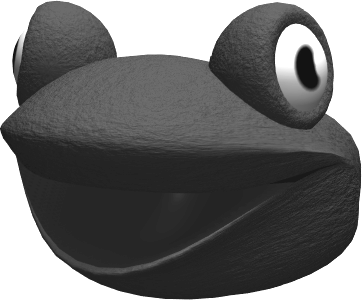
The frog model is divided into two main parts. The head of the frog will be manipulated and animated with ShapeShifter. The back part of the body and legs will not be animated.
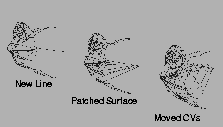
The frog's body was created using a primitive sphere that had its CVs stretched and squashed. The sphere was then detached at an isoparm to create the opening for the mouth. Isoparms were then inserted near the mouth and manipulated to create the lips.
The body was also detached near the head on the upper and lower parts of the body to separate the head from the rest of the body.
The inside of the mouth was created by drawing a curve inside the frog's head with the same number of CVs as the edge isoparm at the mouth. The top and bottom edges of the mouth were then patched back to that line to create the inner surfaces. The internal CVs on these surfaces were modified to shape the inside of the mouth. Since the edge CVs of the inside surfaces match the CVs at the edge of the frog's mouth, you should easily be able to pick and animate the inside and outside of the mouth together.
 Select Pick
  Object. Click the back portion of the frog. It is picked while the frog's head remains unpicked. Click the lily pad to add it to the selection.
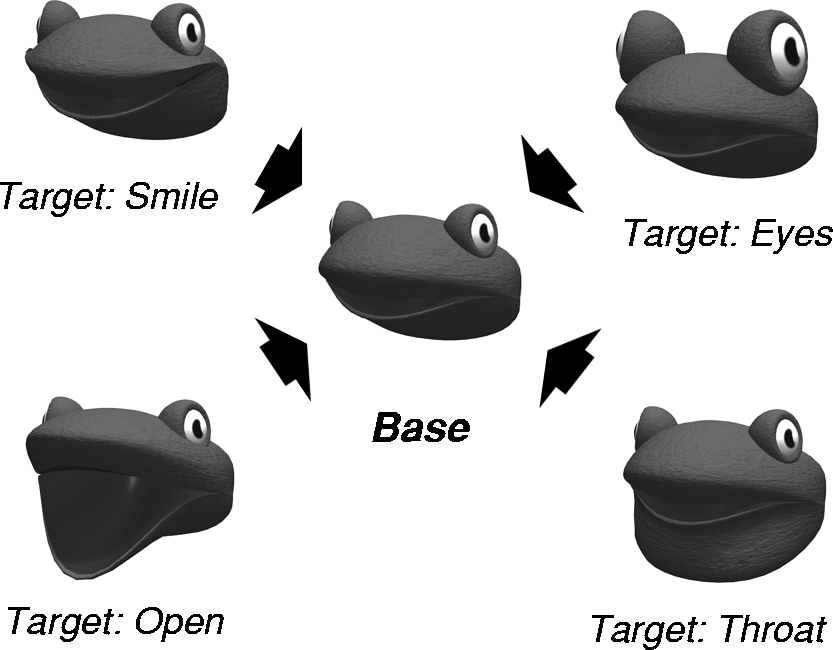
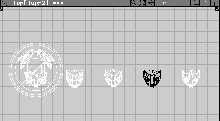
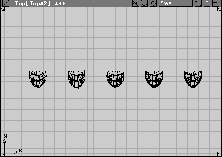
Before applying ShapeShifter, you first need to copy and manipulate the head into several facial expressions. ShapeShifter can use as many target shapes as are needed, but four are enough for the frog. The four are:
| Note: The base frog has its mouth partially open to allow easier manipulation of the mouths of target shapes. |
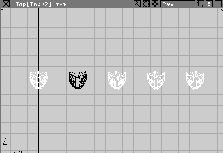
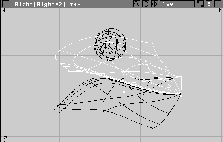
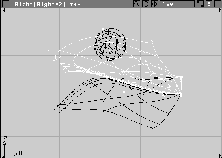
You need to make four copies of the original head that can then be modified to create the required new facial expressions.
 With Pick Object still active, click the head of the frog.
 . In the Duplicate option window, change the
 X Translation to 7 and the Number of Duplicates to 4.
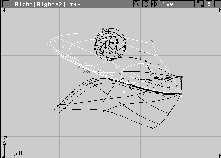
| Tip: The advantage of placing copies along the X-axis is that the Right view shows the same profile for all heads. This makes it easier to pick the CVs on the various heads. |
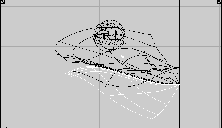
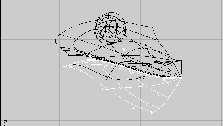
To change the facial expressions and gestures on the frogs, you need to move CVs to modify the appearance of the frog's mouth, throat, and eyes. Start with the first facial extreme, which is the opening of the mouth used for croaking or speaking.
| Note: When using ShapeShifter, you move individual CVs and not CV clusters. Since ShapeShifter sets up clusters for you later, don't assemble CVs into clusters when manipulating facial expressions. |
 With Nothing picked, select Pick Object. Click the second frog head from the left.
 With Nothing picked, select Pick Component. In the Right window, click the frog's bottom jaw.
. In the
With Nothing picked, select Pick Component. In the Right window, click the frog's bottom jaw.
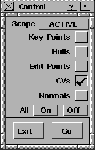
. In the Control window, make sure that ACTIVE is selected under the Scope pop-up. Turn off the options except for CVs. Click Go.
 With Nothing picked, select Pick Point Types CV.
| Note: The Right window is perfect for picking CVs since it shows the side of the face. As most faces are symmetrical, you know that picking CVs from the side view automatically picks CVs on both sides of the face at the same time. |
When you are finished you can evaluate the movement of the CVs in other windows. For now, the side view is best for picking.
 Select Xform Move. In the Right window, click-drag down just below the Y-axis line to open this part of the mouth.
Control window, select ALL under the Scope pop-up. Make sure that all the options are Off. Click Go.
 With Nothing picked, select Pick Component. In the Right window, click the frog's upper jaw.
Control window, select ACTIVE under the Scope pop-up. All the options should be set to Off except for CVs. Click Go.
 With Nothing picked, select Pick Point Types CV.
 Select Xform Move. In the Right window, click-drag up to open this part of the mouth.
This completes the first target of the frog's face. You have created a very wide-open mouth that you can later use with ShapeShifter to choose a percentage of this expression.
 Select Pick Nothing.
Control window, select All under the Scope pop-up. Make sure that all the options are Off. Click Go.
| Tip: It is always a good idea to make sure that the rendered surfaces look the way you want them to. In this case, if you don't like the resulting mouth position, edit some additional CVs. |
With the open mouth target complete, you can move on to the next target shape - the smile. Creating the smile is similar to creating the open mouth, except you manipulate the sides of the mouth instead of the top and bottom.
 Select Pick Object. Click the third frog head from the left to pick it.
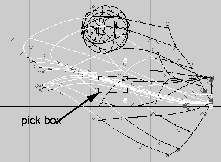
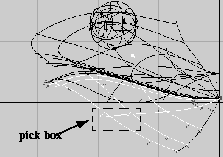
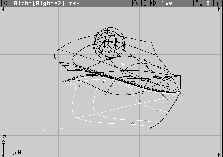
 Select Pick Component. In the Right window, click-drag a pick box around the frog's upper jaw, lower jaw and the two inside surfaces of the mouth. Only the eyes should be unpicked.
Control window, select ACTIVE under the Scope pop-up. All the options should be set to Off except for CVs. Click Go.
 With Nothing picked, select Pick Point Types CV.
 Select Xform Move. In the Right window, click-drag up so that the smile reaches just above the bottom edge of the eye.
 Select Pick Nothing.
Control window, select ALL under the Scope pop-up. Make sure that all the options are Off. Click Go.
With the smile target complete, you can move on to the next shape - a bulging throat.
 Select Pick Object. Click the fourth frog head from the left to pick it.
 Select Pick Component. In the Right window, Click the frog's lower jaw surface.
Control window, select ACTIVE under the Scope pop-up. All the options should be set to Off except for CVs. Click Go.
 With Nothing picked, select Pick Point Types CV.
 Select Xform Move. In the Right window, click-drag down and to the left to create a bulging throat.
 Select Pick Nothing.
Control window, select ALL under the Scope pop-up. Make sure that all the options are Off. Click on Go.
With the throat target complete, you can move on to the final target shape-the bulging eyes.
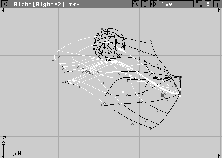
 Select Pick Object. Click-drag a pick box around the first four frog heads, the frog body, and lily pad to pick them. The last head should remain unpicked.
 Select Pick Component. In the Right window, click-drag a pick box over the frog's eyes. This will also pick the upper jaw surface.
| Note: By picking both eyes you can make them bulge symmetrically. If you wanted to have the eyes bulge independently, you would need two target shapes for the eye-one for the right and one for the left. The more target shapes you use, the more flexibility you will have using ShapeShifter later. |
Control window, select ACTIVE under the Scope pop-up. All the options should be set to Off except for CVs. Click Go.
 Select Xform Scale. In the Right window, click-drag to the right to increase the size of the eyes.
 Select Xform Move. In the Right window, click-drag up to move the eyes a little higher on the head.
| Tip: You may want to use the Front window to help position the eyes by moving them up a little. |
 Select Pick Nothing.
Control window, select ALL under the Scope pop-up. Make sure that all the options are Off. Click Go.
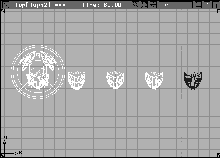
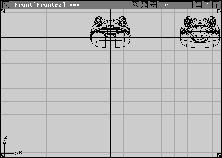
With the facial expressions created, you can begin to use ShapeShifter. The original head is the base object, while the other heads are targets.
To get started, first make the other heads visible and hide the frog's body and the lily pad. Next, set up your modeling views to prepare for ShapeShifter.
 Select Pick Object. Click first on the frog's body, then on the lily pad.
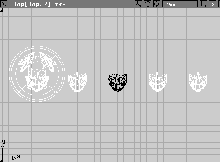
You can now use ShapeShifter to link the different frog expressions to the base head.
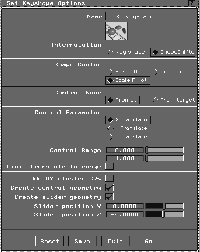
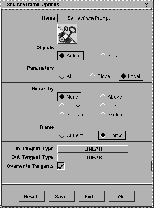
 Select Anim Set key shape -. In the
 Set Keyshape options box, click ShapeShifter under Interpolation. A set of ShapeShifter options becomes available to you.
Shape Center to Scale Pivot. This means that as ShapeShifter interpolates between shapes, the scale pivot acts as the center.
Control Name to Prompt. This lets you name each control yourself; for example, Throat.
Control Parameter set to X Translate. This makes the controls visible in the front window and lets you slide the ShapeShifter controls along the X-axis.
Control Range set from 0 to 1.0. This means that the actual control will link 1 unit along the X-axis to a full interpolation between the base object and the target.
0 next to Slider position Y and -4 next to Slider position Z. The first slider will be placed in 3D space at 0, 0, -4. This places the control sliders below the frog's head. Click Go.
pick the base object. It turns magenta.
pick the target object. It turns white.
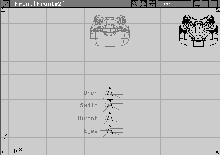
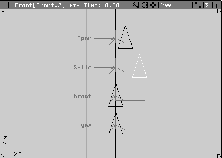
At the prompt, enter a control name of Open. In the Front window, the first ShapeShifter control appears at 0, 0, -4 with the name Open beside it.
pick the target object.
control name of Smile. In the Front window, the next ShapeShifter control appears below the first with the name Smile beside it.
pick the target object.
control name of Throat. In the Front window, the next ShapeShifter control appears below the first two, with the name Throat beside it.
pick the target object.
control name of Eyes. In the Front window, the next ShapeShifter control appears below the first three, with the name Eyes beside it.
Object and drag a pick box around all four controls.
Local Set pivot and enter 0 to move the control sliders' pivots to the origin.
| Tip: The controls are visible in all the modeling windows. You can pick and move them from within any window, although the front window is the most appropriate for now. |
You can now begin to use the ShapeShifter controls to start morphing the base shape. You pick and slide the controls in the front window to morph the shapes.
 Pick Nothing, then Pick Object. In the Front window, click the triangle control next to the word Open.
 Select Xform Move and click-drag with the middle mouse button to move the control along the X-axis to about the half way point of the control range indicator. Once you release the mouse button, the facial position updates.
The mouth is now opened about half way.
Expression Updates section and turn During Xform to ON.
| Tip: Since ShapeShifter uses Alias expressions to link the controls to the faces, this option updates the facial positions interactively. |
| Tip: If you drag past the end of the indicator, the mouth keeps deforming. This is useful if the facial expression of your key shape target wasn't extreme enough. |
0.33 to set the open mouth to exactly 1/3 open.
Move still selected, click with the right mouse button on the triangle control next to Smile in the Front window.
 elect Pick Object. Click-drag a pick box around the four control sliders.
 elect Xform Move and enter
 0. The control sliders are now in their starting positions. This is why the slider pivots were set at the origin.
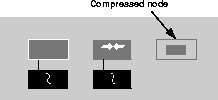
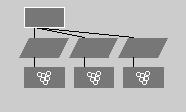
The sliders make the facial positions move by creating clusters for CVs involved in the facial movements, then linking them to the slider. To find these clusters and the expressions that animate them, you can look directly at the SBD and Action windows.
 Select Pick Nothing. From the Windows menu, select SBD. In the SBD window, you see several icons representing the ShapeShifter pieces.
The first is a curve that represents the geometry of the control slider handle. The second is a template bone that represents the slider range indicator. The third is a compressed dag node that contains the CV clusters of the face.
These three nodes exist for each of the target shapes.
 Select Pick Object. Click on one of the compressed nodes to pick it.
Object still picked, click on one of the animated cluster nodes.
Select Pick Object. Click on one of the compressed nodes to pick it.
Object still picked, click on one of the animated cluster nodes.
This cluster node is linked to the triangular control slider geometry using an expression. Basically, it is multiplied by a value calculated by ShapeShifter.
| Note: You don't have to understand or work with the expressions created by ShapeShifter. They are pointed out here to show you how ShapeShifter works. In the future, you can use ShapeShifter without ever worrying about these nodes. |
Once the ShapeShifter controls are set up and you are happy with the results, you can begin setting keyframes. With ShapeShifter, keyframes are set on the control sliders instead of on the CV clusters on the frog's head.
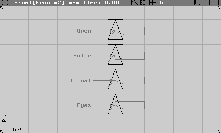
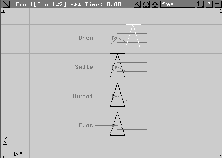
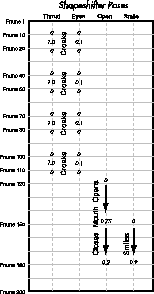
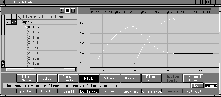
To complete this lesson, you will set up a simple animation where the frog croaks four times then opens its mouth with a sigh and a contented smile. The following timeline shows how the various controls should be set over a 200 frame animation.
The animation is focused on the ShapeShifter controls. The values used are based on the X translation of the slider.
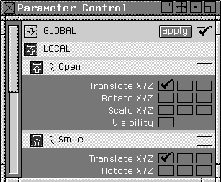
 With Nothing picked, select Pick Object. Click-drag a pick box around all of the control sliders.
Parameter Control window, the sliders are shown with all of their parameters turned on. For the Open slider, turn off all the parameters by clicking on the check mark next to the name, then turn the Translate X parameter back on.
| Note: The order of the sliders in the parameter control window may be different than what is shown. |
 With Nothing picked, select Pick Object. Click the
 Throat and Eyes sliders to pick them.
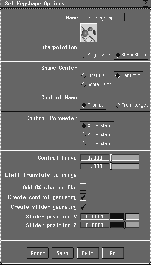
. Set the Parameters option to Local to use the parameter controls. Set Frame to Prompt. This lets you set multiple frames in one step.
In Tangent Type and the Out Tangent Type to LINEAR. Click Go.
| Note: This makes the motion very mechanical, but you can change this later in the Action window. |
1 10 20 40 50 70 80 100 110 to set keyframes for these frames. The frame values come from the timeline. These keyframes set the start and end of the croaking sequences.
 With Nothing picked, select Pick Object. Click the
 Throat slider to pick it.
 Select Xform Move. Enter
 1.0 to make the throat bulge out.
0.1 to make the eyes bug out a little.
 With Nothing picked, select Pick Object. Click-drag a pick box around both the
 Throat and Eyes sliders to pick them.
| Tip: Pick both sliders to set keyframes for them. |
15 45 75 105 to set keyframes for the throat and eyes. This creates the frog's croaking motion.
Start/End pop up to Min/Max. In the Time Slider, change the current frame value to 120.
 With Nothing picked, select Pick Object. Click the Open slider to pick it.
. Set
With Nothing picked, select Pick Object. Click the Open slider to pick it.
. Set Frame to Current. This lets you set one frame at a time. Click Go. A keyframe is set for the Open slider at frame 120.
Time Slider, change the current frame value to 150.
 Select Xform Move. Enter
 0.75 to open the mouth.
150.
Time Slider, change the current frame value to 180.
 With Xform Move selected, enter
 0.2 to almost close the mouth.
180.
Time Slider, change the current frame value to 210.
210.
 With Nothing picked, select Pick Object. Click the
 Smile slider to pick it.
Time Slider, change the current frame value to 150.
150.
Time Slider, change the current frame value to 180.
 Select Xform Move. Enter
 0.9 to create a strong smile.
180.
Play Blast section, make sure that Show playblast is set to OFF. Close the Playback Options window.
Time Slider, click the First frame button.
Play button in the Time Slider.
Stop when you are finished viewing the animation playback.
In the playback, you may have noticed that the actions were a little robotic or stiff. You can refine the quality of the movements by editing the action curves.
 With Nothing picked, select Pick Object. Click-drag a pick box around the
 Throat and Eyes sliders to pick them.
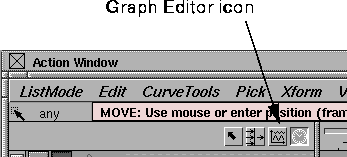
Graph Editor icon to show the action curves on the picked objects.
Action window, select Keyframes. Click-drag around the keyframes at the peaks of the croaking motion. This should include the throat at 1.0 and the eyes at 0.1.
Action Window, select Fast seg in. This makes the initial part of the croak faster.
 With Nothing picked, select Pick Object. Click-drag a pick box around the
 Open and Smile sliders to pick them.
Action Window, select Look at. Now the action curves belonging to the Open and Smile sliders are visible.
Action Window, select Keyframes. Click the peak keyframe of both the curves.
Action Window, select Slow seg in. This changes the action so the mouth opening and the smile occur slowly.
Action Window, select Fast seg out. This alters the action so the mouth closes quickly as the frog smiles.
Nothing and close the Action Window.
Object. Click the target heads to make them active.
Now that the animation is working, and all geometry is visible, you can render it at a low resolution to see the final results. Use the rendering workflow you learned earlier.
ShapeShifter is a powerful morphing tool that is ideal for setting up facial animations. In this lesson, you set up four target shapes from a base shape. By combining the target facial shapes, you added a high degree of expressiveness to the frog's face. ShapeShifter automatically sets up any clusters and expressions that are needed to perform the morphing.
The number of required facial extremes depends on the level of realism your face requires. You can also include more facial extremes than were used in this lesson.
In your own work, when it comes time to keyframe the facial poses, you can use the method outlined in this lesson or use Soundsync to accurately synchronize your facial poses with a voice track. If you would like to use Soundsync, see the Alias Complementary Applications manual for more information.