In a previous lesson, you've seen how to build and animate a skeleton. The next step is to attach geometry to it. This lesson shows you how to control the deformation of pre-built geometry, using tools that let you define skin tucking and folding, and muscle bulging. You also use a tool that lets you stitch together separate pieces of geometry into one skin, and create shaders that deform with the skin. To create deformations for an arm and shoulder, which have a complex joint, you will become familiar enough with applying deformation techniques to extend them to other parts of a character's body.
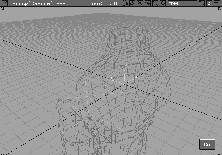
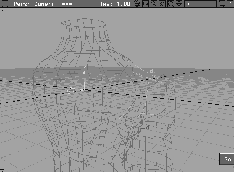
By viewing an existing flipbook of the lesson, you can see what you are trying to achieve.
L23_Moving_Arm.bk.
play button to see the animation.
A file has already been prepared for your use.
From the File menu, select Open, and double-click on the file named L23_ArmTorso to retrieve it.
Note: Animation already exists on the joints of the skeleton. If you should move the joints of the skeleton, and need to get it back to its untransformed state, select Anim  View Frame, and type View Frame, and type in 1. |
This places the skeleton in its untransformed state, letting you proceed with the lesson. The animation also enables you to playblast the arm and torso so you can evaluate any operations you have performed.
| Note: The skeleton in this example is using the Round bone style instead of the Pyramid bone style used in previous IK lessons. You can change a skeleton's bone style from the Line style option in the ObjectDisplay menu to the option that suits you best. |
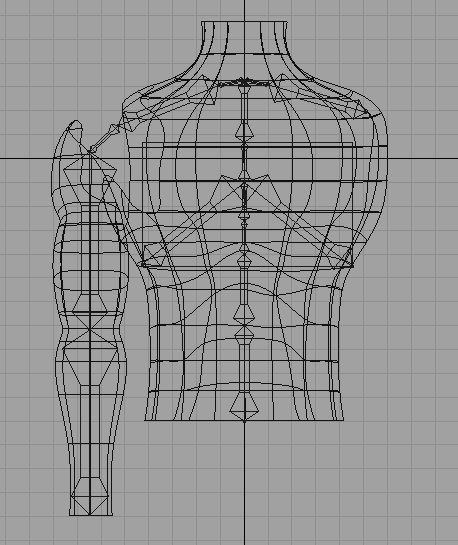
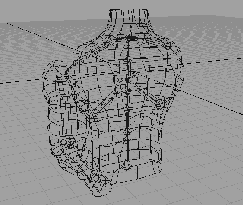
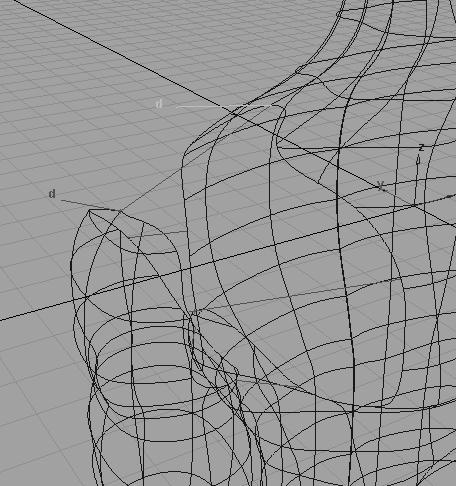
The surfaces in this file were constructed using surface construction tools, such as Skin and Revolve.
The torso was constructed by creating 10 semi- circular cross-sectional profile curves, stacked on top of one another. These curves were skinned together, with construction history turned on. The cross sections were then modified, using Scale on the curves themselves, and finally, by pulling control vertices on the curves to rough out the shape of the torso.
After the rough shape was put together, the construction curves were deleted, which removed the construction history on the skinned surface, and allowed for modification of the surface itself. Isoparms were then inserted on the surface to get more localized control over the shape.
Using Proportional modification, the torso was molded into the final shape desired. This half of the torso was then mirrored to the other side. Then, the two pieces were attached together to create a smooth seam.
The arm was constructed by revolving a cross-sectional profile curve, and modified by pushing and pulling control vertices around using Move and proportional modification.
A curve on surface was then projected onto the torso from the side to describe the attachment point for the surface blend to the body, and also onto the arm from the front to describe the attachment point for the surface blend to the arm. After projecting the curves, the surfaces were then trimmed back to discard the portions of the surface inside the curves on surface.
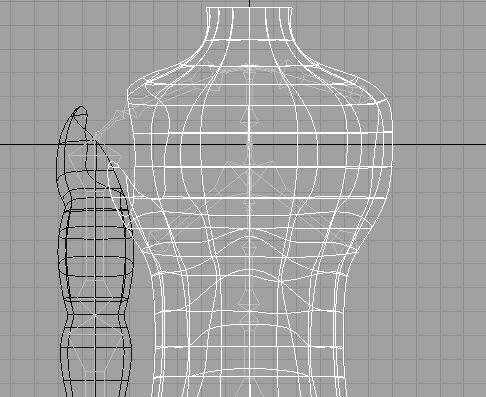
By first attaching the torso to the skeleton you allow for a smooth deformation of the torso as the backbone bends and twists.
 Select Pick Object, and click-drag over the skeleton structure (the bones of the arm and torso) and the torso geometry. Do not pick the arm geometry (the skin).
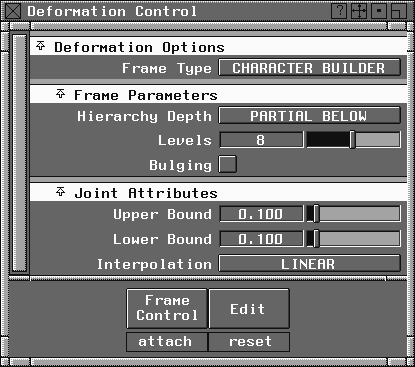
Deformation Control window, change Frame Type to CHARACTER BUILDER.
Frame Parameters section of the the Deformation Control window, set Hierarchy Depth to Partial Below, and set Levels to 8.
| Note: This sets up the deformation attach operation to descend 8 joint levels down the skeleton. A hierarchy depth of 8 for this skeleton means that you are attaching the torso to all the joints in the skeleton down to the shoulder joint. You are effectively removing the arm joints from the attach operation. |
Deformation Control window, from the Frame Control menu, select Set Attributes.
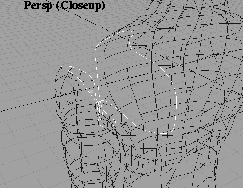
| Tip: Circular bounding disks have been drawn around the upper and lower ends of the bones in the skeleton. These bounding disks tell deformation control where you want skin tucking and folding to occur. If the bounding disks are closer together, you will get a tighter fold, and if they are further apart, you will get a looser-looking fold in the skin when you rotate the skeleton joints. |
Joint Attributes section of the Deformation Control window, set the Upper Bound to 0.3, and the Lower Bound to 0.3.
0.3 and 0.3.
Frame Control Attach. Alias now constructs the cluster nodes necessary to deform the torso geometry smoothly when the skeleton joints are transformed. This may take a few moments.
Deformation Control window to the side.
 Select Pick Nothing, then select Pick Object, and type in
 backbone_1. This selects the backbone node one joint away from the waist joint node.
 Select Xform Rotate, and click-drag with the right mouse button to rotate the backbone joint node in Z.
 With the
 backbone_1 joint node still selected, select Xform Rotate, then type in 0. This returns the backbone joint node to its original orientation.
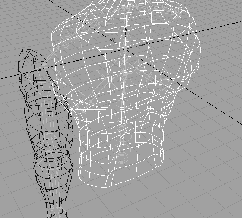
Next, you attach the arm geometry to the arm joints of the skeleton, using the same method as the torso. In this case, you also want the upper arm of the character to bulge, so you need to add some bulging attributes to the arm joints of the skeleton before performing the attach operation.
 Select Pick Nothing, then select Pick Joint. Type
 lower_shoulder and press Enter to pick the appropriate joint.
Deformation Control window, set Hierarchy Depth to None.
| Tip: This lets you set up the bulge attributes for only the upper arm bone. |
All (Studio) so you can see the bulge curves from multiple perspectives.
Deformation Control window, select Frame Control Set attributes. Setting attributes again creates attributes for bones that get saved with the skeleton.
| Note: You can easily build a library of skeletons that have pre-set attributes, such as bulging, to use in future projects. |
Deformation Control window, under Frame Parameters, click on the Bulging option. This opens up additional parameters that you'll set to cause the biceps and triceps of the arm to bulge.
Tip: Click-drag with the right mouse button on the border of the Deformation Control window to expand it. |
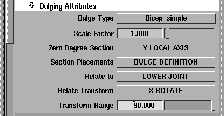
Bulging Attributes section, set Zero Degree Section to Y Local Axis. This sets up the bulge so that it occurs in the local Y axis space of the arm joint.
For your arm geometry, setting this to Y causes the bulge to happen in the positive and negative Y-axis.
| Tip: If you look at the geometry in the Right window, you should be able to visualize the bulge in this axis. |
Relate Transform to X Rotate. This causes the bulging to take place when you rotate the elbow joint in X.
| Tip: For each joint, you will have to determine whether you want the rotations to occur during a negative or positive rotation, and also over what range you want the bulge to occur. For this skeleton, -90 degrees works well for the elbow joint. |
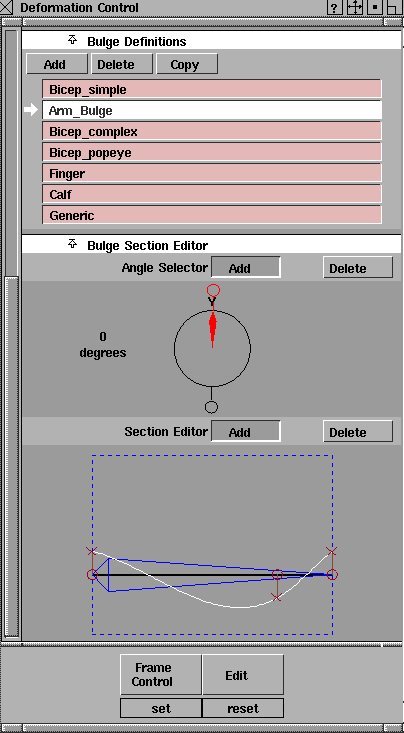
Bulge Definitions, select Add to create a new bulge type.
Arm_Bulge. This creates a default bulge section you can modify to suit your purposes.
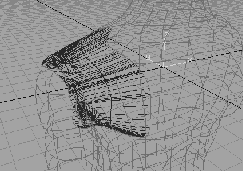
Under the Bulge Section Editor part of the Deformation Control window, you now modify the bulge curve shapes to create a bulging biceps and triceps.
Section Editor, click-drag the middle X on the white curve to make the curve look as follows:
These two settings now will ensure that bulging occurs as the joint rotates.
 Select Pick Nothing, then enter
 upper_shoulder to select the joint node.
 Next, select Pick Object, and click on the arm geometry to pick it.
Deformation Control window, scroll up to the Frame Parameters section and set the Hierarchy Depth to BELOW.
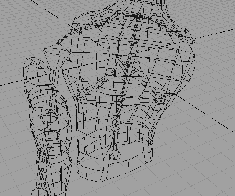
Deformation Control window, select Frame Control Attach. Alias now constructs clusters for the arm with the appropriate CV percentages to allow for folding and tucking. Alias also creates clusters to control bulging of the geometry through expressions.
 Select Pick Nothing, then select Pick Joint, and enter
 elbow to select the elbow joint.
Rotate, and use the left mouse button to rotate the elbow in X.
Tip: Since the bulging is difficult to see, you can turn on the evaluation of the bulging expressions, so the bulging occurs while you're rotating the elbow. From the Preferences menu, select Performance options.... In the Expression Updates section, turn the During Xform option On. Close the Performance options window. |
 Select Anim View Frame, then type in
 1. This puts the skeleton back in its default position.
| Note: There are many parameters you can change to affect how the bulge is going to perform. If you want more control over the definition of a bulge, you can add additional control points on the curve, to localize the deformations of the geometry. You can also change the scale value of the bulge, to increase or decrease the amount of bulging you get, without having to modify the actual bulge curves. Don't be afraid to experiment. If you run into a problem, and don't get the result you want, reset the attributes for the joint and re-attach the geometry to the skeleton! |
You now have a torso and arm that deform in a similar manner to their real life counterparts.
You now need to join the arm back to the torso, to stitch the surfaces into one complete mesh. To do this, you use Surface Blend, which creates a surface that maintains tangency with the edges of two other surfaces, even if the surfaces move or deform during your animation.
Skeletons. This turns the display of the skeleton off so you can see the surfaces more clearly.
 Select Surfaces Fillet surfaces Blend. Click on the upper edge of the arm geometry. This a closed loop. Click Go.
| Note: Sometimes a boundary curve is made up of two or more pieces. As long as the pieces form a closed loop, they can be used in a blend surface. |
 Select Surfaces Fillet surfaces Blend. This cancels the last blend operation, and starts another. Click the middle mouse button to flip the locators.
| Note: If you are not sure that this is the case, use the tumble icon in the Perspective window to tumble the model around. This lets you evaluate the orientation of the locators more easily. |
Skeletons to turn the display of your skeleton back on.
 Select Pick Nothing, then select Pick Joint, and enter
 lower_shoulder to pick this joint.
Rotate, and use the middle mouse button to rotate the lower shoulder joint in the Y- axis. When you let go of the mouse button, the surfaces redraw, and the Blend Surface used to join the arm to the torso re-builds itself.
| Note: At this point, you may have noticed that the clavicle (collarbone) also rotates when the shoulder rotates. This linked rotation was set up by placing an expression on the collarbone joint that tells the collarbone to rotate a percentage of the amount that the lower shoulder joint rotates. |
Parameter Filter button and make sure that all of the parameters are on. Change the Action window to the Time View mode. There is an expression listed that changes the Y_Rotate value of the clavicle joint, as the lower_shoulder joint Y_Rotate value changes. After looking at the expression, close the Action window.
 Select Anim View frame, then type
 1 to reset the skeleton back to its default position.
You now have a single skin that deforms rather realistically. Your next step in creating a believable skinned skeleton is to add textures that move and deform with the geometry that they're applied to. In effect, you want to achieve a "rubber doll" look, creating stretchy textures that pull and pucker along with the surface. You do this by creating what is known in Alias as surface or UV-based textures. These differ from projection or solid textures in that they are applied directly to the surface, rather than being projected through the surface. Projections break down as soon as you deform or move your surface, so you need to take a solid or projection texture and turn it into a surface or UV texture using a tool called Convert Solid Texture.
 Select Pick Nothing, then select Pick Object, and drag-select over the arm, torso and blend surface geometry.
Shaders....
Select Pick Nothing, then select Pick Object, and drag-select over the arm, torso and blend surface geometry.
Shaders....
mottled_skin, then select Shading Assign Shader. This assigns the mottled_skin texture to all the picked surfaces.
Convert Solid Tex in the Multi-lister. In the requester that pops up, change the PIX Size to 512, and turn Anti Aliasing OFF.
OK. You are telling Alias how large the resulting surface files should be, and whether or not you want to Antialias the resulting pix files.
| Tip: In most cases, you should leave Anti- aliasing on, and the size of the pix files generated depend entirely on how close you are going to get to a surface with the camera. If you need finer detail, use a larger pix file size. For this lesson, a small size with no antialiasing works well enough, and the pix files are generated more quickly. |
You can now evaluate the overall results of your work by performing a playblast with QuickRender turned on.
Play Blast section of the window, and turn on QuickRender and Compress. Set the quality level to 25. This quickrenders a small preview of your animated arm and torso, using the animation already existing on the skeleton, when you retrieved it.
| Note: This animation may take a long time to complete, depending on the limitations of your system. |
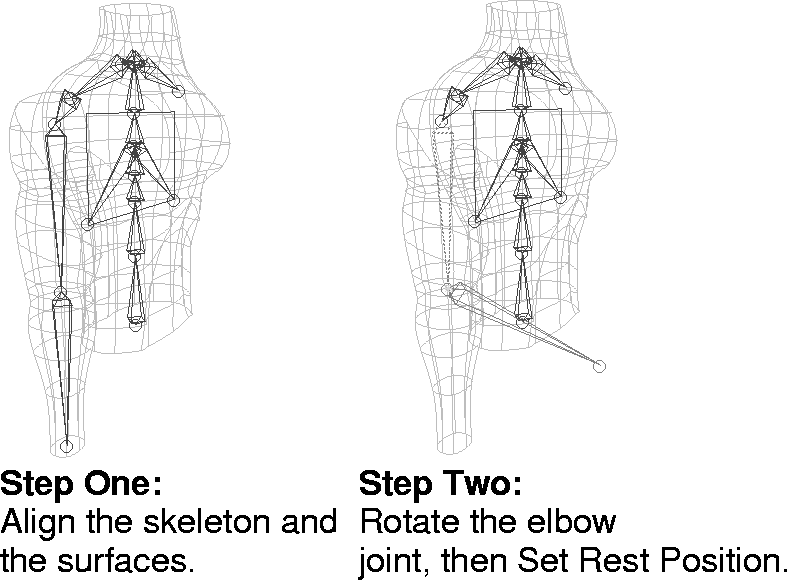
In this lesson, the skeleton was already animated. Run IK was used to put rotational keyframes on the various joints and any constraints and IK handles were removed. The following set of images follows one possible workflow for setting up the IK handles and then attaching the surfaces to the skeleton.
To re-animate the arm using the L23_ArmTorso file, reload the original file, then Pick the whole skeleton. Once it is picked, go to the Delete menu and select Delete channels - . In this option window, change
 Channel types to Both and Hierarchy to Below. Click Go to remove the animation channels and expressions on the skeleton.
To re-animate the torso, start with the surfaces and the skeleton aligned, as they are found in the L23_ArmTorso file. Then, Pick the elbow joint of the arm and rotate it to an appropriate angle. This is your rest pose.
Pick the whole hierarchy and select Set Rest Pose from the Edit menu. The rest pose governs the motion of the arm's IK chain. At this point, you have not attached the surfaces to the skeleton. You can attach the surfaces first, but for now focus on the skeleton.
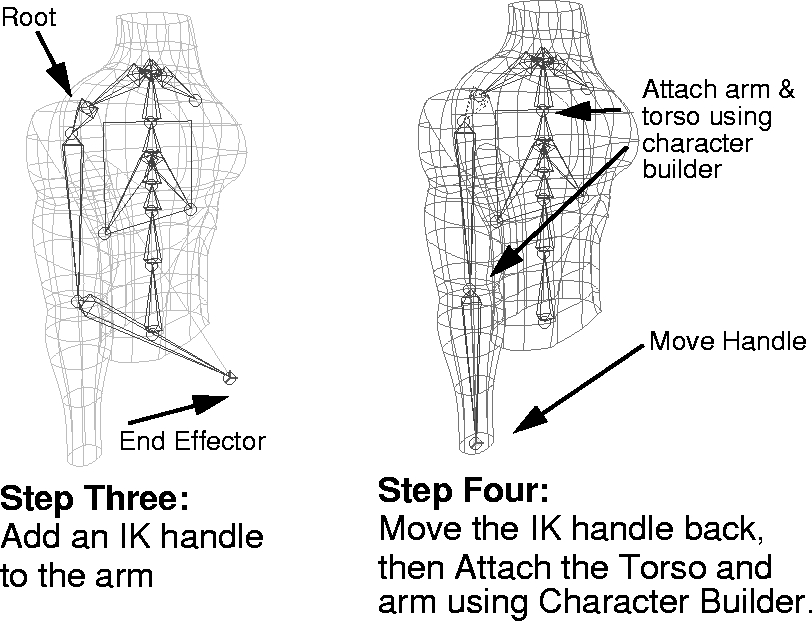
The next step is to add an IK handle to the arm, with its root at the lower shoulder and its end effector at the hand. If desired, set up any constraints or selection handles, as you did in Lessons 20 and 21.
Before working on the surfaces, move the IK handle back to its original position. Using Character builder and the same methods taught earlier in the lesson, set up and attach the arm and the torso.
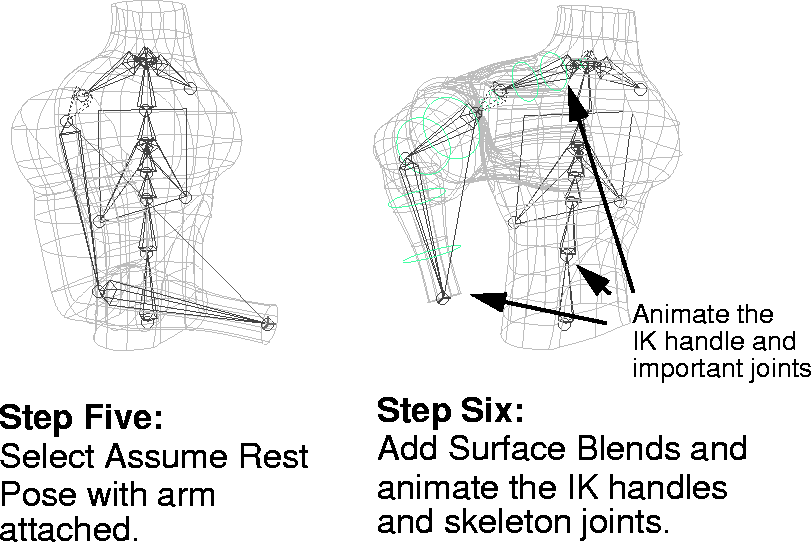
Once the surfaces are attached, use Assume Rest Pose to see how well the arm is attached to the skeleton. Next, you can add the Surface blend and then test the motion on the arm. The character is now ready for you to animate. You can use the IK Handles and any joint that isn't part of an IK chain to animate. Try having the Torso bend forward as the arm pulls back. This allows you to see character builder deformations in all parts of your character.
Congratulations! You have just walked through one of the most difficult processes in computer graphics character animation. Creating complex joints like shoulders is very challenging and requires a number of steps to properly set up and execute.