In the last lesson, you created a skeleton, added IK handles to some of the joints, and set keyframes on various pieces of the skeleton. The resulting animation showed a character sitting down from a standing position.
Another important aspect of animating characters is the ability to create a walk cycle. To make a character walk, you want it to plant one foot then move forward. This action needs to be repeated by alternating feet to create the walking motion.
Just like in the last lesson, you use one IK handle for the leg and one for the foot. Since IK handles don't have their own dag node structure and can't be grouped, you must use constraints. Constraints offer a groupable dag node that lets you control the foot IK handles more easily. Using these grouped constraints and IK handles, you can easily create a simple walk cycle.
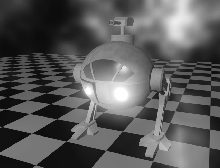
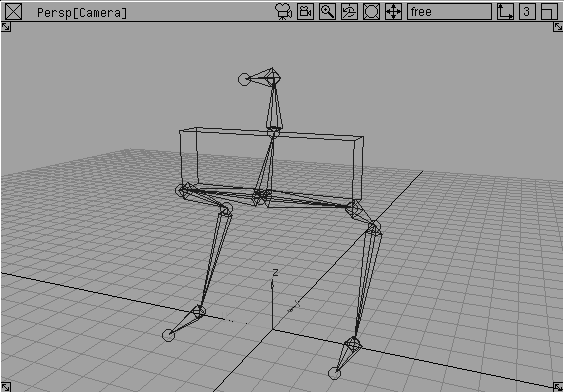
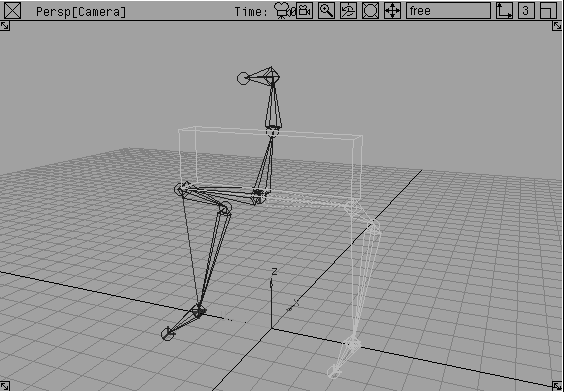
In this lesson you animate a two-legged robot with a gun turret. This model has a skeleton already defined as well as some geometry that must be grouped into the skeleton hierarchy (so it can animate with the skeleton.)
By using IK handles and constraints, you can make the robot walk with planted feet. You can also use an expression to link the constraint objects and to make sure that the hip of the robot works with the legs. Finally, an aim constraint is used to keep the gun turret aimed at a specific target in the scene, no matter where the robot moves.
Start by retrieving a two-legged robot that is aligned with an underlying IK skeleton.
From the File menu, select Open. Select the wire file named L21_Constraints and click Open.
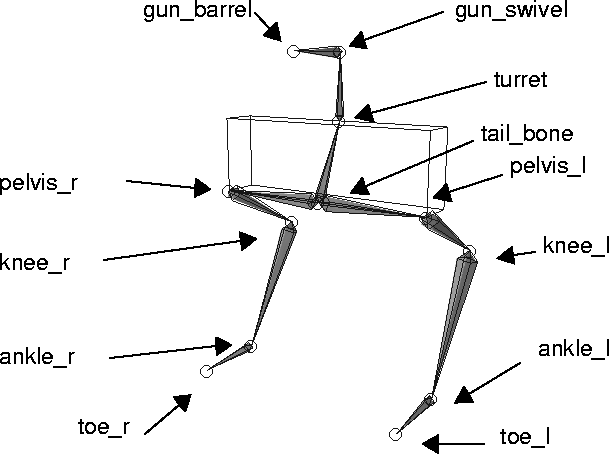
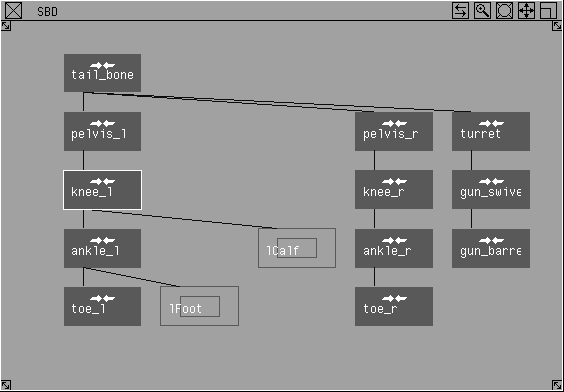
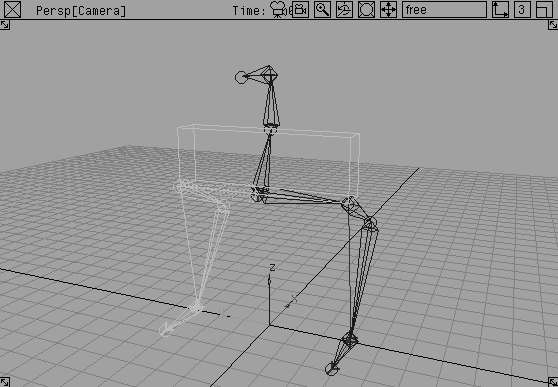
The robot skeleton has been created with no limits on the joints. Because you are going to use the single chain IK solution, the limits are not needed. The following diagram shows the names of all the robot joints that make up the skeleton hierarchy.
To simulate the movement of mechanical objects, such as a knight with armor or a robot, you need to use non-deforming grouped geometry. This keeps the surfaces rigid during animation, yet still lets the joints move and rotate. Each set of objects grouped to a joint inherits information from the joint. As a result, any type of surface can be used to create these objects.
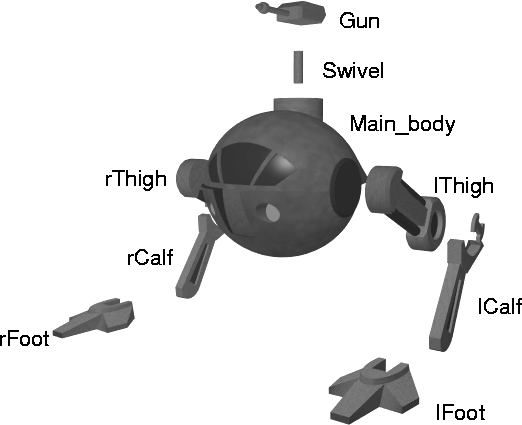
Although it may seem to have complex geometry, the robot is really made up of simple pieces. It was created primarily with planar and patched surfaces. Trimmed surfaces were used for details such as the window and the front lights.
The surfaces were then grouped into several key pieces that can rotate with the joints. The pivot point of the objects and groups were not really a concern, because the animation will be dictated by the joint pivots. You would need to worry about the pivot locations only if the pieces were to be animated apart from the skeleton. The model was created with only a few key details so it can be faster and more interactive during playback and testing.
To make the skeleton and geometry animate as one, you have to group the model to the bones. Think of the skeleton as the "bones" of the hierarchy. When the objects are grouped into the skeleton hierarchy, they will seem to be "hanging" off the skeleton structure.
Since you are, in fact, moving and animating the skeleton and not each individual object, you can group the objects before, during or after animating the skeleton. Animating a skeleton without grouped geometry may be more interactive, but it is harder to evaluate the robot's final movement on a bare skeleton. Having the model grouped will give you a better indication of the movement in your animation when you preview it. Once they have been grouped, you can always hide the surfaces while setting up constraints.
| Tip: Because the modeling views may be somewhat cluttered, this window lets you pick pieces easily and accurately. |
 Select Pick
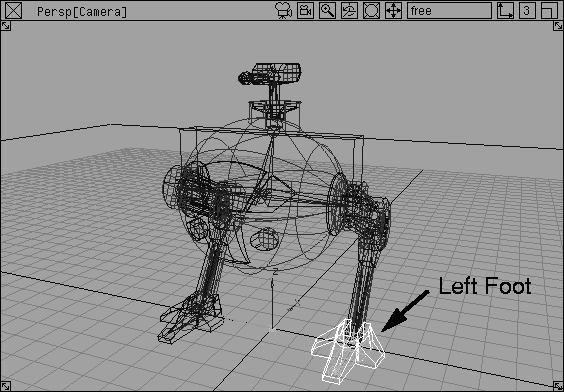
  Object. Click on the left toe joint in the SBD window.
|
Note: To pick joints in the modeling window, you need to use Pick Joint. To pick them from within the SBD window, you can use Pick Joint, Pick Object or Pick Component. |
| Tip: As in the last lesson, the surfaces and joints are labeled from the object's perspective. As a result, the robot's left foot is to your right. |
 . Set
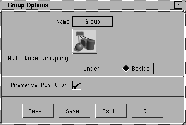
. Set Null Node Grouping to Beside. Click Go.
 Select Pick Object. Click on the left ankle
 (ankle_l) joint in the SBD window. The toe joint and foot geometry are picked automatically, since they are lower down in the hierarchy.
|
Tip: Avoid picking the entire skeleton. If you do, select Pick Nothing, adjust your view, and redo the last two steps. |
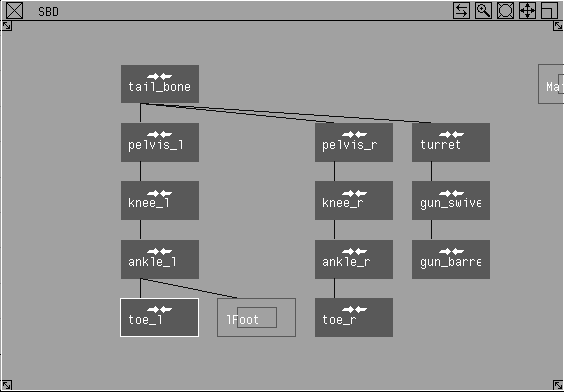
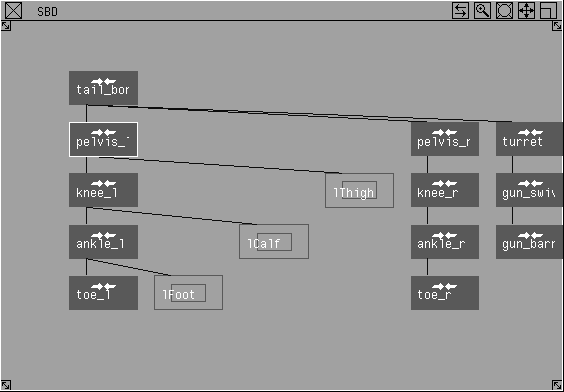
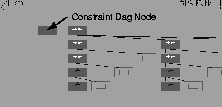
After grouping, the left knee joint is already picked in the SBD window along with the joints and geometry below this node.
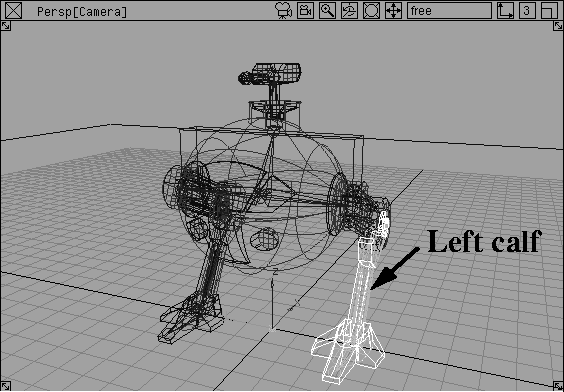
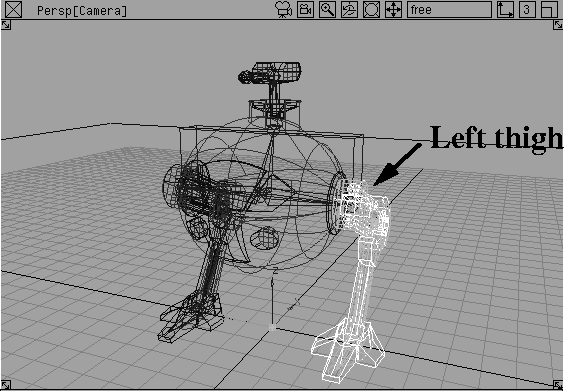
 With Pick Object still selected, go to the Perspective window and click on the geometry of the left thigh.
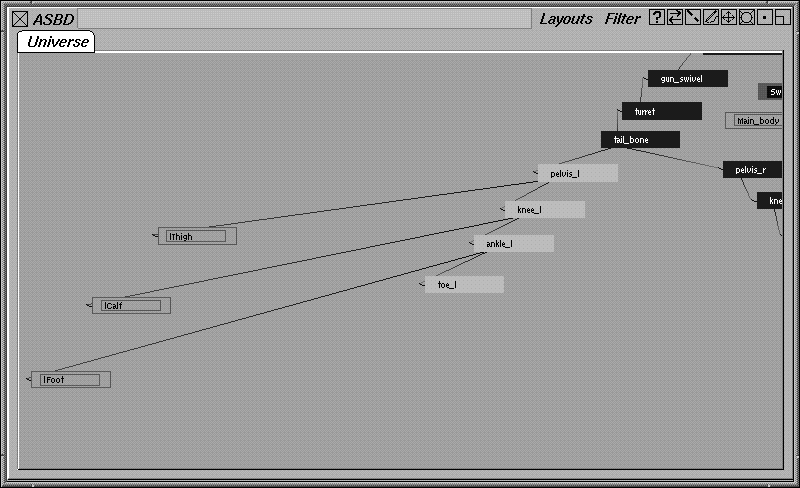
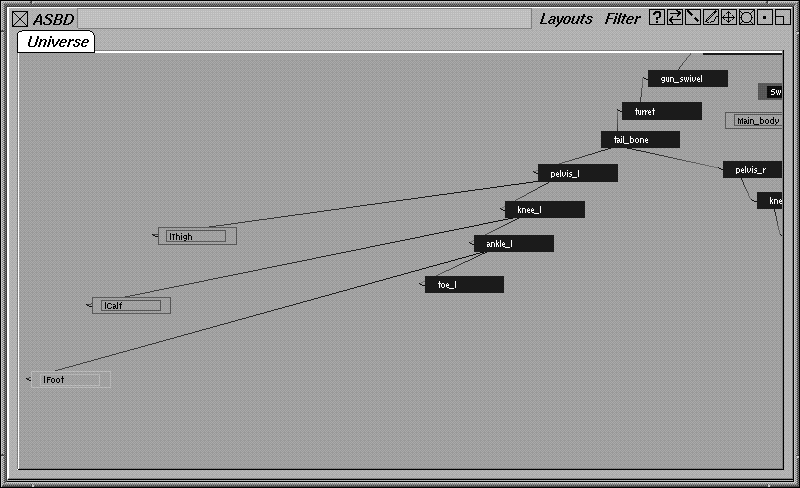
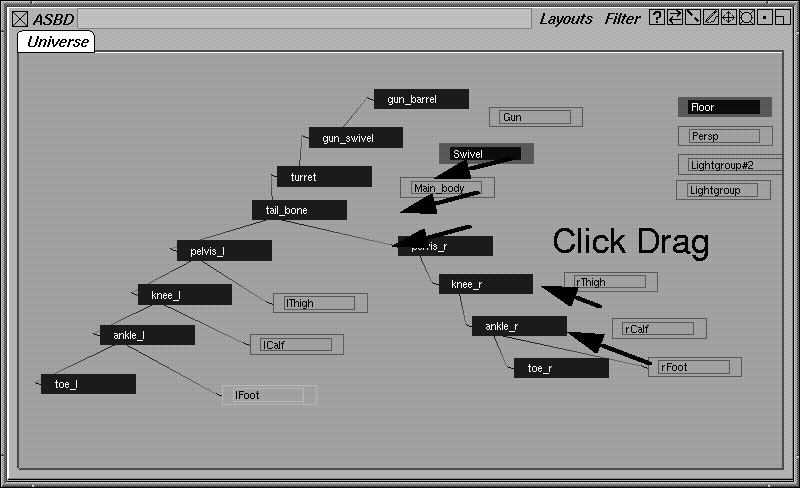
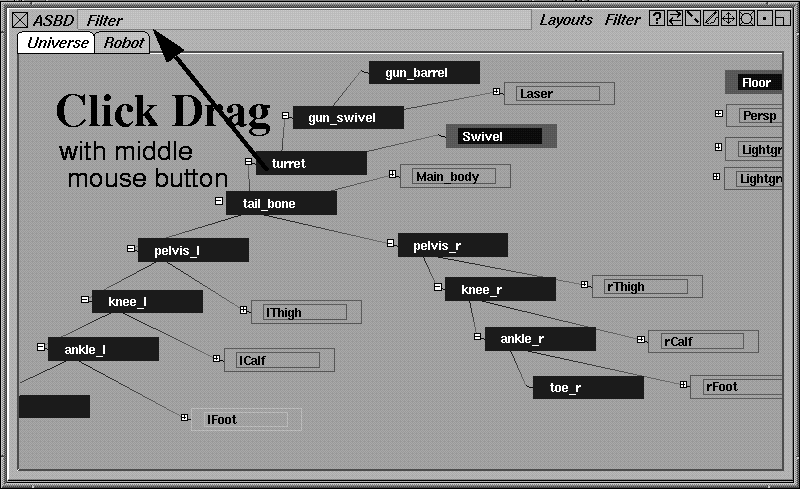
The Advanced SBD window or ASBD window lets you execute such actions as the grouping and renaming of files from within the SBD. You can also manage your SBD in a personalized manner, using special SBD "pages", that let you focus on only certain dag nodes. For the robot, the ASBD can be used to group the rest of the surfaces into the skeleton hierarchy, using a simple click and drag.
 Select Pick Object. With the middle mouse button, click on the dag node labeled lfoot in the ASBD.
The ASBD can be used to pick dag nodes in the same manner as the SBD.
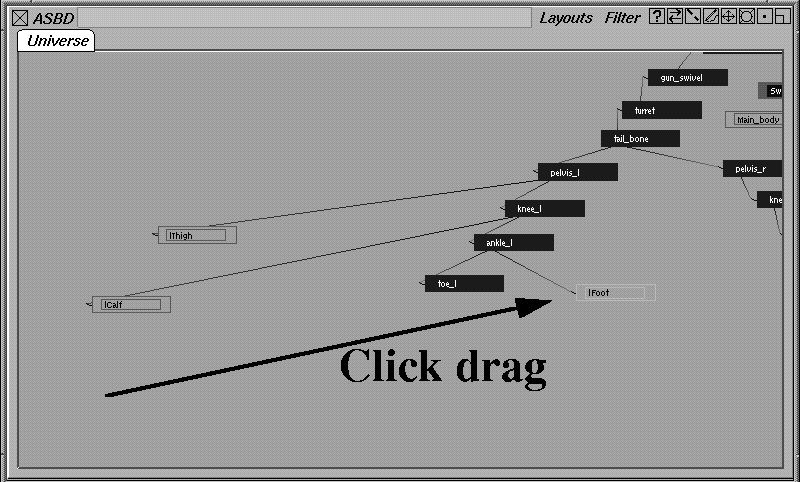
Tab key. The thin white line that surrounds the window work area turns into a thin red line.
You can use the left mouse button to drag a dag node and its children around the window. If you use the Shift key and the left mouse button, you can move the dag node independent of its children.
| Tip: When the ASBD displays a white line, you are in Select Mode and you can use the three mouse buttons to pick objects as usual. When the ASBD displays a red line, you're in Edit Mode and the mouse buttons can be used to move and even group dag nodes. |
Another important capability of the ASBD window is the ability to group and ungroup dag nodes using a simple click/drag approach.
To properly group the surfaces into the skeleton you must perform the following actions:
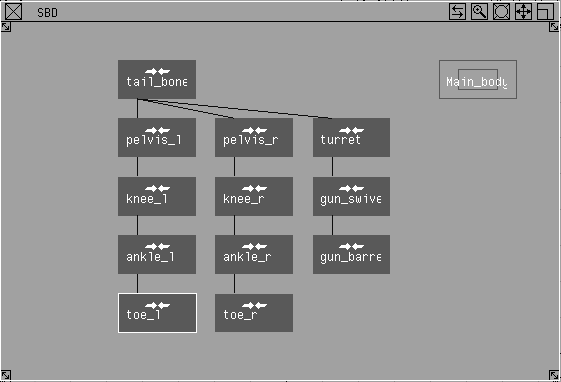
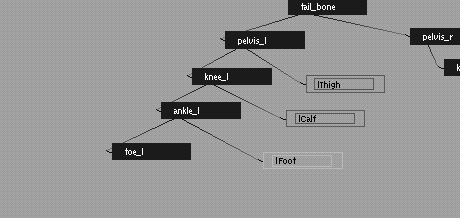
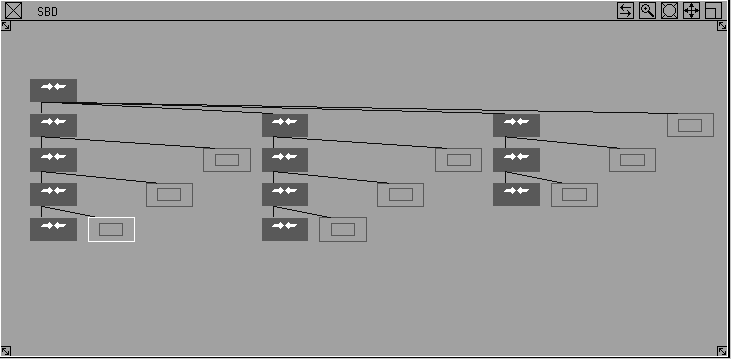
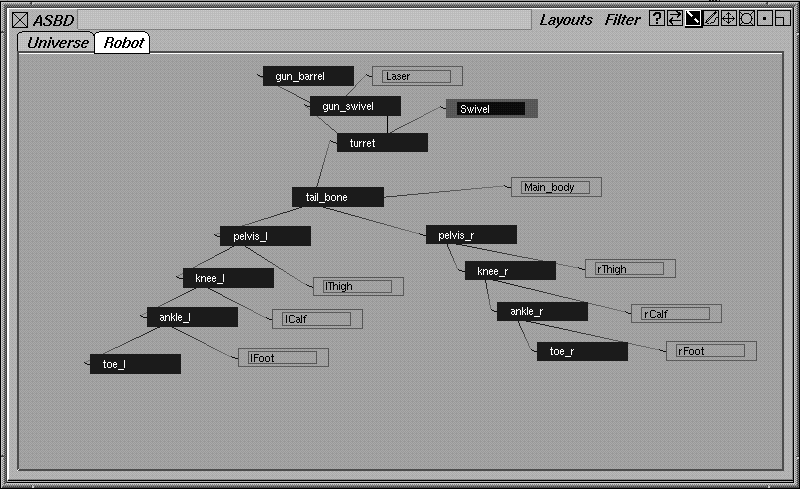
If necessary, use the left mouse button to reposition the nodes as needed. If you were to open the basic SBD window the nodes would look as follows:
In addition to moving and grouping nodes, the ASBD offers many other features. In this example, you will use a few of them to set up the robot, but be sure to check out the description of the ASBD in Basic Tools in Alias for the full range of features.
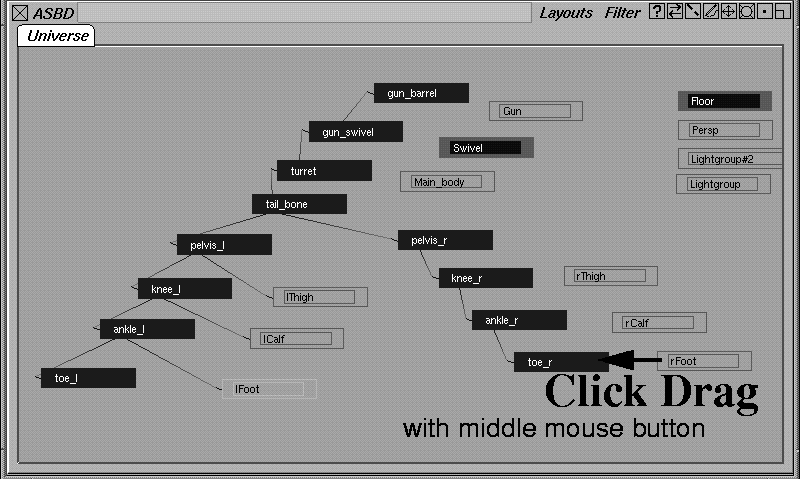
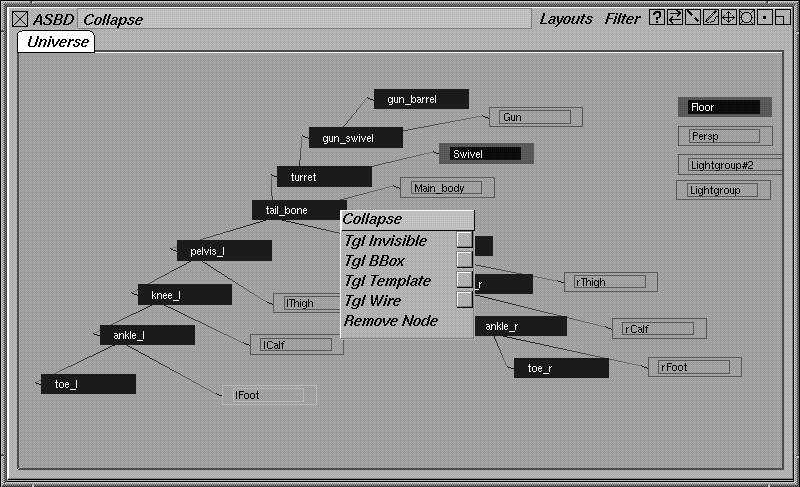
Collapse to collapse the structure.
Now, you only have a single collapsed tail_bone node.
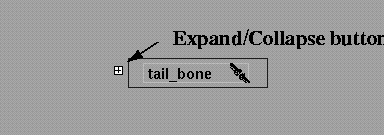
| Tip: You can use either the white box (if the dag node is big enough in the view) or the right mouse button menu to expand and collapse dag structures. The white box is only visible when you are zoomed in close enough. |
Ctrl key and double-click on the Gun node in the hierarchy. An editor window appears. Change the name to Laser and press Enter. You can use the Ctrl key to rename any dag node.
Ctrl key and double-click on the new page tab. Rename the page to Robot. This new page is empty.
Now you have a special dag node structure dedicated to the robot. All dag nodes remain on the Universe page, but these secondary pages can be used to further structure your work.
| Tip: The ASBD has many features like this that will enhance your work. Be sure to read about them in the Alias Overview manual. |
It's important that you double check your SBD window to make sure that your surfaces are all grouped as instructed. Otherwise, the surfaces won't animate with the skeleton.
To add IK handles and constraints to the skeleton, you don't need to see all of the geometry. It is a good idea to hide these surfaces until you have some motion keyframed onto the skeleton.
 Select Pick Component-. In the option window, turn
 All to Off, then turn Surfaces back On. Click Go.
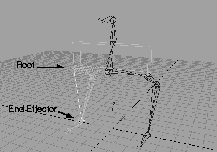
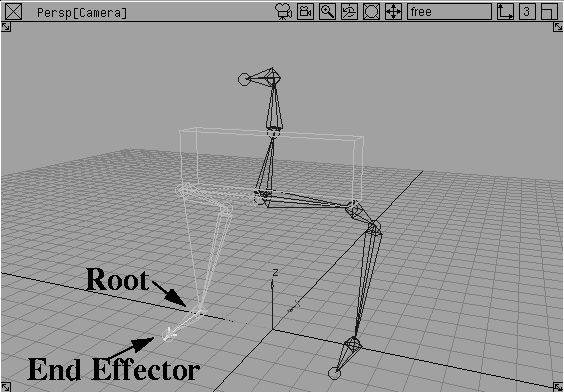
To add IK to the skeleton, you must apply IK handles to both legs and feet. This way you can animate them with point constraints.
Nothing.
 Select Objects Add IK handle. Click on the pelvis joint of the right leg to make it the root of the next IK chain.
You have now applied single chain IK chains to the legs and feet.
A constraint can be any node, such as a curve, object, skeleton joint, camera, light, and so on. This object can then be applied as a constraint to any dag node, including a joint on a skeleton. As a result, the constrained dag node is related to the position or orientation of the pivot point of the constraint object.
There are three types of constraints: point, orient, and aim. Each of the constraint types are used for different reasons, but can easily be combined in a single animation. In this lesson, you will use point constraints on various joints and IK handles.
| Note: It is important to remember that constraints can be applied to ANY dag node. In this lesson you use them only on IK handles and joints. |
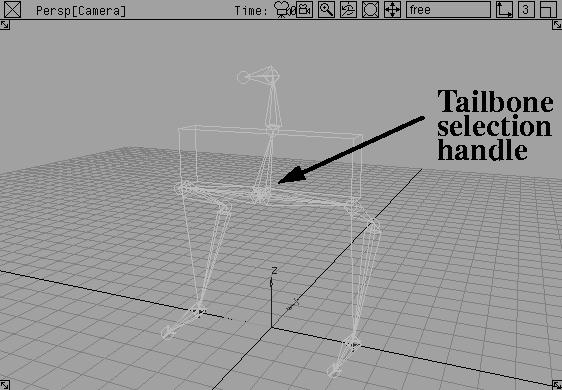
To animate the skeleton's tailbone, you can add a point constraint. While it is possible to simply animate the tailbone joint itself, the use of a constraint lets you animate a more neutral node. This neutral node can have its own hierarchical structure, or it can be removed later.
 Select Pick Joint. With the middle mouse button, click on the tailbone joint of the skeleton. The whole hierarchy is picked.
 Select Object Edit Constrain Create constraint-. Choose the
 Point constraint option and then select create selection handle.
Click Go. It now appears as if the joint has a selection handle on it. In fact, the handle is on a constraint dag node that is only visible in the SBD window.
 Select Pick Object Types Selection handle and click on the tailbone constraint object's selection handle.
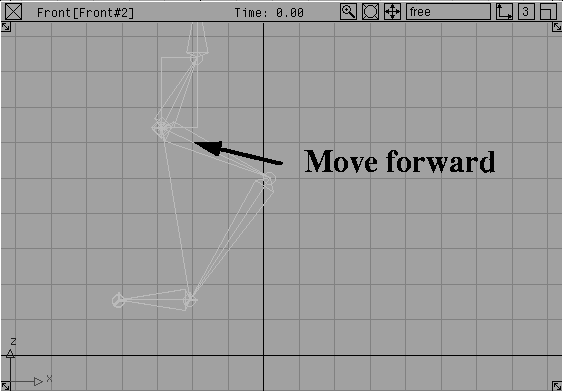
 Select Xform Move. In the Front window, drag the handle forward. The skeleton body moves forward.
| Note: The feet are not yet planted because they are not constrained. You could set keyframes on them, but to make a more useful rotating foot, constraints are needed. |
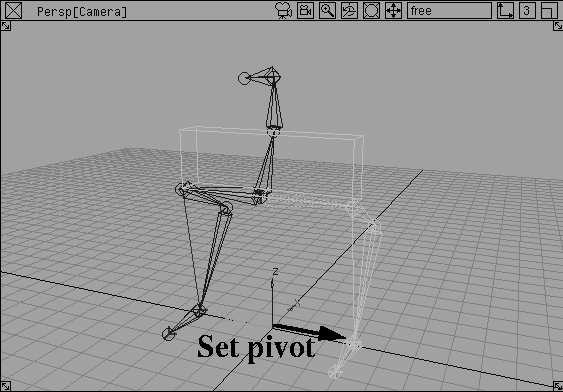
In the last lesson, you planted the sitting man's feet by setting keyframes on the IK handles. While this is fine for a stationary figure, it means extra work for a walking character. To make the two IK handles on each foot act as one piece, you should use a grouped hierarchy of point constraints. By properly setting up the rotation pivot of the group, you will be able to rotate the foot, if it is needed.
 Select Pick IK handle. With the middle mouse button, click-drag over the two IK handles belonging to the left leg.
 Select Object Edit Constrain Create constraint. Two point constraints are created with selection handles on the foot.
 Select Pick Object Types Selection handle. In the Perspective window, click-drag over the two selection handles of the point constraints belonging to the left foot.
 Select Xform Local Set Pivot. Click-drag the pivot from the origin until it lies at the ankle joint of the left foot. You may need to drag in a couple of orthographic views to properly line up the pivot and the ankle joint.
 Select Pick Object Types Selection handle. In the Perspective window, use the middle mouse button to click-drag over the two selection handles of the foot. This will pick the lower constraint nodes rather than the upper grouping node.
 Select Pick Object, and in the SBD window click on the top node of the constraint hierarchy.
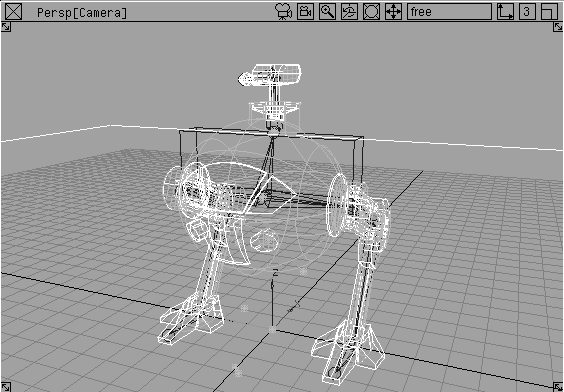
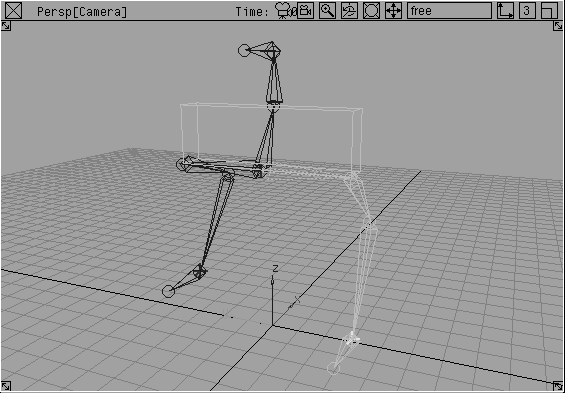
To make sure that the pieces of the robot are properly grouped to the skeleton and that the foot is working properly, you can now test the extremities by moving the IK handles.
 Select Pick Object Types Selection handle. In the Perspective window, click on the handle belonging to the left leg.
 Select Xform Move. Click-drag in the Front window to test the motion on the leg.
If something looks wrong with the robot's geometry and it is not following the skeleton, then it was not grouped properly. Go back to the SBD view and see if the surfaces are grouped in their proper places.
 Select Xform Rotate. Click-drag with the middle mouse button to test the rotation capabilities on the leg.
 Select Pick Component. In the front window, use the middle mouse button to click-drag a pick box around all the surfaces of the robot and the floor surface.
In order to work with the IK handles, it is a good idea to assign them useful names using the information window. If you are going to apply expressions to the nodes, it is also a good idea to use short names that can be easily remembered to make entering expressions easier.
 Select Pick Object Types Selection handle. In the Perspective window, click on the handle belonging to the left foot group.
Information window... Change the name of the handle to
Select Pick Object Types Selection handle. In the Perspective window, click on the handle belonging to the left foot group.
Information window... Change the name of the handle to cons_l to make it easier to type into expressions.
cons_r.
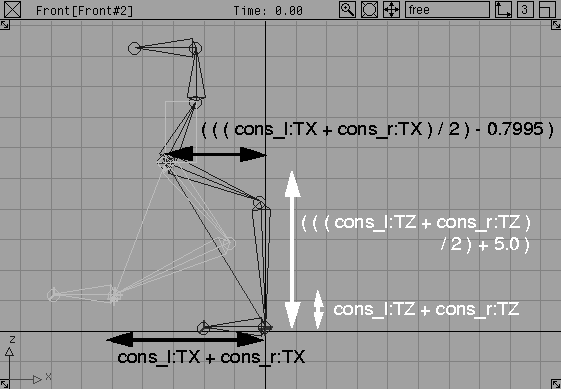
A useful animation technique is to use an expression to animate the position of the tailbone constraint. One expression places the center constraint just in front of the half way point between the two feet, while another uses half of the height of a raised foot to animate the body bobbing up and down.
By handling the motion of the tailbone constraint, these expressions let you focus on keyframing the feet. Although the motion of a human hip is more complex and is not always found at the half way point of the feet, this robot is a little more simple.
 With Pick Object Types Selection handle still selected, use the middle mouse button and click on the tailbone constraint object's selection handle.
constraint.
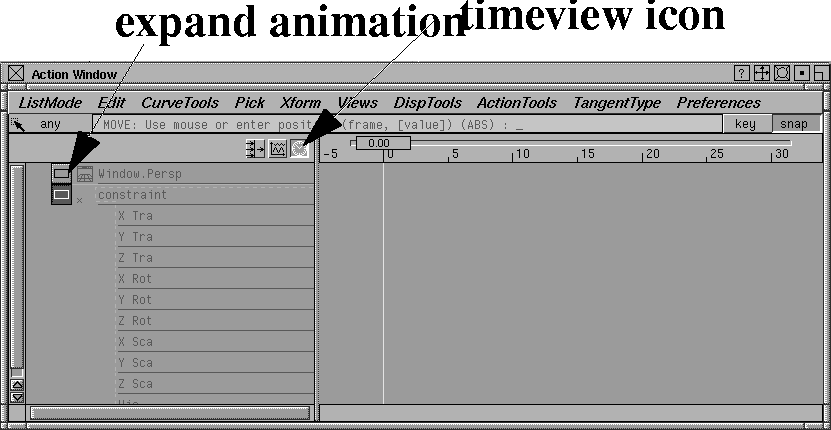
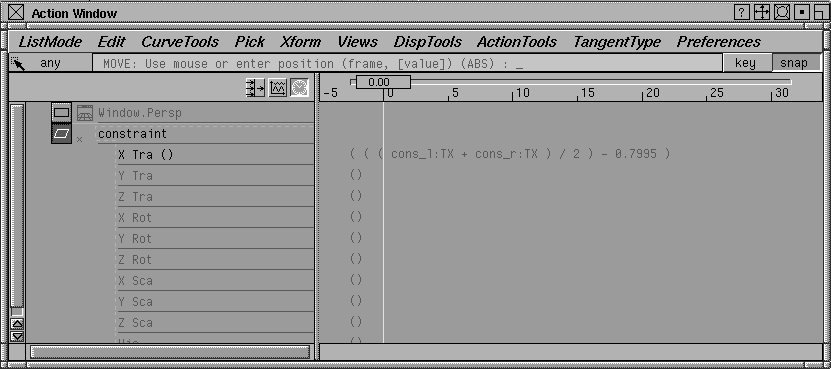
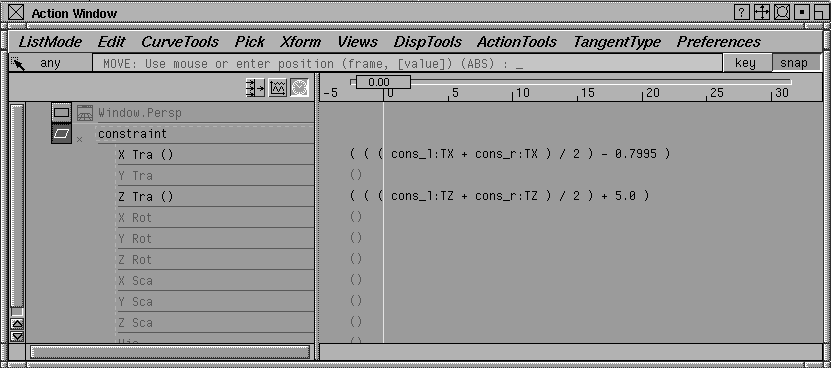
X Tra channel and enter the following:
( ( (cons_l:TX + cons_r:TX ) / 2 ) - 0.7995 )
This expression finds the half way point between the positions of the right and left ankles. The -0.7995 part of the equation positions the tailbone constraint slightly ahead of the half way point of the ankles. The value of 0.7995 was obtained by checking the difference between the X-axis position of the tailbone constraint versus the ankle constraints before adding the expression.
Z Tra channel and enter the following:
( ( (cons_l:TZ + cons_r:TZ ) / 2 ) + 5.0)
This part of the expression adds together the Z translate values of the feet, then adds 5 to keep it above the ankles by this amount. As the feet are each raised individually, the tailbone will bob up and down in response.
Expression Updates, set During Xform to ON. Close this window.
 With Pick Object Types Selection handle selected, use the middle mouse button to click on the left leg's selection handle.
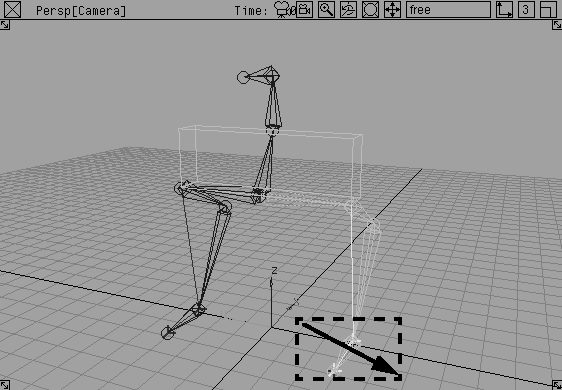
 Select Xform Move, and in the Front window, click-drag to move the IK handle.
As the IK handle moves, the tailbone constraint also moves. You can now focus on setting keyframes for the feet knowing that the tailbone will follow.
To animate the robot walking, keyframes must be set on the feet. You can start by animating the up and down motion of the feet. Then, using a different technique, you can animate the feet moving forward. A simple walk cycle is created and you can complete the cycle using the Action window.
 Select Pick Object Types Selection handle. With the middle mouse button, click-drag over both constraint groups to pick them.
Z Translate channel.
Min/Max and change the current frame to 0.
. Set Parameters to Local, and the In and Out Tangent Types to Linear. Make sure that Frame is set to Current. Click Go.
Keyframes are set for the Z translation of the two ankles.
 With Pick Object Types Selection handle still picked, use the middle mouse button and click on the right foot's constraint group to pick it.
10.
20.
5.
 Select Xform Move. Enter
 r 0 0 1.5 to move the handle up by 1.5 units.
0 10 to copy the keyframes from within this range.
 Select Pick Object Types Selection handle and use the middle mouse button to click on the left foot's selection handle to pick it.
At the prompt, enter 10. This pastes the frames from 10 on.
Playback button on the Time slider. This shows the ankle constraints moving up and down, one after another.
When you are finished, press the Stop button on the Time slider, then click the First Frame button.
To make the robot's feet go up and down a few more times, you could copy and paste keyframes as you did with the bouncing ball in Lesson 16. But, for this lesson, you'll apply a cycle to the two ankles to make the motion continuous.
 Select Pick Object Types Selection handle. With the middle mouse button, click-drag over both of the feet to pick these constraints.
Start/End and change the range values to 0 and 120.
Playback button on the Time slider. This shows the ankle constraints moving up and down, one after another, until the End frame is reached.
When you are finished, click the Stop button on the Time slider, then click the First Frame button.
Next, you keyframe the forward motion of the robot. This time, you'll use the Expression controls window to apply the keyframes using a different technique.
Of course, a more intuitive way to set keyframes is to move the feet in the modeling windows and visualize the results. But, if you like to work in a parameter window, the Expression controls window is a good option. This window is also useful because it bypasses the parameter control window.
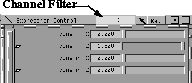
TX in the Channel Filter field.
This removes the Z Translate channels and limits you to the cons_l and cons_r X channels.
0.
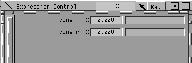
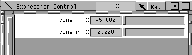
cons_l TX channel name and enter -5 in its field.
cons_r TX channel name and type 0 in its field.
Key button at the top of the control window to set a keyframe on these channels.
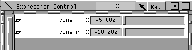
-10 in the cons_r TX channel and click on the Key button to set a keyframe for both channels. (Make sure the channel names are selected.)
20.
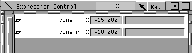
-15 in the cons_l TX channel and click on the Key button to set a keyframe for both channels.
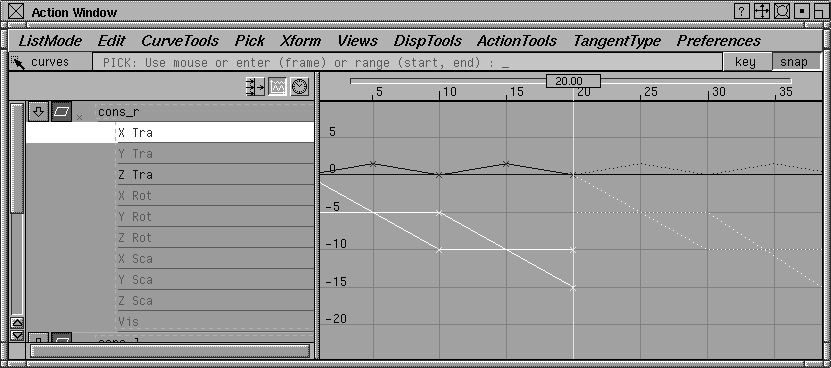
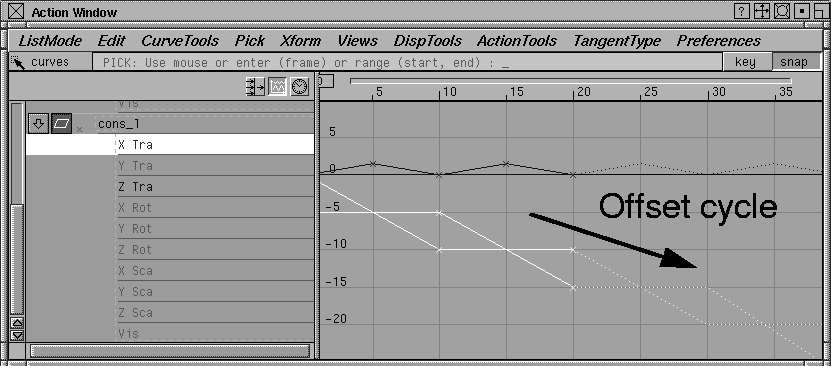
To cycle the forward motion of the robot, you can use a method similar to the up and down motion. This time, you should apply a cycle with offset so that the values of the motion are added to the last part of the curve.
Play.
This cycle shows the feet forward, then going back to 0 when the cycle is complete. In the case of X, the motion needs a cycling that ADDS to the motion instead of repeating it.
Playback button. This shows the feet moving forward without jumping back to 0.
When you are finished, press the Stop button on the Time slider, then click the First Frame button.
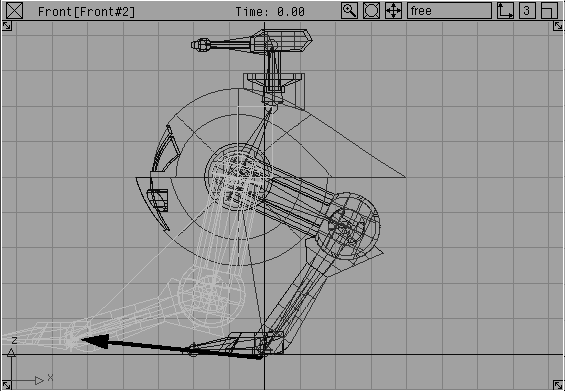
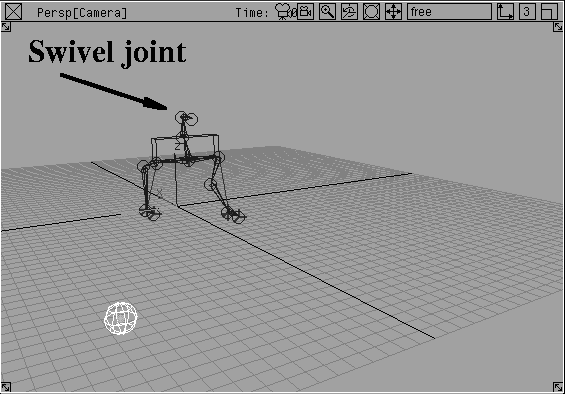
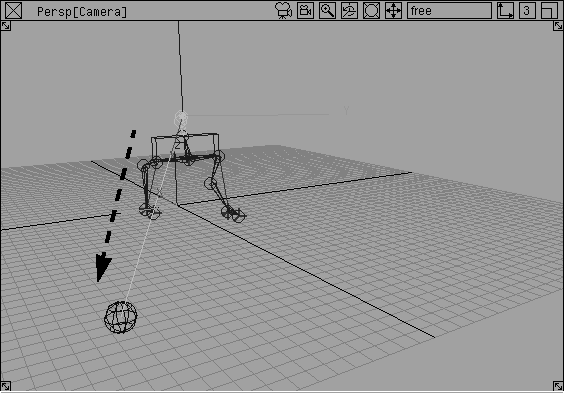
The third constraint type is an aim constraint that makes a skeleton joint point at the constraint object. To learn how this constraint type works, you can add an aim constraint to the gun barrel so that it points at an object in the scene.
 Select Objects Primitives Sphere. Enter
 -32, 15, 5 to place the sphere to the right of the robot's path.
 With Nothing picked, select Pick Joint. Click on the gun barrel's swivel joint (the rear joint, not the front) to pick it.
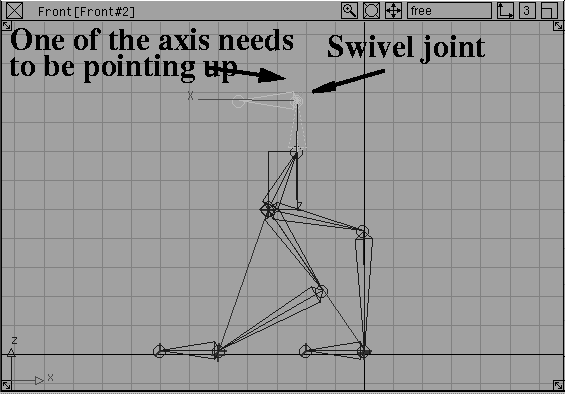
 Select Xform Local Set local axes. You will see that the X axis is pointing out, but no axis is pointing up.
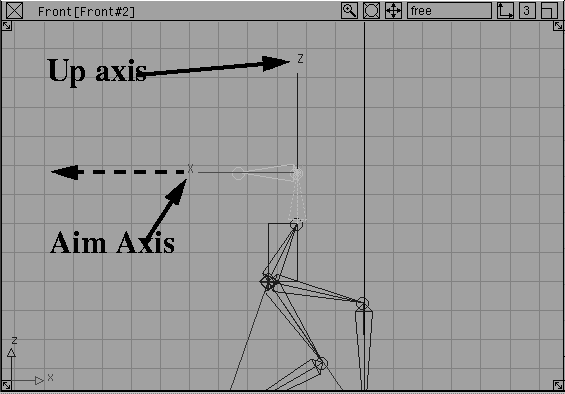
a 0, 0, 180 to rotate the local axes in absolute mode, so the X axis is pointing along the gun barrel and the Z axis is up. The orientation of these axes is crucial to properly setting up an aim constraint, since the Aim and Up axes must be clearly defined.
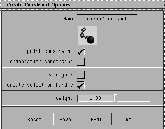
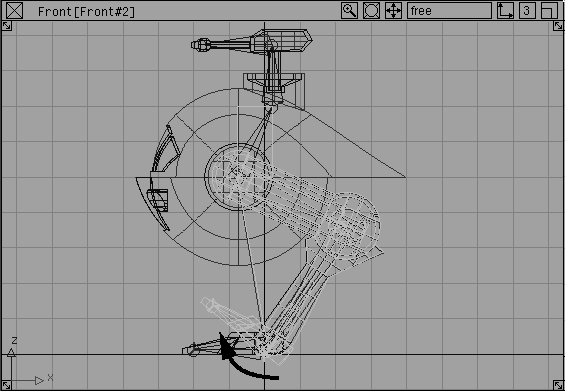
 Select Object Edit Constrain Constrain to -. In the
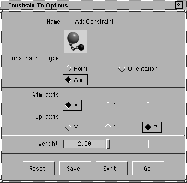
 Constraint to Options window, change the Constraint Type to Aim. Make sure that the Aim Axis is set to X and the Up axis is set to Z.
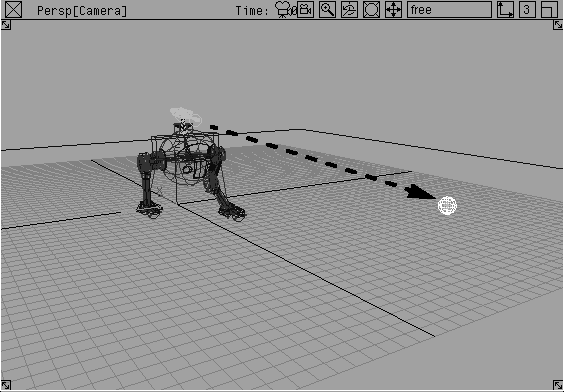
Playback button on the Time slider. The gun barrel joint now points at the ball as the robot walks by.
If you now wanted to move or animate the ball around the scene, the gun barrel will follow it.
Stop button on the Time slider then click on the First Frame button.
Robot_final.
Now that the animation is working, you can render it at a low resolution to see the results. Use the same method for creating test rendered animations as you learned in Lesson 13: Rendering.
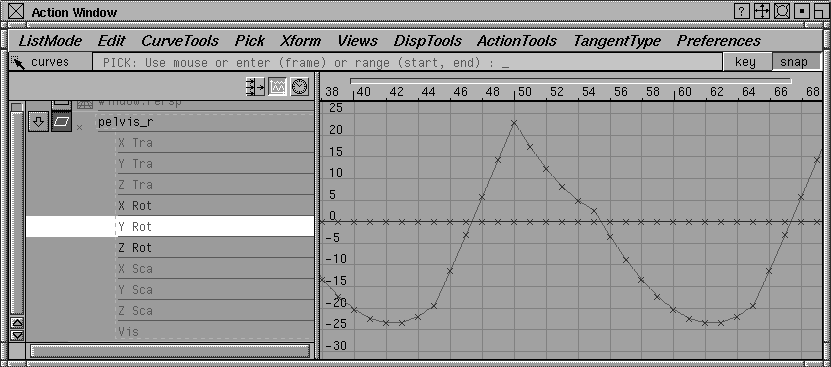
Sometimes after animating a skeleton, you may want to see the animation of all these elements translated into rotation information on the joints. If you do, then you must apply Run IK. By translating the information into rotational information, you can apply more subtle edits to the various animation channels for secondary motion.
 Select Pick Joint. With the middle mouse button, click on the robot's tailbone joint to pick the whole skeleton.
| Note: You did not pick the selection handle because it would have picked the constraint node instead of the skeleton. You must have the skeleton picked to Run IK. |
.
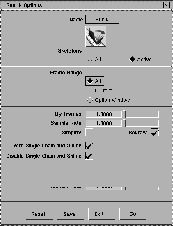
In this window, change the Frame Range to Option Window and the Start Frame to 0 and the End frame to 120.
Next, click on the With Single Chain/Spline IK option. This lets you Run IK on the Single Chain IK chains. Next, choose Disable Single Chain/Spline IK. This means that the IK handles will be turned off after Run IK is applied and the rotation on the joints will take over. If you want to reactivate the IK chains, then you can turn them back on in the Information window...
Click Go. The system computes and then records the animations onto the joints.
Notice that The Y Rotation channel now has keyframes set. Close this window.
 Select Pick IK handle. Use the middle mouse button to click-drag over one of the IK handles to pick it.
Information window.... In this window, open the
Select Pick IK handle. Use the middle mouse button to click-drag over one of the IK handles to pick it.
Information window.... In this window, open the IK Handle Info section. You will find the IK handle has been turned off. Now the rotations on the joints will govern any playback and rendering.
In some cases, you may find that you want to get the animation of the various expressions and constraints not onto the joints as Run IK does, but rather, back onto the IK handles themselves.
To do this you can use a special plug-in called bake. This plug-in can be loaded using the methods outlined in the plug-in manager section of Basic Tools in Alias. After it is loaded, it is placed on the Animation menu.
Robot_final wire file.
.
If you don't see it, go to the Utilities menu and select Plug-in Manager. Scroll down to bake and click the Load Unload checkbox to load the plug-in. Then go back to the Animation menu and select Bake- .
.
Constraints and Expressions. Make sure that Objects is set to All.
Change the Start Frame to 0 and the End Frame to 120.
Click Go and the animation of the constraints and expressions is translated onto the appropriate joints and nodes.
When animating IK skeletons, you can combine IK handles, constraints and expressions for various types of motion. Remember that these tools offer various techniques that in turn, offer different solutions. Constraints will solve certain animation problems, while IK handles alone will solve others. You should try to animate a character using these tools in combination for best effect.
You should also be sure to check all the plug-ins available to you. These include many task-specific tools that will streamline your workflow and help you create and refine animations quickly and more easily.