Now that you have learned how to model, assign shaders, light, animate and render a scene, it would be a good time to review the whole process. This lesson lets you take a simple project from original curves to a rendered animation.
After constructing the sailboat using a variety of modeling techniques, you apply shaders to the various surfaces to enhance the realism of the rendered sailboat. Then, you animate the camera using the Autofly tool before rendering the final animation.
Until now, you have used many tools in isolation to perform various tasks. This lesson shows you how the tasks connect to complete this project. The steps in this lesson -modeling, assigning shaders, lighting, animating and rendering - are typically used to complete Alias projects. Learning to integrate these steps successfully is the key to creating effective visual results.
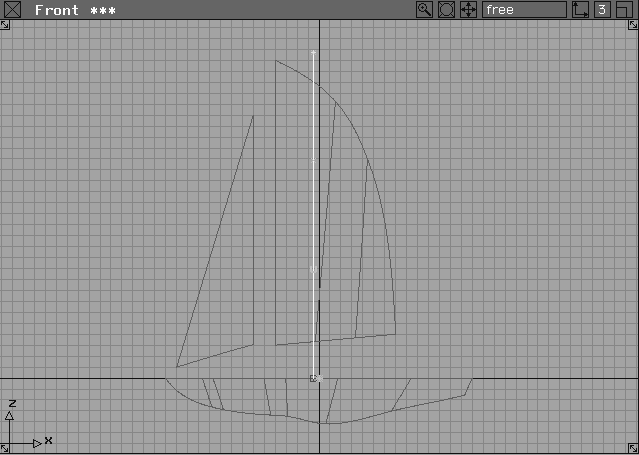
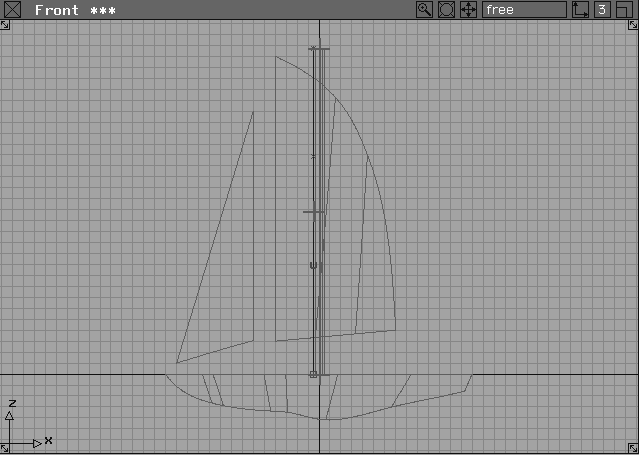
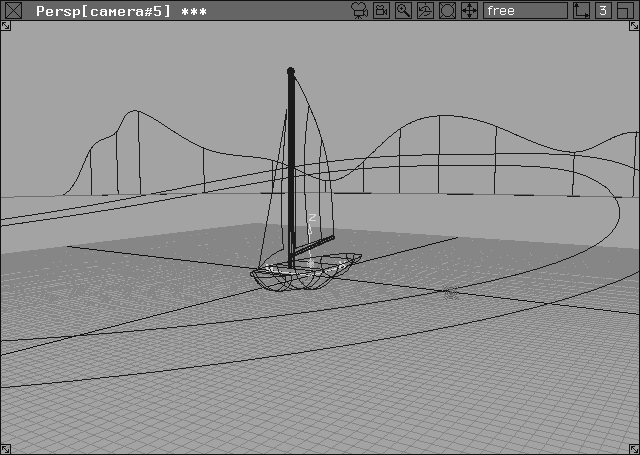
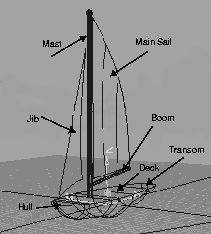
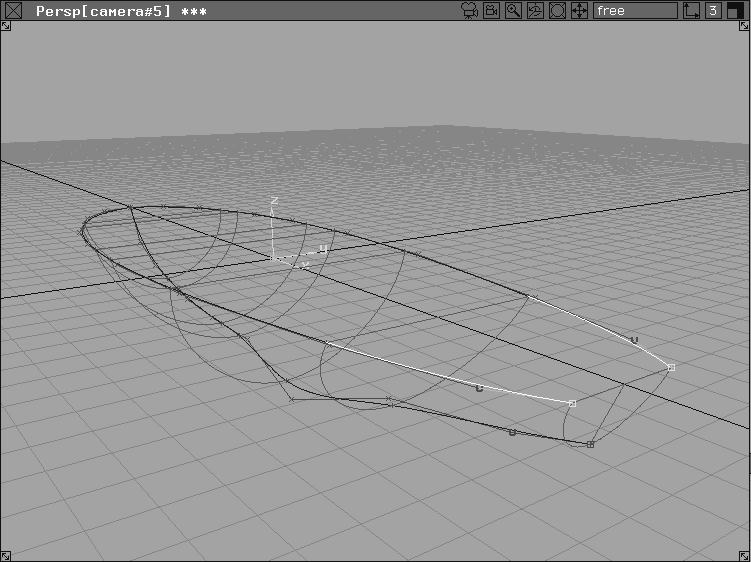
The following diagram illustrates the various parts of the boat you build in this lesson:
In this section, you use the boundary, skin, revolve, set planar and copy tools, among others, to build surfaces from a series of existing curves. The curves have been provided so you can concentrate on surface creation.
To start, you open the wire file containing the objects that will be used in the creation of the entire scene. Each set of curves has been placed on a different layer for convenience, with only the hull curves visible.
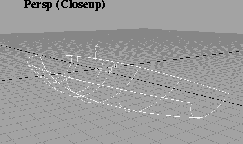
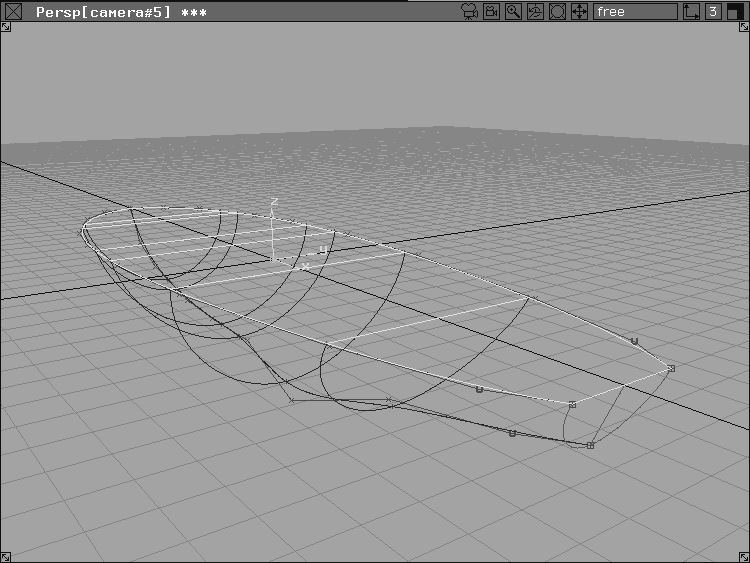
From the File menu, select Open, and select the file L15_SailBoat. The two visible profile curves are for half of the top, and the bottom profile of the hull of a sail boat.
The first piece of the sailboat to build is the hull. It is created by copying one of the existing curves and skinning all the curves together.
Hull Layer button to highlight it as the Construction Layer. The created objects will now be placed on the same layer as the curves.
 Select Pick
  Object. Pick the top curve, as shown highlighted in the Perspective window.
 . Type
 -1 in the Y Scaling field.
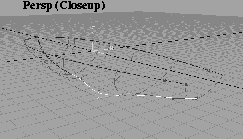
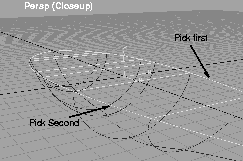
 Select Surfaces Skin-.
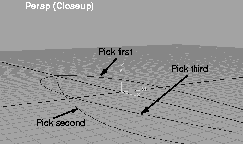
 Under V Knot Spacing, select Uniform and then click on GO. The system prompts you to select the first curve. Pick the curves in the order shown below.
As the curves are selected, the skin surface is constructed. Be sure to Shift-click the last curve to include it in the surface.
If you recall, all surfaces by default use construction history. With construction history you can adjust and reshape your surfaces by editing the CVs of the original construction curves.
 Select Pick Object. Click-drag a pick-box around all the objects on your screen. Since the boat hull was already picked when it was created, it becomes unpicked when the construction curves are picked.
. Choose
Select Pick Object. Click-drag a pick-box around all the objects on your screen. Since the boat hull was already picked when it was created, it becomes unpicked when the construction curves are picked.
. Choose Active under Scope and turn on all the options.
 Select Pick Nothing. Select Pick Point Types CV and, in the Front window, click on one of the CVs on the bottom curve to pick it.
 Select Xform Move. Click-drag with the right mouse button in the Perspective window to move the picked CV down a little. The hull geometry updates to conform to the edited construction curve.
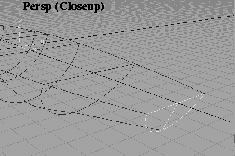
The sailboat's deck and transom are also created with the Skin function. The deck closes off the top of the boat, while, at the same time, creating a second curve for use in the construction of the transom. The transom is also built with the Skin function, using isoparms from the deck and the hull as construction curves.
 Select Pick Nothing. Select Pick Object and drag a pick box around the curves and the skinned surface to pick everything.
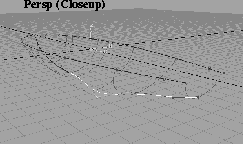
Tumble and Dolly the view to get a better look at the top and back curves of the hull.
 Select Surfaces Skin and click on the curves at the two sides of the deck.
 Re-select Surfaces Skin to stop the construction of the deck surface. Click on the end isoparm of the deck and then the end isoparm of the hull. This results in a second skinned surface that creates the transom. These two surfaces are also created with history.
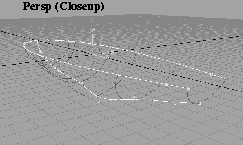
Construction history is used to adjust and reshape your model. Note that you have three surfaces that share either construction curves or isoparms. Since Alias uses multiple levels of history, a change to one level of history (such as a curve) affects all the levels below (such as resulting surfaces).
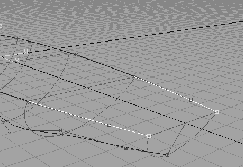
 With Nothing picked, select Pick Point Types CV and click on the two end CVs as shown. Note that you have chosen matching CVs from both sides of the hull.
 Select Xform Nonp scale. In the Perspective window, use the middle mouse button to click-drag a little to the left. The CVs are scaled about the origin and move in a little, as a result.
| Note: The construction history of the model causes the edited CVs to also edit the deck, transom and hull. Only with Alias' multiple levels of history can this be accomplished with a single edit. |
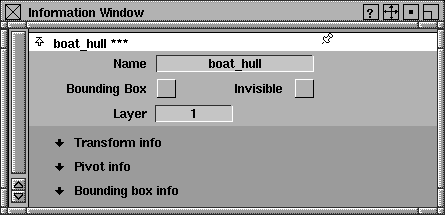
The last step in building the hull is to group together some of the pieces of the boat. Naming the pieces makes them easy to distinguish and pick in the modeling process. Also, by changing the layer to a referenced state, you can ensure pieces drawn so far won't interfere with upcoming modeling procedures.
 Select Pick Nothing, then select Pick Object.
Information window.... This opens a window in which you can rename the active object. Click to the right of the name box, and type in
Select Pick Nothing, then select Pick Object.
Information window.... This opens a window in which you can rename the active object. Click to the right of the name box, and type in boat_hull. Press Enter. When finished, close the information window.
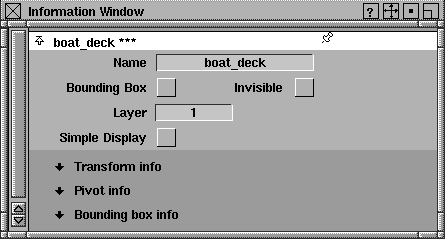
 Select Pick Object, then drag a pick box over the whole model. This action de-selects the hull and its construction curves while, at the same time, picking the deck.
Information window... and name the model
Select Pick Object, then drag a pick box over the whole model. This action de-selects the hull and its construction curves while, at the same time, picking the deck.
Information window... and name the model boat_deck. Close the information window to complete the procedure.
The hull is now completed. Note that you did not build a centerboard (a retractable keel) for the boat, this is because a centerboard would be hidden below the waterline in the final rendering.
| Tip: Avoid building geometry that won't be part of the final image. Otherwise, the renderer takes up time rendering invisible geometry, and you spend more time modeling a potentially complex object that no one will see. |
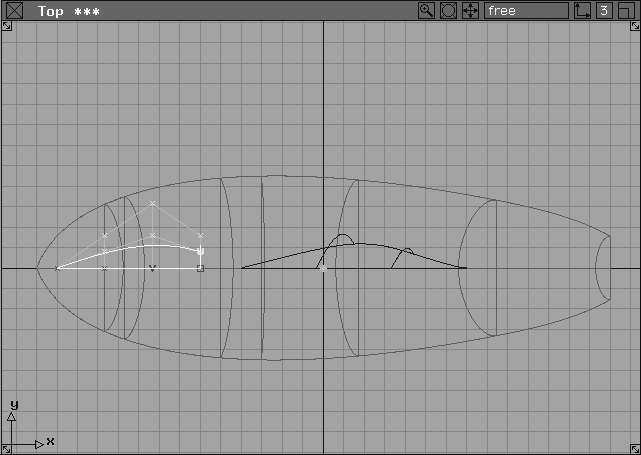
Next, you construct the main sail and the jib, using the 3-sided boundary function to build the surfaces from pre-defined curves. You could use the set face function to build these surfaces, since their final shape is completely flat. By using the boundary function, however, you can simulate the effect of wind in the sails for more realistic results. After creating the two sails, you remove the construction curves (and history) and group them together.
Set state Reference.
| Note: Setting the state of a layer to reference allows the objects on the layer to be seen and snapped to, but keeps them safe from accidental modification. |
Sail Layer button to highlight it as the construction layer.
These curves are used to make the sail. Note how the end points of all the curves meet. To effectively use the boundary command, all curves should touch at their ends.
 Select Surfaces Boundary surfaces Boundary-. Set the Boundary Curves option to
 THREE, and uncheck Create History. Click Go.
| Note: Since you won't edit the construction curves of the sails later, construction history is not needed. |
 Select Pick Object and click on the main sail so both surfaces are active.
 . Click
 All to On. Click Go.
 Close the Control window and select Pick Nothing. Now you see the CVs and hulls of the surface.
 Select Pick Component-. Turn all the options off except
 Curves to limit the picking to curve components. Click Go.
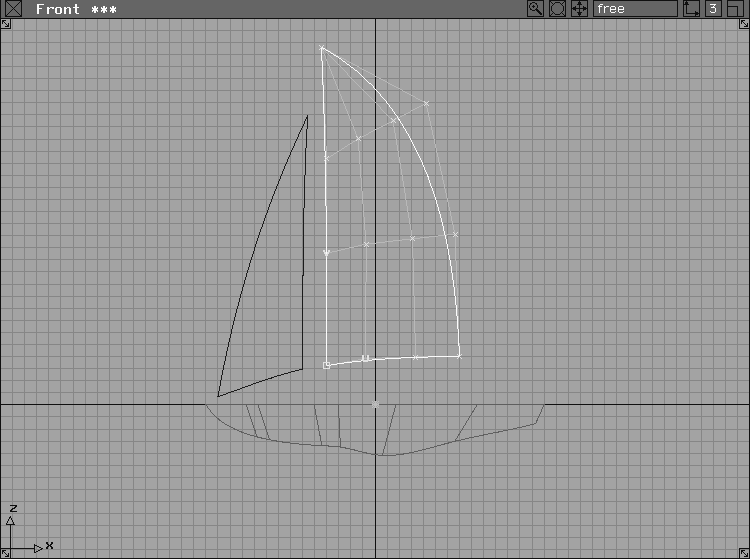
If you were to look at the sails in all three dimensions now, you'd find they are both flat. By modifying the surfaces with the proportional modification tool, you can make them bulge in the wind.
 With Nothing picked, select Pick Object. Click on the large sail.
. The Control window appears. With the
With Nothing picked, select Pick Object. Click on the large sail.
. The Control window appears. With the Scope to All, toggle all the check marks off and press Go. All the object surface controls are turned off. Keep this window open on the screen.
Scope ACTIVE. Turn on all parameters and click Go. Your large sail now has CVs and hulls displayed.
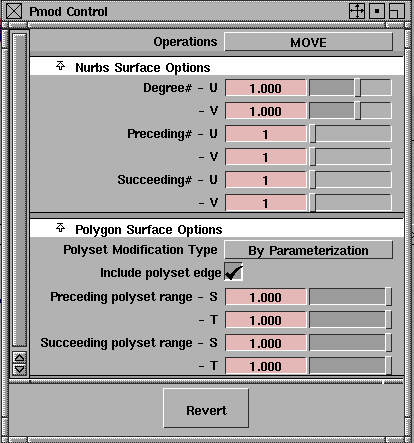
 Select Xform Modify Proportional mod -. Change both
 Preceding and Succeeding U and V values to 1 in the Nurbs Surface Options section.
 With Nothing picked, select Pick Object and click on the jib.
Scope ALL. Check all the parameters OFF and press Go. Choose ACTIVE and recheck all the parameters ON and click Go.
 Select Xform Modify Proportional mod. Click on a CV in the middle of the jib. Click-drag up with your left mouse button in the Top window.
 With Nothing picked, select Pick Object, and make sure that both the main sail and the jib are picked.
Information window... and rename the sail object
With Nothing picked, select Pick Object, and make sure that both the main sail and the jib are picked.
Information window... and rename the sail object Sails. Close the window.
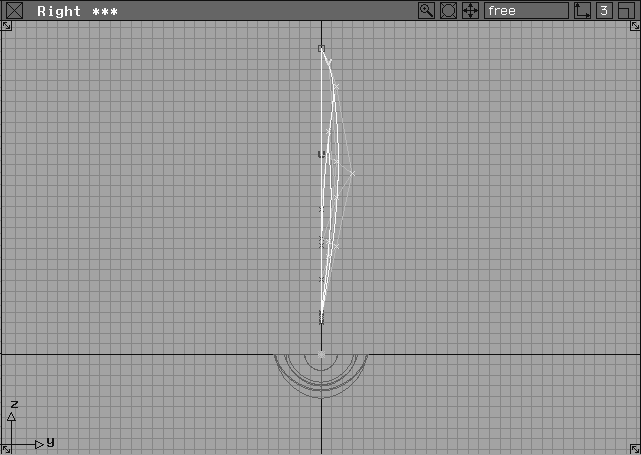
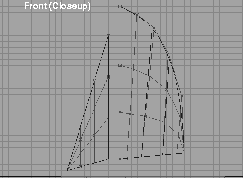
You construct the mast of the sailboat by drawing a simple straight curve, then using the revolve function.
 Select Curves New Curves New curve (edit pts).
-0.20 to place the first edit point. For the second edit point, click with the right mouse button at a point near the top of the main sail. Because you are using the right button, a new edit point is created vertical to the first point.
 Select Pick Object. Click on the curve you have just created to pick the whole curve.
 Select Surfaces Revolve -. Make sure that the Z-axis is selected and that the
 Sweep Angle is 360 degrees. Click Go to complete the mast.
Notice that the curve forming the main mast was placed near the origin. The revolve tool revolves about the chosen axis using the origin as the pivot point. Since the origin is your desired revolve axis, you don't need to adjust the axis.
 With the mast surface still active, select Pick Object and draw a box that extends through the mast surface. This de-selects the new surface and selects the underlying construction curve.
 Select Pick Object and click on the mast surface.
 Select Xform Move. Type "r" in the prompt line to set it to relative mode. Enter
 -2.5 to move the mast along the negative X-axis.
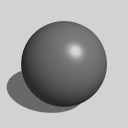 Select Objects Primitives Sphere. In the Front window, click at the top of the mast to place the sphere.
 Select Cameras Look at to get a close up view of the sphere.
  Select Xform Move and move the sphere to a more accurate position
 Select Xform Scale and enter a value of
 0.55. Select Cameras Previous to return to the old Front view.
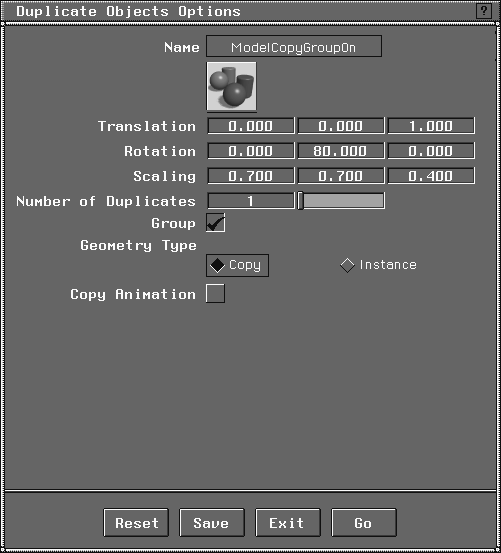
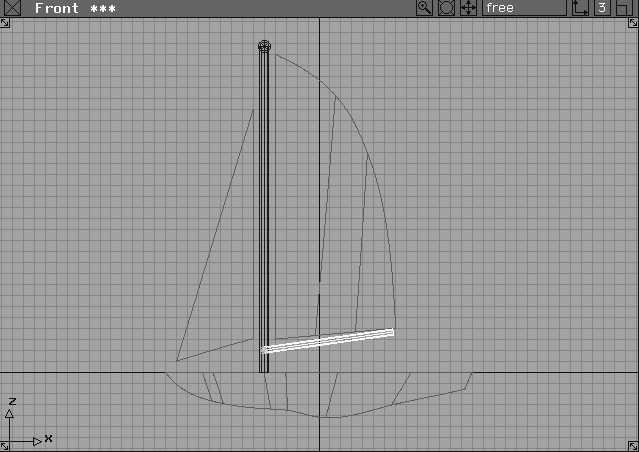
By scaling and rotating the main mast, you can create the boom without having to model it from scratch. By grouping the main mast and the boom together, they will later share the same shader attributes.
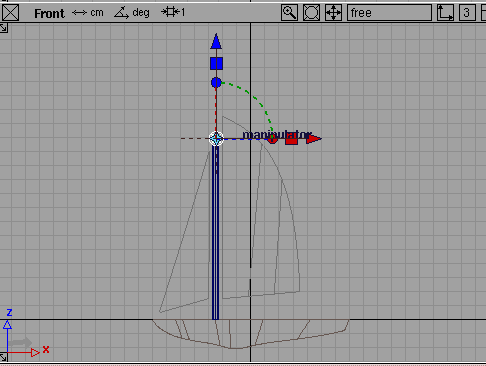
 Select Pick Nothing. Select Pick Object and pick the
 Mast.
. Click on Reset to start with default values.
1 in the Z Translation field.
80 for the Y Rotation value.
X Scaling value to 0.7, the Y to 0.7, the Z to 0.4.
| Note: This illustrates the flexibility of Duplicate. The main mast is copied, scaled, rotated, and moved, all at once. |
 With Nothing picked, select Pick Object, and select the ball, the main mast, and the boom.
Information window... and change the name of the group to
With Nothing picked, select Pick Object, and select the ball, the main mast, and the boom.
Information window... and change the name of the group to Masts.
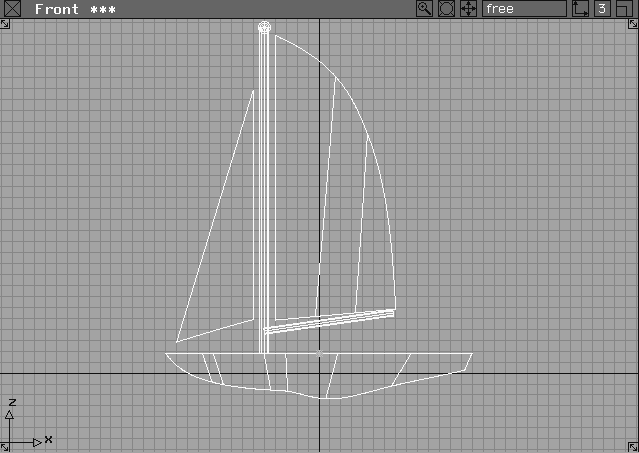
You need to untemplate the sails and the hull to finish the modeling part of this lesson. Move the boat above the ground plane so that the water line lies just below the deck. This is important when the water surface intersects with the boat later.
 With nothing picked, select Pick Template and click-drag a pick box around the sails.
Hull layer pop-up menu, select Set state Pickable.
 Select Pick Object Types All obj/lights to select all objects in the scene.
, and under
Select Pick Object Types All obj/lights to select all objects in the scene.
, and under ACTIVE, turn all options OFF. Click Go. Close the Control window.
 Select Xform Move. Click in the Front window with the right mouse button and click
 YES to remove history.
| Note: Moving the objects deletes construction history on the hull and deck. |
Sailboat01 and click Save Wire.
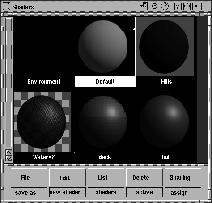
Assigning predefined shaders to the various sailboat parts gives your boat color and texture. You can then create a new bitmap texture shader to apply to the sails.
Shaders. This opens the Multi-lister with the shaders and default environment that were retrieved with the file at the beginning of this exercise.
Next, you assign the shaders by picking objects in the SBD window, selecting preset shaders in the lister and assigning them accordingly.
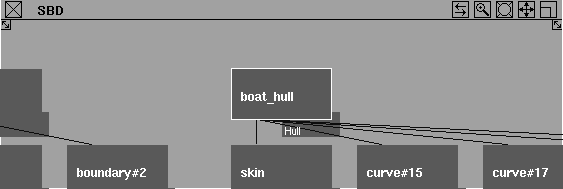
 With the SBD window active and with Nothing picked, select Pick Object, and type in
 boat_hull, followed by the Enter key.
 Select Cameras Look at, and the
 boat_hull object now fills the SBD window.
For the rest of the lesson, you can use the SBD window to pick the objects with shaders assigned to them. Because the objects have been named, they can be easily selected.
boat_hull selected, click on the shader called hull in the Shader Editor, and select Shading Assign Shader from the Shader Editor menu. The hull shader is now assigned to the sailboat hull.
boat_hull node in the SBD window to de-select it. Scroll to the right through the SBD window using the tracking icon in the upper right of the SBD window.
boat_deck node. To make sure that the boat_deck is active, watch for the active objects in the modeling windows.
Assign Shader from the Shader Editor menu to assign it to the boat_deck.
| Tip: If the SBD window view is too large, use the Dolly icon. |
resize button on the top right corner of the Perspective window to expand it to full screen.
| Note: All untemplated and visible surfaces render in the scene with the particular shader color assigned to them. |
| Note: Any surface shaded default blue indicates it has not yet been assigned to a proper shader. Click in the QuickRender window to return to the modeling window. |
Next, you use the Sails shader to create two new shaders: one for the jib and the second one for the mainsail. To do this, you first copy the sails shader and then add a Projection map texture to it. The projection texture lets you project a logo image onto the Main Sail.
sails shader in the Shader Editor.
sails#2 shader appears. It has all the parameters of the original sail shader.
sail#2 shader icon, press the Esc key and enter the name MainSail.
 With Nothing picked, select Pick Component-. In the option box, turn all options off, then click on
 Surfaces. Click on Go.
MainSail shader is picked in the Multi-lister and choose Shading Assign shader from the Editor.
MainSail shader to open the shader parameter window.
Map button next to Color. In the texture window, click on the Solid section to open it. Click the Projection button to open the Projection Editor.
Blur section to open it then change the Blurmult to 0.1.
Map button next to Source Texture. The Projection#2 Source Texture window appears.
Stencil texture, and the Parameter window changes to Stencil#2 parameters.
Stencil#2 Stencil Texture parameters, click the Map button next to Image and choose file from the Surface section of the Texture Procedure window.
Browse button next to Image. In the file lister, choose L15_Logo from the CourseWare/pix directory. Click Use Pix.
Map... button next to Mask and choose File from the Surface section under Texture Procedures.
L15_Logo_mask and click Use Pix. Now you have the stencil masked out to reveal the sail's color below.
Blur section and set the Blurmult to 0.1.
Uwrap and Vwrap. This keeps the logo from being repeated on the Sail like a pattern.
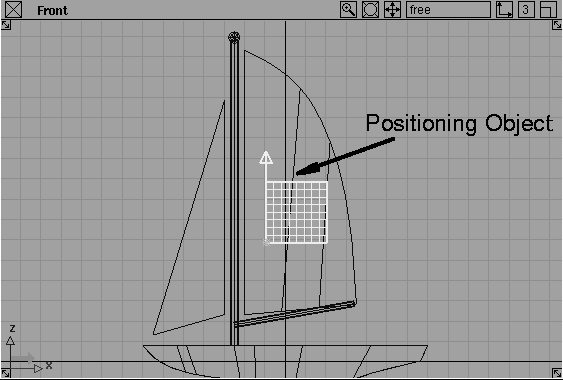
To position the logo onto the MainSail, you rotate and position the texture positioning object. Since a projection mapping technique is used, you must properly align the texture positioning object.
Projection#2 texture in the Shader Editor. At the bottom right, click on the small white outlined cube with an arrow pointing upwards from one corner. A green texture positioning object appears at the origin.
 With Nothing picked, select Pick Object and click on the green matrix at the (0, 0, 0) origin.
 Select Xform Rotate and enter 90, 0, 0 at the prompt line.
 Select Xform Scale and enter a value of
 3. The rotation orients the positioning object so it faces the Main sail while the scaling gives the logo its size. The basic placement of the logo is based on this positioning object.
 Select Xform Move. Back in the Front window, move the positioning object to the middle of the mainsail. It now projects from the Positioning object to the sail in this position.
Projection#2 Editor window, open the 3D placement section. Turn Wrap to Off. This makes sure that you don't get the sail logo repeating on the surface.
component and click on the mainsail.
Projection#2 Editor, click on the Link with Obj. button, so any time you move the sail, the icon will go with it.
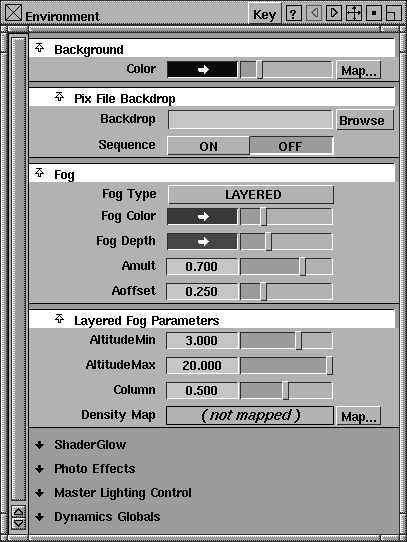
You change the background color of your Environment shader by applying a predefined Ramp Texture as a color map. You can also add a fog effect to the scene. A wire file, containing geometry for the water's surface and mountains in the distance, completes the scene.
Fog section in the Environment Shader Editor.
Layered.
Fog Color. In the Color Editor set the HSV values to: 225.0 (H), 0.100 (S), and 0.25 (V). This determines the color of the fog.
Fog Depth. In the Color Editor, change the HSV values to 210.0 (H), 0.100 (S), and 0.300 (V). This color determines how thick the fog is. The darker the color the thicker the fog. Close the Color Editor.
Amult to 0.700 and the Aoffset to 0.250. This adjusts the color a little.
Layered Fog Parameters section and change the Altitude Min to 3.000 and the Altitude Max to 20.000. These settings determine the extent of the fog in relation to the camera. Now, set the Column setting to 0.500.
Scene Layer, then select Layers Visibility Visible.
The ring of mountains is a simple surface that will appear through the rendered fog as a background to the scene.
| Note: Both the water and the hills have shaders already applied. If you would like to know more about these shaders, open them up in the Editor. |
Sailboat02 and click Save Wire. By saving this file under a different name, you can keep the old version for reference.
Lighting a scene in Alias is similar to lighting a stage or a photography shoot. A number of variables affect lighting, such as intensity, position, number and even color. You can also choose from a variety of lighting models, such as directional and ambient (the default lights in Alias); or point, spot, area, linear and volume lights for more controlled effects. Lights can cast shadows, be linked to certain objects, and create special effects such as glow, fog or halo.
When you QuickRendered the scene earlier to test out the applied shaders, you automatically created two default lights - a directional light and an ambient light. Next, you create a second directional light and adjust its parameters to add a particular mood to your image.
Lights... from the Multi-lister menu. Two default lights appear. You'll leave the ambient light settings and copy the directional light.
Light#2, in the lister.
 Select Xform Rotate, and enter rotation (X, Y, Z) angles of
 0, 0 and 180. This points the light in a new direction to light the back of the sails.
Common Parameters section of the light editor to open it. Now, change the Intensity to 0.5. Since this light is at the back of the scene, it does not need as much intensity.
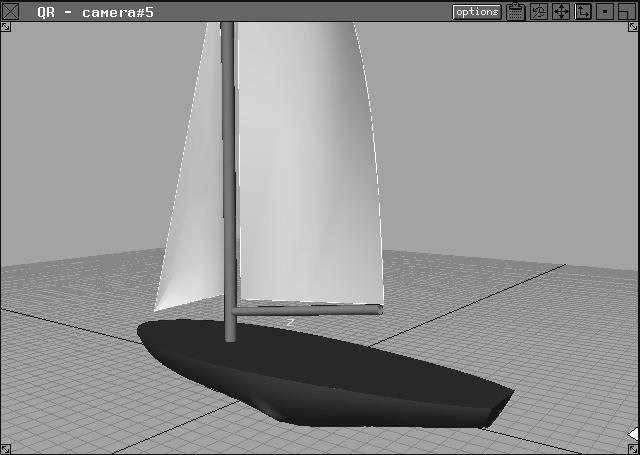
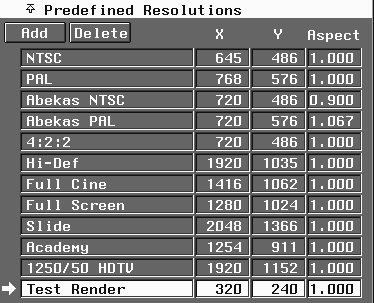
Now that shaders and lights are applied to the scene, you can create a test rendering to evaluate the positioning of textures and the lighting. Because of the fog environment, a RayCast rendering is more appropriate than a QuickRender.
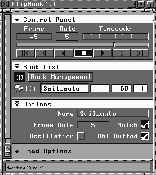
Image File Output section. Under Predefined Resolutions click the Add button.
User Defined box at the bottom of the list and press the Esc key to delete the current name. Change it to Test Render and press Enter.
320 and the Y resolution to 240.
| Note: The X and Y settings above change automatically to reflect these values. |
boat_test and click the Save SDL button.
Render Status.
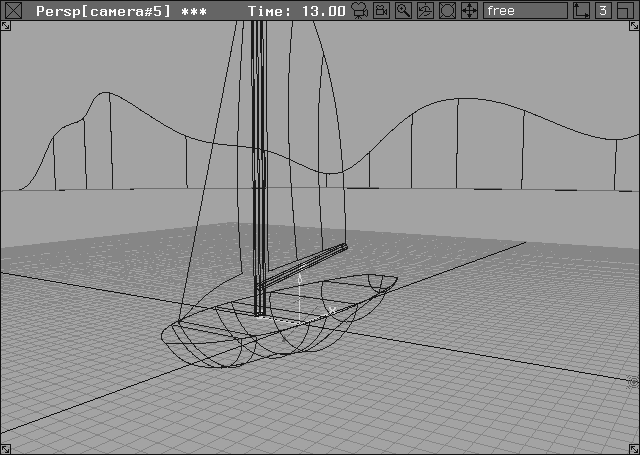
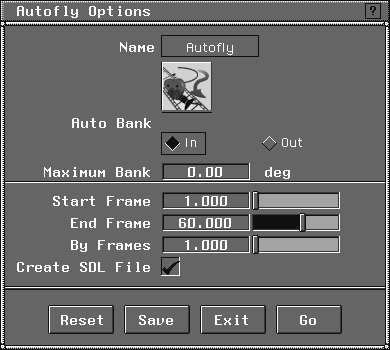
To complete this project, all you need to do is animate the camera with the Autofly function. As you recall from Lesson 14, an Autofly animation lets you assign the camera eye, view and the camera up vector to several motion path curves. This lets you control the animation by how you position the curves.
To create this animation, use two pre-defined curves on an invisible layer to define the Autofly. The layer contains an inner curve that defines the camera view motion, and a larger outer curve that defines the camera eye and camera up vector motions. Once implemented, these curves will take viewers all around the boat.
| Tip: If you were to define a third motion path curve, you could use that to animate the camera up vector independently of the other camera components, giving the camera a banking motion. |
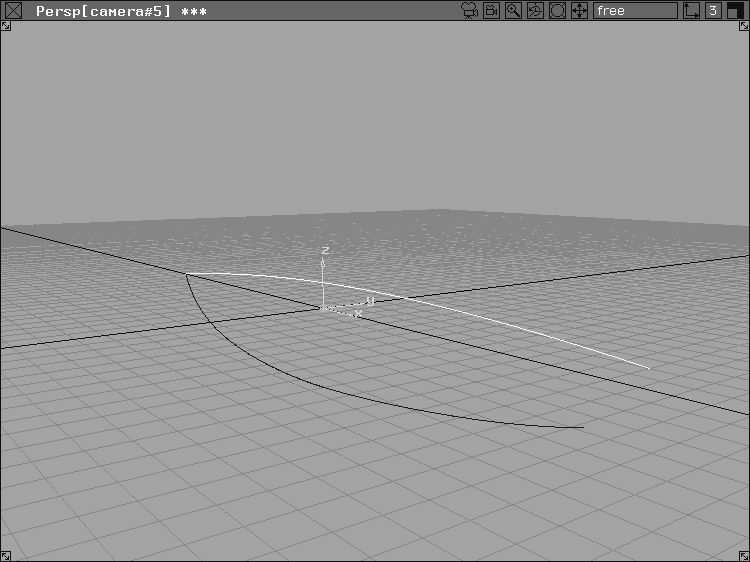
From the Autofly Layer pop-up menu, select Visible. The two curves can be seen in the Perspective View window.
 Select Anim Autofly - from the tool palette, and change the start frame to
 1.0 and the end frame to 60. This makes the animation last approximately two seconds. Make sure that the Create SDL option is turned off. Click Go.
Select the motion path for the camera up vector, or select the Go icon. Click Go, to maintain the default up vector that follows along the motion path.
Esc key or click in any modeling window.
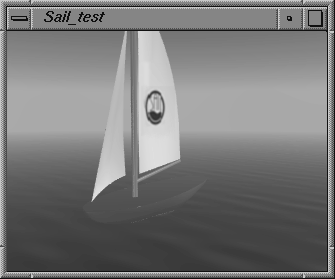
The final step is to render the autofly sequence and play back the results using the Flipbook. Now, you can see the fruits of your labor as all the modeling, shaders, lights and animation become a final rendered piece.
To create a rendered autofly animation, you must first generate an SDL file. As you have seen, you must always create an SDL file to render an image or animation. For Autofly, you first generate an SDL file and then render it afterwards.
 Select Anim Autofly- and leaving all options already set, simply turn
 Create SDL File on.
| Note: By creating an SDL file, not only do you define the geometry, lighting and shading for the scene, but in this case, the number of frames that have been set for the animation, and at what frame rate the animation is to be played back. |
The system again prompts for the curves to be used that define the view and motion of the camera components.
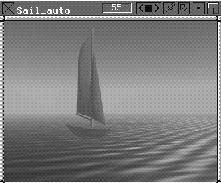
Sail_auto and click on Save SDL. At this point, the autofly sequence plays in your modeling views. You can stop it at any time. The SDL file is automatically created.
The SDL file is used to create a rendered animation. Alias' renderer then renders all of the frames and stores them in the pix directory.
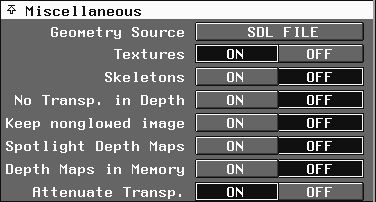
Miscellaneous section, turn Geometry Source to SDL FILE. This tells the system that an SDL file already exists and that you want to render it.
. Click Raycaster under the Rendering Type and then Go. You are prompted for the SDL file to render. Type in Sail_auto and click on Render SDL.
Alias starts to render your animation.
| Tip: Render status was toggled on earlier, so you don't need to select it again. |
| Note: Raycasting takes less time than raytracing rendering, although there are some limitations to the level of reality that Raycasting can achieve. True reflections and refractions are impossible, and shadows can only be cast by spotlights. For this lesson, raycasting is enough. |
You can see the status of the render as it proceeds in the status line. There are 60 frames in total.
Notice that each file has the name Sail_auto, and also has a numerical suffix; for example, Sail_auto.009, Sail_auto.010. Each of these numbered pix files represents one frame of animation. Rendering large numbers of frames can take a considerable amount of time.
| Note: If you had wanted to see reflections in the animation, you could have raytraced the SDL file. This requires more rendering time, but gives you more realistic results. |
To view the animation, use the Flipbook tool.
Sail_auto.001 up to Sail_auto.060. Click on the pix file called Sail_auto.1. Click on Show. This loads the animation files into Flipbook and automatically plays the animation.
Options section, change the frame rate to 5 and press Return. This slows down the animation to 5 frames per second.
Congratulations! You've just completed a full project. By taking an initial model to final playback, you have a good feeling for the typical workflow of a complete project. You can use Alias for a number of projects that range from flying logos to industrial design prototypes. Although the basics are the same, individual project workflows may vary from this one.


 .
.