Fieldstripping the Stoeger .22 Luger, Continued
To Previous Page
8. To disassemble the bolt assembly, use a punch to remove the rearmost
crosspin from the bolt. Be ready to catch the spring that will be
released when the pin is removed.

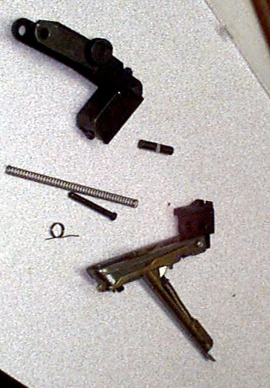
9. The disassembled toggle and bolt. Further disassembly is not
covered here, and should be undertaken with care and great attention to
detail, as the Stoeger has a lot of little pins and springs to lose.
Reassembly
1. Insert the crosspin through the toggle assembly. You will have
to reinstall the spring at this point. The arrows below illustrate
the surfaces against which the spring legs will contact.

2. Force the spring into place, and push the pin the rest of the way
(from underneath) when you have the spring where you want it.

3. The toggle and bolt assembly is ready to be placed in the frame.
Note the draw bar below has a hole in it. This hole mates up with
the projection on the left top of the trigger.
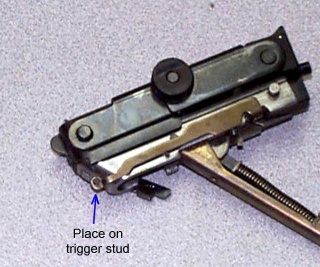
Here I'm pointing to the trigger stud which will hook into the drawbar.
You can also see the screw (which you loosened in Step 5) on the left side
of the frame which will be tightened down to keep the drawbar in place.

4. From here, you can simply reverse the order of disassembly to get
your Luger back together. There really isn't much else to it.
To Previous Page
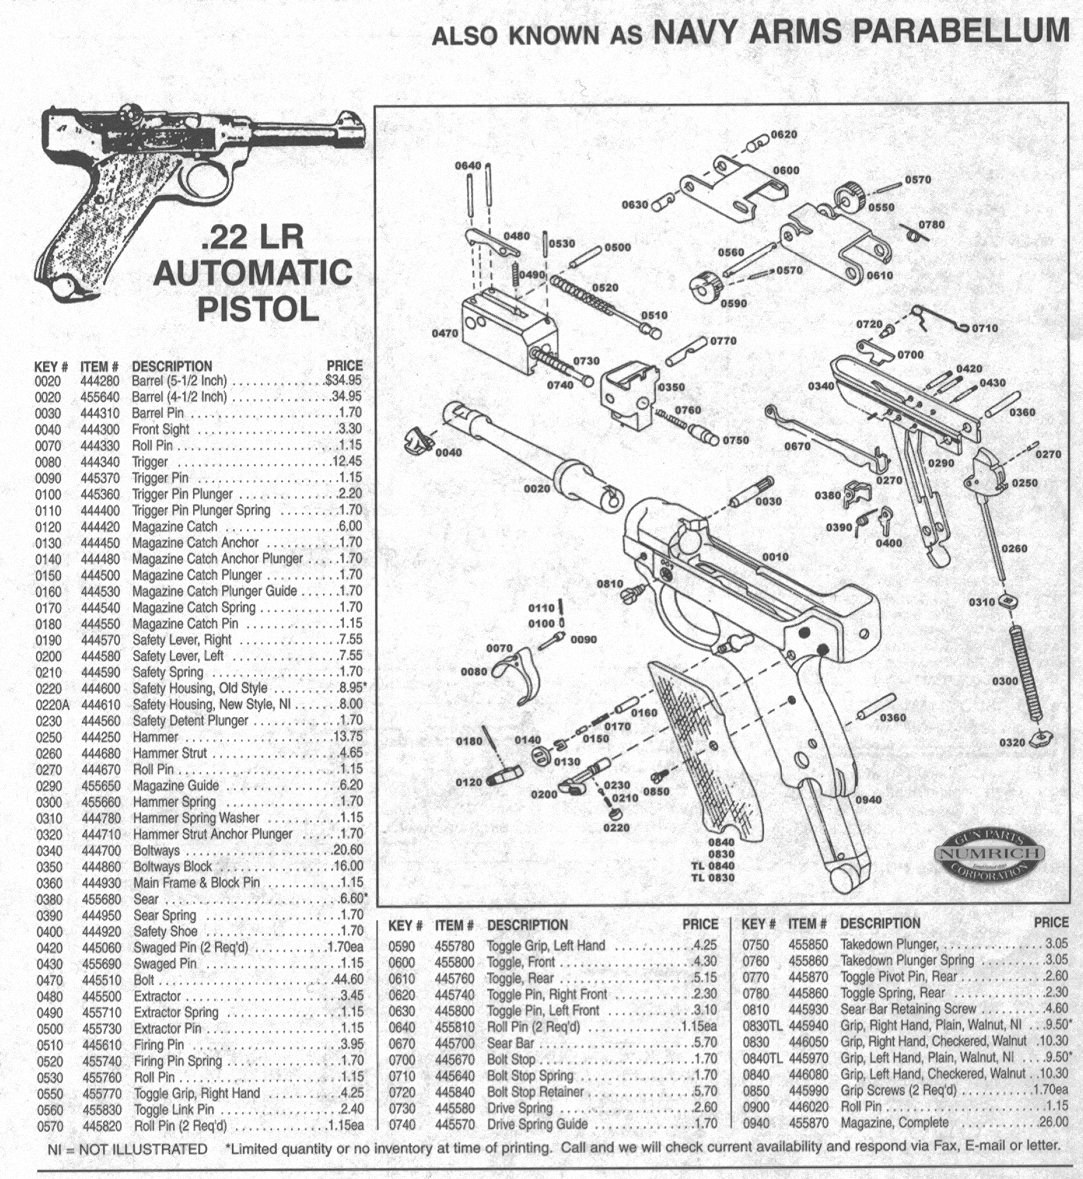
To Exploded Parts Diagram
Back to Stoeger Luger page
Back to Main Page