|
|
   
|
Introduction and Equipment:
Somewhere in Banff National Park - Alberta, Canada Index: Introduction:
Why Cross Country Ski? Cross country skiing is a great sport. It is fun and exciting, and it is the best exercise for your body. Unlike down hill skiing, cross country skiing is easy to learn, and is much cheaper. and you don't need mountains to cross country ski - any where there is snow you can ski. Many cities open up their parks in winter to x-country skiers, so its even possible to get in brief trips after work, or during your lunch break! Anyone who can walk can x-country ski, its really that easy. X-country skiing is a great way to see the outdoors, or enjoy a day in the park. Most ski rental stores rent cross-country ski equipment, and the cost for everything is usually less then $15/day. A lot of x-country ski equipment is available second hand, and you can usually outfit yourself completely for less the $75. Once you own your own equipment the only other cost is the gas to get you to the trail!
Where to learn You do not need an instructor to learn how to x-country ski. After reading this section and the basics section you will know everything you need to start skiing! If you feel uncomfortable trying to learn on your own contact the local ski shop - they should be able to provide you with phone numbers for several groups that can provide lessons. If you choose to learn on your own try starting in a city park. The trail in these parks are usually flat and well groomed. If this isn't possible contact a ski store or club - they should be able to recommend a good area for beginner skiers. To learn you should make sure the area you're planning on skiing in has groomed trails. This means that the trails have had two groves pressed into them. Your skis fit into these groves, which makes it easier to control your skis and makes staying on the trail a cinch!
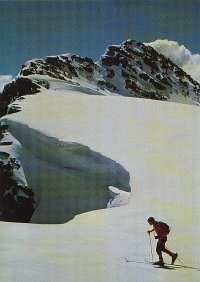
Where to ski: I've already mentioned city parks. These parks are great places to learn, or refresh your skills after summer has passed. Once you know the basics you can head out into the country or mountains. Believe it or not the side of a country road makes a great ski trail - and the scenery can be unbelievable! It amazing how beautiful the scenery can be a measly fifteen minute drive out of the city. Or you can head out to the mountains. Although the terrain is more challenging, the scenery is worth it. Some of the best skiing can be found in national and provincial/state parks. Most of these parks maintain some ski trails. Check your local library for ski guides - these book are a gold mine of information on where to ski.
Equipment: In order to make x-country skiing as pleasurable as possible its essential you get proper equipment. Equipment that doesn't fits right can take all of the fun out of skiing. I recommend that you rent equipment first, as it will give you a chance to try out different styles of bindings, boots and skis. That way you will know exactly what you want when it comes time to buy your own equipment. You will need five pieces of equipment to ski: skis, poles, bindings boots and waxes. Skis: Ski Structure: For obvious reasons picking the right ski is essential, and before you can do this you must understand the ski. The front of the ski (the part that is curved up) is called the tip, the back of the ski is called the tail. Some skis are wider on top then they are one the bottom. This is called side cut - a small amount of side cut is desirable, but too much can make turns difficult (its very rare that you'll find a ski with too much side cut). Some skis may have metal edges, but these are not required by most x-country skiers. If you look at the ski from the side you will notice that it has two curves in it. The first curve is continuous from tip to tail. This curve gives the ski flexibility. The second curve is in the middle of the ski, and forms a small pocket. This pocket is where grip wax is placed, and is essential for the operation of the skis. Ski Length: The first step is to get a ski that is the right length. As you can see in figure 1 (below) your skis should come up to your palm if you extend your hand over your head. This will insure that your skis have enough floatation to keep you from sinking in soft snow.
Figure 1: Proper length of cross-country skis and poles. Ski Stiffness: The next step is to make sure the skis are built for a person of your weight. If your skis are to flexible or too stiff they wont work. Remember the wax pocket I talked about in the first paragraph on skis? Your ski has to be rigid enough that this pocket will not be in contact with the ground when you stand on both skis, but the ski must be flexible enough so that the pocket will be in contact with the ground when you put your weight on one ski. To test stiffness take a piece of 8-1/2" X 11" paper and place it under the wax pocket of the ski. Stand on both skis and have a helper pull the paper from underneath the ski - if it's pulled out easily the ski is stiff enough. Now put the paper back under the skis, and stand on one ski (hold your other leg in the air). Have your partner pull on the paper again - if the ski is designed properly your partner will not be able to pull the paper from under the ski. If both of these tests work then your ski has the appropriate level of stiffness. Wax or Waxless? I haven't covered the topic of ski waxes in depth yet, but you need to know some basics before you buy your skis. Waxes are used at allow your skis to stick to the snow. This is important, as its very difficult to move forward if your skis just slide on the snow. The only problem with waxes is that you much match the type of wax to the temperature of the snow (which isn't as easy as it sounds) Because waxing causes some problems ski companies have developed "waxless" skis, which means that they have been designed to work without wax. These are good skis to learn on, as they reduce the number of things you have to worry about. Unfortunately they only work with certain snow conditions. Waxless skis work poorly on compacted snow, and don't work at all in powder. I'd recommend renting these for your first time or two out, but I wouldn't recommend buying them. Waxed skis are much better - by changing waxes you can make your skis work perfectly on any type of snow. Ski Type: There are two types of x-country skis commonly used by cross-country skiers. Light touring skis are narrower and have no metal edges, whereas touring skis are wider and have metal edges. Light touring skis are the best to learn on, and most people never need anything more. The first skis you buy should be of this type. These skis are best for groomed trails, and for minor off trail skiing. Touring skis are more expensive and require stiffer bindings. They are wider then light touring skis and have metal edges. This allows you a greater degree of control off trail, but it makes traveling on groomed trails more difficult. Touring skis should only be purchased if you are planning on making long trips off trail, or skiing on terrain with many large hills. Poles: It is also important that you pick the right poles. First you must get poles of the proper length. As you can see if figure 2 (above) poles should extend from the ground to your arm-pit. Poles are usually made of either aluminum or bamboo. Bamboo poles are cheap and light. Unfortunately they are easy to break, and form dangerous edges broken. Metal poles are more expensive, but they are more durable and tend to bend instead of break. Some of the fancier metal poles can be screwed together to form avalanche probes. Make sure your poles have safety straps attached to the handles. Straps that can be adjusted are best, but are not necessary. On the bottom of your poles there will be a point and a basket. The point keeps the poles from moving when they are pressed into the snow. The basket keeps the pole from sinking too deep into the snow. If your buying second-hand poles there are several things you should check. First look at the poles to see if they're bent. If they are bent, even slightly, don't buy them! Next, check the points to make sure they're not bent, and also make sure the baskets are not damaged. Finally make sure the handles are snuggly fit to the poles and that the safety straps are undamaged. Bindings: There are four common types of bindings available today. The bindings are what hold your boot to the ski. Picking the proper binding can be as important as picking the proper ski. Some types of bindings are "automatic" which means you can step in and out of them with little effort. These bindings are convenient, but tend to be heavier then "manual" bindings. There is no other significant difference between manual and automatic bindings. Automatic bindings are available with all binding types except the "telemark" type of binding. Below are summaries of the main types of bindings:
SNS - Salomon Nordic System: These bindings are excellent for light touring skis. They are easy to use and provide sufficient support for groomed trails and moderate off trail skiing. These bindings do not provide enough support for steep down hills or serious off-trail skiing. These are one of the most common bindings, which makes finding boots that fit much easier. NNN-II - New Nordic Norm: These bindings are almost identical to the SNS system. Some people consider them to be more reliable then the SNS system, although I've noticed no difference. Like the SNS system these bindings are ideal for light touring skis, but are not good for serious off-trail use. This system is a little better for off-trail use then SNS, as they are more rigid. Besides this one point they are no better or worse then the SNS system. NNN-BC - New Nordic Norm Back Country: These bindings are the binding to use on touring (edged) skis. They provide enough stiffness for hard, off-trail turns, but are light enough for regular trail use. These bindings combine the easy of use of the SNS and NNN-II systems, but provide the level of control necessary for serious off trail travel. There only drawback is weight, which makes them a poor choice for light touring skis. Telemarking: These are an even stiffer binding then the NNN-BC. They are actually designed for a different type of skiing, but they can be used on edged touring skis. Unless you also telemark ski you should avoid buying these bindings. Boots: A good ski boot will fit like a good shoe. It should be comfortable to wear, and should not rub. When fitting boots wear a thick pair of socks, as this is what you'll be wearing when you ski. Many people have purchased a good pair of boots just to find at the trail head that they cant fit warm socks and their feet into them! Make sure to get the right kind of boot for your bindings - SNS boots wont fit an NNN-II binding, NNN-II's wont fit NNN-BC's and so on. If you are planning on doing most of your skiing on groomed trails buy flexible boots. If you are planning on skiing off-trail a lot buy a stiffer boot. High-topped boots are best as they give you good ankle support. Waxes: In order to be able to apply and remove waxes you need three things: a scraper, a cork and the waxes. Luckily for the beginner most wax companies make a starter kit which comes with the cork, scraper and a good selection of waxes. It's best to use waxes from one company, as mixing waxes has been known to lead to unexpected results. See the waxing section in the basics section for information on how to select and apply waxes.
|
This Page Copyright (2004), Knights of Dionysus
Authored by: Bryan Heit