Step 1: Models of Real World Objects
1. You can create shapes, by defining formulas, to act according to industry design rules, codes, or principles as they relate to real world objects.
Step 1: Models of Real World Objects
|
1. You can create shapes, by defining formulas, to act according to industry design rules, codes, or principles as they relate to real world objects. |
Step 2: ShapeSheet Spreadsheet |
2. Each shape within Visio has its own values that define its behavior and characteristics. These values are contained in the ShapeSheet spreadsheet., which acts as the property sheet for a shape. Each time you modify or edit a shape, these values get recalculated and adjusted. |
Step 3: ShapeSheet values |
3. The values that you assign to a shape are controlled by formulas. These formulas, in turn, control attributes such as a shape's positioning (rotation, horizontal or vertical "flip"), fill color, pattern, or line weight, text (font and format), control handles, connection points, and custom properties. |
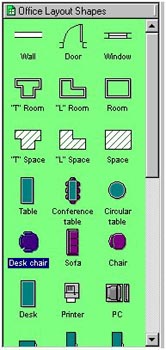
Step 4: Integrating data
|
4. Since you want your shapes to model real world objects, rarely are objects just standalone items. For example, when preparing an office layout, a desk isn't just a piece of equipment sitting in a cubicle. Doesn't it usually belong to someone? And that someone has a name, department number, phone extension, etc. By using the custom properties of a shape, you can integrate valuable and useful data into your shapes. |
 Proceed to the Next Page!
Return to the Previous Page!
