Step 1: New Stencils
|
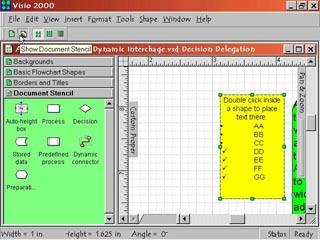
1. The first button on the left of the toolbar is the New Stencil command. Click this to create a new blank stencil that you can drop selected shapes on for later use in other drawings. The Show Document Stencil command to the right of the New Stencil command automatically groups together all the shapes and connectors being used in the currently open document on to one stencil for easy reference.
|
Step 2: Stencil Views
|
2. The remaining three buttons are the stencil view toggles. How a stencil appears depends on which of these three is active.
|
Step 3: The Icons and Names
|
3. The Icons and Names toggle displays both a thumbnail of the shape and its assigned name under it in the stencils.
|
Step 4: The Icons Only Toggle
|
4. The Icons Only toggle displays only the thumbnail of a shape without a name.
|
Step 5: Names Only Toggle
|
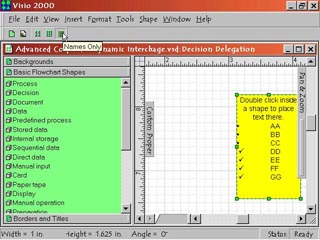
5. The Names Only toggle lists the names of shapes without the thumbnail showing the shape.
|
 Proceed to the Next Page!
Return to the Previous Page!