Page 17 - The Developer Toolbar

Step 1: For Experienced Users

1. The Developer Toolbar provides access to some of Visio's most advanced features. These features give Visio its unique flexibility and its most outstanding abilities. They give the ability to incorporate programs, functions, and controls and even control spreadsheet functions through the shapesheet properties of shapes.

Step 2: Macros and Visual Basic

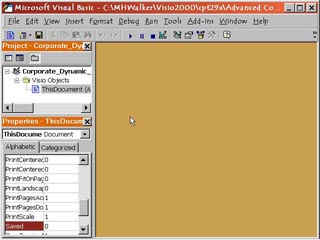
2. The first button on the left is Run Macro. When a shape has had a macro associated with it through the Tools menu, this button will run the macro when the shape is selected. Right of it is the Visual Basic Editor control. Click this to bring up the built in Microsoft Visual Basic Editor in a new window with the Visio drawing already loaded for programming.

Step 3: Control & ShapeSheet Buttons

3. Third from left is the Insert Control button. Click this to open the Controls dialog box. From the dialog box you can choose form a very large list of Active X controls that can be added to a drawing. These are usually linked through Visual Basic programs. The fourth button from left is the Show ShapeSheet control. Click this to open the ShapeSheet workspace under the drawing workspace. Shapes in Visio are written and run as a spreadsheet. The ShapeSheet workspace gives access to modifying the shape's code.

Step 4: Design Mode Toggle

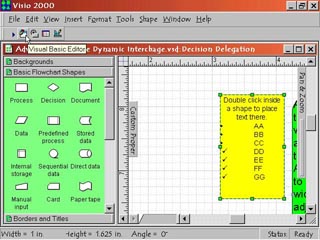
4. When you add a control, macro or program function to a drawing, the Design Mode toggle will automatically activate. This prevents program errors from the controls, macros and functions that are incomplete until linked with other information or functions within a program. If you switch Design Mode off before the various controls, functions and macros are properly connected, the resulting errors may cause the offending functions (et all) to be dropped from the drawing.

Proceed to the Next Page!

Return to the Previous Page!

Hosted by www.Geocities.ws

1