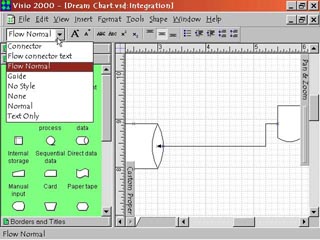
Step 1: Text Style and Font Sizing
|
1. On the far left of the Format Text Toolbar is the Text Style text box. Click the pop down menu arrow on the right to view the format style selections. The choice of style will affect both the selected textbox object on the page and the text within the textbox. The two buttons to the right are the Increase Font Size and Decrease Font Size commands. Click these to change the font size of selected text. The font size will change (larger or smaller) to the next available size.
|
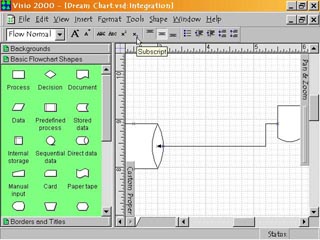
Step 2: Special Font Effects
|
2. The group of four buttons to the right of the Font Sizing buttons does special effects on the selected text. Strikethrough puts a line through the center of the words. Small Caps converts lowercase text to uppercase letters slightly smaller than the capitalized letters. Giving you all capital letters in two sizes. Superscript lets you add superscripted letters and numbers to your text. Subscript lets you do the same with subscripted letters and numbers. Both are very useful for math and science formulas.
|
Step 3: Vertical Alignment Commands
|
3. The next three buttons to the right are the Align Top, Align Middle and Align Bottom buttons. Select text and then click these to align text within a text box or on a page vertically.
|
Step 4: Paragraph Format Commands
|
4. The last five buttons on the toolbar's right side control paragraph formatting. Bullets indents and puts bullets in front of selected lines of text. Decrease Indents moves selected text to the left. Increase Indents moves selected text to the right. Decrease Paragraph Spacing decreases the distance between selected paragraphs or within a selected textbox. Increase Paragraph Spacing increases the distance between selected paragraphs or within a selected textbox.
|
 Proceed to the Next Page!
Return to the Previous Page!