Aoyama Feathers
African Guineas
Aoyama Feathers
African Guineas
|
|
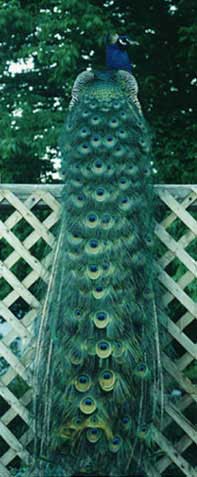
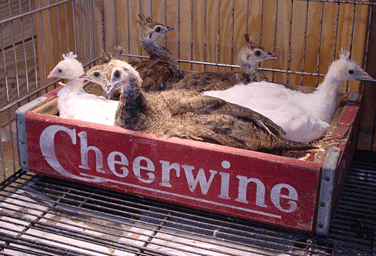
Peacocks India Blue Peacock, Liberty, inspired me to start raising baby pea chicks. Peacocks do not have tail feathers like these until they are a few years old. Only the males have these beautiful trains. These fine feathers are shed at the end of each mating season and each year finer, longer and a more spectacular set of feathers emerge. Usually, the male with the finest feathers is the only successful breeder of the bevy of pea hens. |
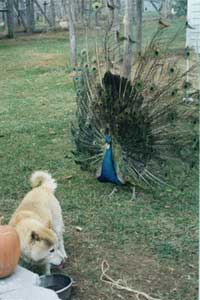
One of their favorite foods is dog food. Often, the peacocks chase the older shibas away from their food and steal the special treat.
|
|
||
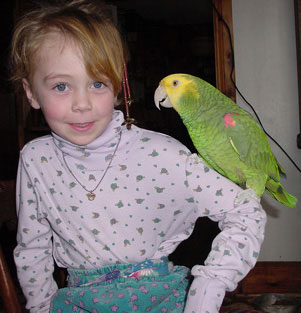
Fiona
and Pesto
 .
.
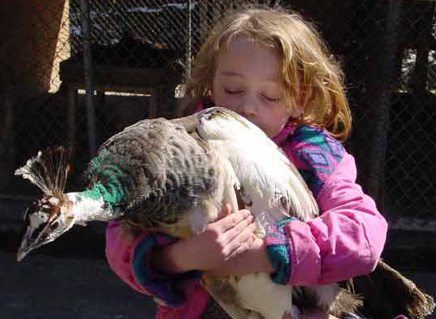
Pesto is a Double Yellow-headed Amazon Parrot who has resided at Aoyama since he was a baby chick. Now seven years old, Pesto has learned an extensive vocabulary from his Mistress, Fiona, who is 7.
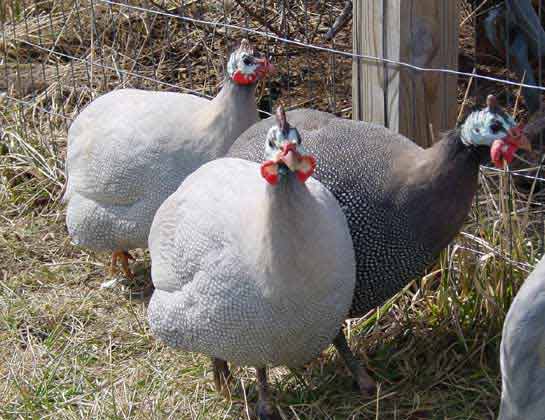
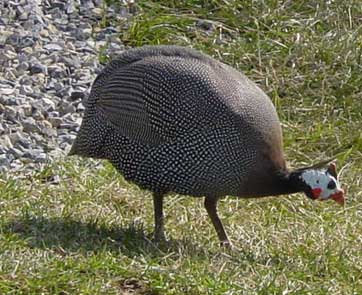
| At right- Sharky, a young African Lavender Guinea, can be distinguished from the other males by the red and white pattern on his waddles. Guineas males have larger waddles than their female counterpart, pictured below, and also bigger "helmets" on their heads. |
|
 |
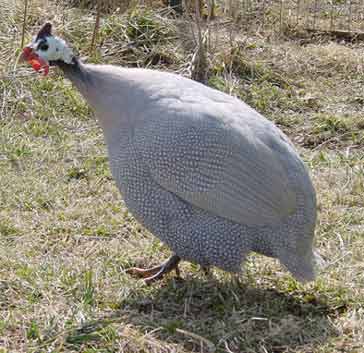
On left-Only Female Guineas make the sound "Buckwheat, buckwheat". This young female Pearl Guinea is searching for bugs, the basic and preferred diet of these entertaining birds. Guinea raisers often remark at the notable decrease in insects once they are introduced to an area. |

Red Golden Pheasant, Raamses
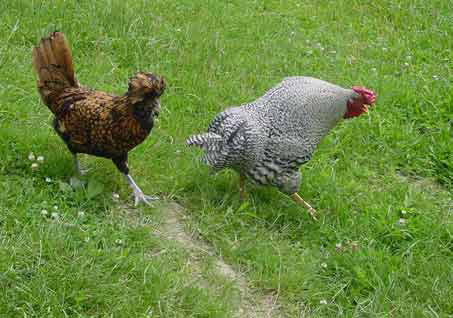
A loving and attractive couple, Toso, a Dominique Rooster with his mate, Sally, a Golden Laced Polish.
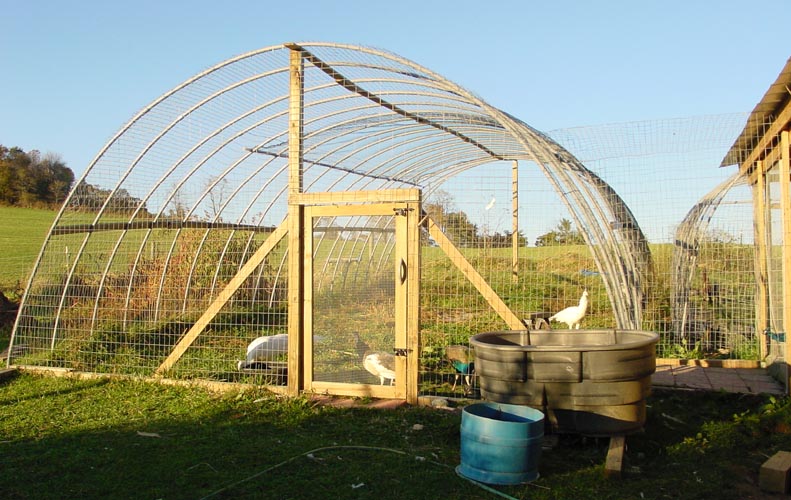
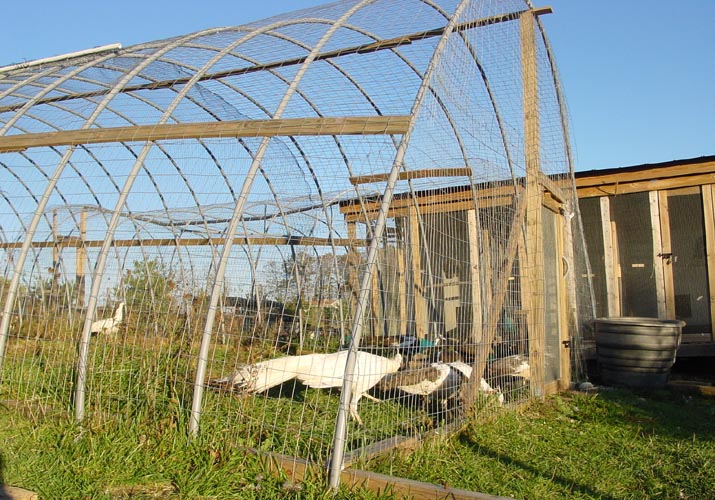
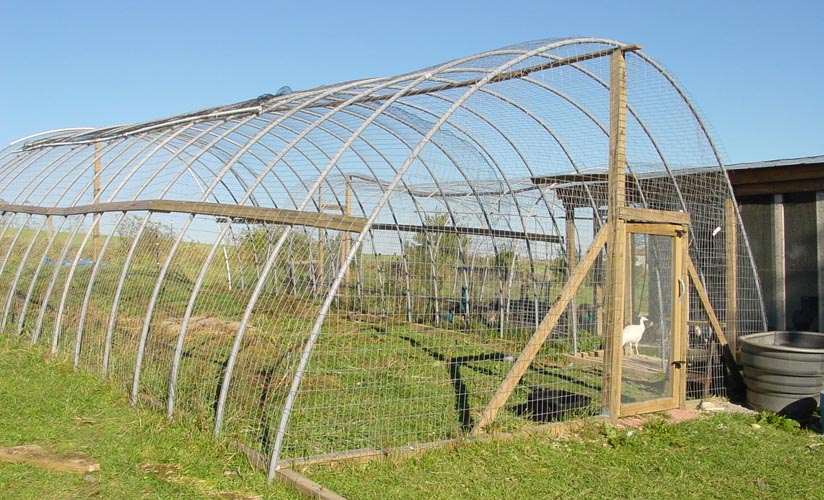
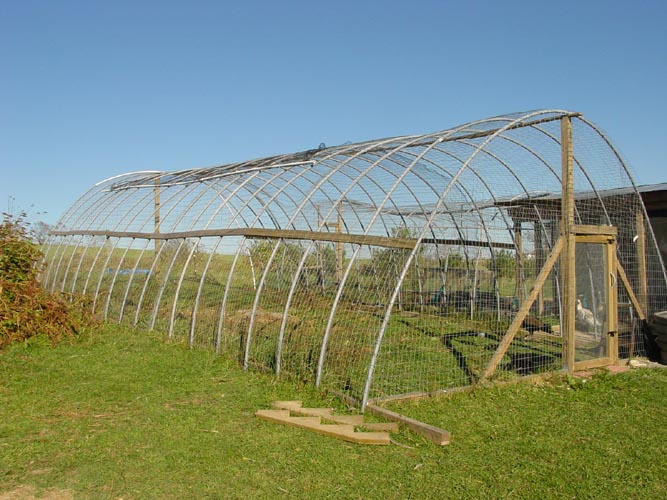
BUILDING A PVC HOOP HOUSE
I am not a carpenter or engineer the design is my own and undoubtedly
can be improved upon.
First decide how big you want your hoop house. My design uses
a width
of about 18 feet as this will yield a house with a center height of about 9
feet. Measure a rectangle 18 feet wide and however long you want, to insure
squareness measure from corner to corner, both diagonal measurements should
be the same. Put stakes in the ground on the corners and run string down
the sides.
I use pressure treated 4x4s for the base, once they are laid
out
straight along the string lines, I drill 3/8th inch holes in the 4x4s at two
foot intervals and use a small sledge hammer to drive 3/8 inch by 18 inch long
rebar through the
holes into the ground. Once the 4x4s are anchored to the ground, I tie them
together with pieces of pressure treated 1x4s 18 inch pieces work fine. I
place them on top of the 4x4s where they join and screw the 1x4s in with 2
inch self taping deck screws, they can be driven straight with out
pre-drilling a pilot hole.
Once all the 4x4s are tied together lay out the lines for the
pvc
hoops. I space the hoops at two foot intervals, use a small square and mark
the vertical lines on the outside edges of the 4x4s perpendicular to the ground.
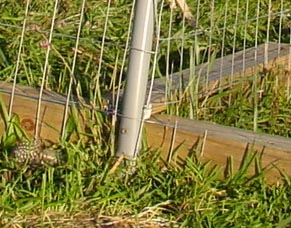
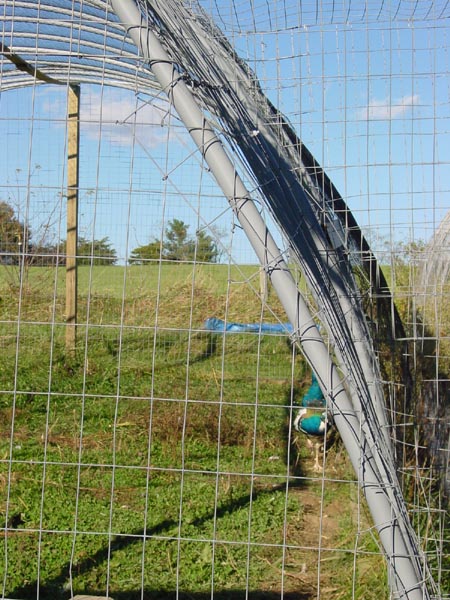
I use 1 inch grey sunlight resistant pvc electrical conduit. It comes in 10
foot lengths, this type of pipe is flared on one end and does not require
the use of joints, connectors or glue. The width of 18 feet for your house
means no cutting of pipes. Remember the small ends fit into the large ends.
One side of your house will have pipes with large side pointed down the
other side will have pipes with small side down; make sure all pipes on each
side are oriented in the same way. I pre-drill holes in the ends of the PVC
pipes and attach them to the 4x4s using 2 3 1/2 inch deck screws. Center
the pipes on the vertical lines you previously marked on the 4x4s, drive the
screws flush to the surface of the pvc pipe.
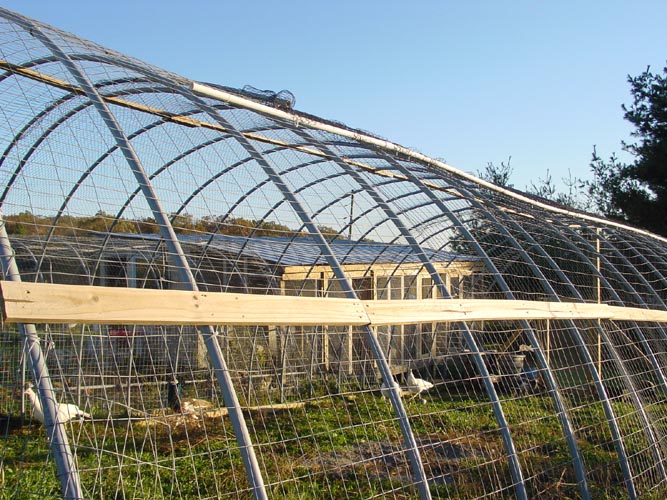
After the pipes are attached, it is time to make the center
span that
will join the two sides together. I use pressure treated 1x4s for the
center of the middle span. Use a square and mark lines across the 1x4s at 2
foot intervals. Next lay out the PVC pipes, remember they should all be
oriented in the same direction. Measure the pipes and use a permanent
marker to mark the center of the pipe. Make another mark 1 3/4s inch on
each side of the center mark , the 1x4s will be placed between these marks.
These pipes are attached to the 1x4s that were marked at two foot intervals,
remember there is no mark for zero or the end of the 1x4. I use two 2 inch
self taping deck screws to attach the pipes to the 1x4s. The number of 1x4s
used will
depend on the length of your hoop house and the length of the 1x4s used for
the center span. When attached to the sides, the center span will be
oriented so the pipe is on top, wood underneath. I use 8 foot 1x4s as I do
all my projects solo and 8 foot lengths are easier to handle. For the first
center span I start at the end of the 1x4 or the "zero" position.
The pipe
is actually attached about a half inch from the end of the board. Next,
attach the pipe at the 2,4, and 6 foot marks, you will not need to attach a
pipe at the end or 8 foot mark as you will begin the next center span at the
"zero" mark. If you were to attach pipes at each end you would an
extra
pipe where the spans meet. I lay the pipes on top of the 1x4s and drive
the screws through, you may want to drill a pilot hole in the pvc. The last
center span will have pipes attached at each end as well as the 2 foot
intervals.
Attaching the center spans is tricky if you are working solo.
Start at
one side, you will need a step ladder, place the ladder roughly in the
center, a little closer to the side you wish to attach first. Bend the pipe
on the side towards you and slide it into the end of the center span pipe.
Continue until all the pipes for that span are connected to the side pipes.
When one side is complete you will need to support the center
span.
A second step ladder or a helper can be utilized for this purpose. Repeat
the process for the opposite side of the span you began with. Once all the
pipes are connected, the hoops are self supporting. Repeat this process
until all hoops are up. Because the pipe ends are flared, they fit easily
together and require no glue, you can easily disassemble if you need to.
I tie the 1x4s that are now at the apex of the arch together with 18 inch
pieces of 1x4. Use your step ladder and drive the screws from underneath.
To deter predators, I use welded wire fencing on the sides
and ends.
I like 5 or 6 foot high 14 gauge 2x4 inch welded galvanized wire. This
fencing comes in 50 and 100 foot rolls. I use galvanized fence staples to
attach the welded wire to the 4x4s that form the base of the hoop house.
The fence is rigid and will lean up against the hoops. Once the fence is
attached at the bottom, I use 1x4s to anchor the top of the fence to the
hoops. Mark the 1x4s as you did for the center span. If you are working
solo you can clamp the 1x4 to the PVC pipe; the welded wire is sandwiched
between the 1x4 and the pvc pipe. Drive 2 inch deck screws through the 1x4
and into the pvc pipe. Repeat the process completing both sides. The fence
and the 1x4s add rigidity to your hoop house and makes it self supporting.
For the ends, I use a step ladder and hang a plumb bob from
the end
of the 1x4 at the apex of the hoop. next run a string across the end of the
4x4s at the base of the hoop house. With any luck, the plumb line and the
string line across the end will meet. Mark this spot on the ground, here
you will dig a post hole for a support and entry gate. Your house will have
a center height of approx. 9 feet, dig your hole 3 feet deep and use a 12
foot 4x4 for the end post. I use a post level to ensure the post is plumb.
I fill the post hole in with gravel which keeps shifting to a minimum. You
can attach the hoop to the post directly with screws or an additional piece
of 1x4. Repeat for opposite end of hoop house.
You may wish to use a second post of shorter height to form
the
doorway for your entrance. This post is set so it is lined up with the
string that goes across the end of the house. I run 4x4s across the width
of the ends of the hoop house, they are attached in the same manner as the
4x4s for the sides. You may wish to brace the opening for your gate with
1x4s or 1x6s running diagonal from the top of the 4x4s framing the gate to
the 4x4s running cross the ends of the hoop house. Cut the wood at 45
degree angles and attach with deck screws.
I use welded wire to completely enclose the ends, it is nailed to
the 4x4s at the base and the center 4x4 support. You may cut and bend the
wire to attach it to the PVC pipes or use heavy duty plastic cable ties
that are similar to the flex cuffs you may have seen police or military using.
Since
the welded wire is only 5 or 6 feet tall you will need a second run of
welded wire to reach the top of the hoop house. Measure and cut the wire to
the correct width, overlap the fence by one square cut the fence wire and
wrap it around the fence you are attaching it to. Again, you may use wire or
cable ties to attach fencing to the pvc. I only use a gate at one end of my
houses as it saves time and material.
I used plastic bird netting to complete the house, the netting must
be at least 20 feet wide and a foot or 2 longer than the house. I found the
netting difficult to work with as it comes on a roll and likes to stay
rolled. To ease installation, I attached one end of the netting to PVC
pipe. I drilled holes in the pipe and attached the netting using cable
ties. I used a step ladder, lifted the roll of netting to the top of the
hoop house and rolled the net down the sides of the hoop. The netting is
attached with cable ties.
To figure materials, decide on the length you want your house
to
be, the number of pipes equals the length of the house divided by two and
multiplied by three. Remember you will need 4x4s running the length of each
side and across each end. There are three runs of 1x4s {side and center}.
Also you will need two 12 foot 4x4s for end posts and additional posts to
make the entrance. The entry gate can be made of treated 1x4s and welded
wire.
Try to lay out your house as square as possible as this will
ease
construction. If your land slopes as mine does you may need to make
adjustments to make everything fit. One of the hoop houses has been up for
about a year and has withstood snow, ice and high winds. The long term
durability of the plastic parts remains to be seen.