 |
|
|
|
|
|
|
|
|
|
|
|
|
|
|
|
|
|
|
|
|
|
Building a Preselector |
|
|
|
Back Home Next |
|
|
|
|
|
Panel Layout |
|
|
 |
|
|
|
Here's the basic graphic layout that I finally settled on. Some of the nomenclature needs adjusting, but I now have something to study over coffee, and make any final decisions before I drill the holes |
|
|
|
 |
|
|
|
Note that the actual panel is 19 inches long, so I had to print the graphic in split form. This is the same printout pasted together as it will look on the final device. |
|
|
|
 |
|
|
|
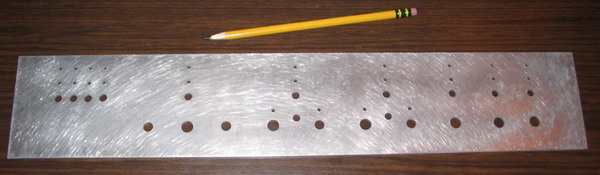
Here's the drilled aluminum panel ready for component mounting. Compare it to the graphic layout above it. |
|
|
|
Whenever I build a new version or a new design, I always build the "big" version first and then a mini version later. This big version of the "Type III" has all the bells & whistles which are not really necessary, but that design reasoning comes from several sources:
* Philosophical: Intuitive and ergonomic design are important - "user friendly" - especially on a complex device that has a lot of controls and functions.
* Formative influence: My training was in the military where almost every functional mode, on their communications equipment, has some kind of fancy indicator to define the position and function of what you are doing or going to do.
* Pragmatism: It's always easier to "build-down" on subsequent models. So the mini-version of this will not have the LED indicators, will use smaller knobs, and the height and width will be compressed by about 50%.
BTW: Standard indicator terminology applies:
Red = Off/Stop
Yel = Hold/Stnby
Grn = On/Operate
Blu = Adjust/Active |
|
|
|

|
|
|
|
I snuck away from the "honey do's" and made this page on January 15, 2006 |
|