<
<
<
In addition to the items listed on the other pages of this web site, there are a few things that just don't merit their own pages. Things like decor, my minor excursions into wood working, and creations that don't fall under any other category.
Kubbspel: Throwing logs/blocks Game
During my wife first trip to Sweden, we were introduced to a very old game (1000+ years), that is still quite popular in Sweden, particularly on the island of Gotland. It is called Kubb (or sometimes Kubbspel). This game is played outdoors with 2-20 participants on a (preferably) fairly smooth, flat field measuring 5x8 meters (roughly 16’-5”x26’-3”). For larger teams (over 12) the field size is 8x10 meters (roughly 26’-3”x 32’-10”).
The game pieces are made of hard wood and contains of following parts: 1 Kung (King) approx. 10 x 10 cm2 by 30 cm's height. (3-15/16 sq. x 11-13/16”) 10 Kubb approx. 7 x 7 cm2 and 15 cm's height. (2-3/4” sq. x 5-7/8”) 6 Kastpinner (Throwing batons) round 25-45 (44) mm in diameter and 30 cm's in length. (1 to 1-3/4” Dia. x 11-13/16”) 4 Hörnpinner (Corner sticks) 2 x 2 x 30 cm are also useful to have. (13/16” sq. x 11-13/16”)
The objective of Kubb is to knock down your opponents’ kubb with the kastpinner according to the rules below. When all the kubb are knocked down, the Kung may be targeted. The team that topples him wins the game.
The Field:
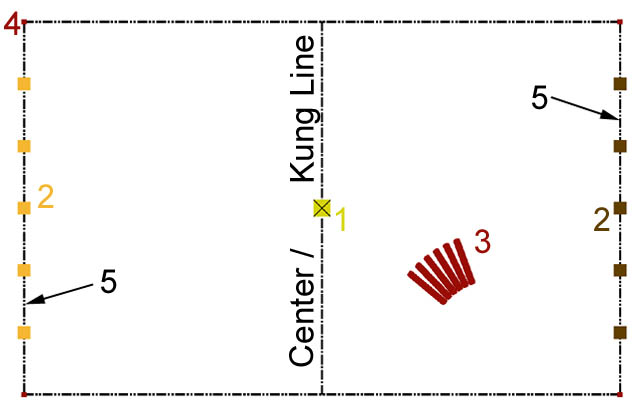
Kubbspel Field Layout
The first thing you need to do is set up your perimeter. Start laying the field by driving one of the Hörnpinner in the ground to mark the first corner. Measure or pace out the length and width as needed for your group and plant another Hörnpinner at each boundary corner. Next, set up the game pieces (as shown above) with each team’s five kubb equally spaced across their base line. Place the Kung in the center of the field.
Now that the field is set, choose teams and decide which team will “attach” first. When this is completed, you will be ready to play.
Rules:
The two teams take their place behind their respective baselines. The "attacking" team (here after called team A) divides the kastpinner as equally as possible among themselves. While standing behind their base line (location 5 on image above), members of team A throw their kastpinner at team B’s kubb attempting to knock as may over as possible. The kastpinner must be held on one end, not in the middle and thrown underarm (with the kastpinner launching from below and forward.)
After team A is done throwing, team B begins play by throwing their fallen kubb over the halfway (Kung) line. If any land outside the opposite team’s base line, team B is given two more chances. If they fail to land the kubb within team A’s side of the field, team A may place the kubb wherever they like on their own side. (Most often this is behind the Kung making it nearly impossible to hit.) After all the toppled kubb have been thrown, team A raises them on the field where they came to rest.
It then becomes team B’s turn to throw the kastpinner at their opponents’ kubb (from behind their baseline). They must first knock down all of their kubb now standing on team A’s "side" before they can start knocking down the kubb on team A’s baseline.
After the toppled kubb are thrown back and positioned as stated above, play returns to team A. If the team B failed to knock down all the kubb on team A’s side, team A gains the possibility to throw from an imaginary baseline drawn through the kubb closest the Kung on their side. Play will continue in this manner until one team has been reduced to one kubb.
In order to attempt to topple the Kung, the “attacking” team must have a kastpinne in reserve for this purpose. If only one kubb is standing and the attackers only have one kastpinne, the last kastpinne may not be thrown on that kubb, instead the play is passed to the opposing team.
The game ends when the Kung is toppled. When this is attempted, the attackers must return to their baseline and throw from behind it.
Generally speaking, Kubb sets, or at least the Kubb and Kung, should be made of a hard wood such as oak or ash. I personally recommend the Kastpinner be softer then the fore mentioned pieces so your Kastpinner to get dented up before your larger pieces. The reasoning for this is it is easier and cheaper to find dowel then lumber large enough to make Kubb and Kung. The Hörnpinne really aren’t necessary so it doesn’t matter what you make them from.
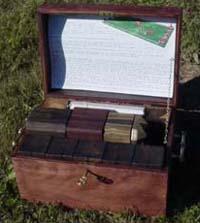
My first set was made of pressure treated pine because I could not track down lumber thick enough and I do not have the means to plain and laminate wood well enough for the potential beating a set can receive. It is a good idea to make a bag or chest to carry your set in as well.
Högbergsfältet Glass:
While on our second trip to Sweden, my wife and I visited some copper mines and smelting ruins near Högbergsfältet. Apparently while smelting the ore, silicates in the rock melted and formed glass within the furnaces. Glass literally fused to their bases and lower walls. Occasionally, the refiners would dismantle the furnaces, presumably to clean them out, and when they did so, they cut the laminated blocks free and used them to expand the surrounding buildings. It was also during these furnace rebuilds that scrap chunks of glass and rock were strewn throughout the site. This was done to such an extent that I had pieces wedged into the treads of my boots by the end of our visit.
Since it was inevitable that tourist left with souvenirs (well in their shoes anyway), I decided to grab a few of scattered lumps. At the time I had no idea what I was going to do with it, but thought it was awesome to be able to hold “artifacts” and tell other about finding them. I blindly ended up with some of the raw stone, partially fused glass and stone, pure green glass and a few pure gray glass bits. I decided this would make a neat “before and after” display when we returned home.
A few years later, I found a fellow SCA-dian with a professional rock tumbler who agreed to tumble some of this glass for me. After digging our pouch of Högbergsfältet glass out of the attic, I realized the pieces really wouldn’t be usable after tumbling without some form of shaping prior to it. There was one big problem with this revelation, I possessed absolute no lapidary knowledge what so ever. The project was therefore shelved until this was remedied.
Several months later, I decided I was not likely to attain lapidary training or tools, especially only for a one time project, so I made a blind stab at shaping them with the tools I did have access to. I started with a belt sander with 60-grit paper. It worked well for shaping, but the heat buildup kept exploding the pieces in my hands. I learned to take shorter passes to keep the glass cooler, but in the time it takes to really shape a larger piece they inevitably fractured because of the heat. After completing about four or five pieces, all roughly half the size of a pencil eraser, it occurred to me to try a grinding stone rather then sand paper. The more aggressive surface shapes the stone faster with slower heat generation. The over-heating problem was resolved, but a new issue arose. It you ventured into a not-so-smooth/warn surface of the wheel, the rough surface acts a multiple micro-hammers and chips or outright shatters the glass. After learning the delicate balance of stone, paper, pressure, positioning, timing and holding techniques, the roughs were created: To date the only historical information I could track down related to the Högbergsfältet site is as follows (my Swedish is not that good anymore so please bear with me):
Gruvorna was producing in September 1580 (...may possess draws yet older) and ansågs to a beginning left fairly gott substitution. Further, any pits were working (in the) ensuing year, so that in June man migrated daily 2 thin (remove) ore. In November, each (of) the high silver pits (were) 4,5 m depth. Moreover we had access around two copper pits, presumably "old brutal", of which the enas ore held 27 fields copper and 6 weight silver. Underline to November, we had hunnit quarry consequential 140 thin (removers of) copper ore. Men at Torskebäcken also request(ed in) 1582, a silver hut with a furnace, a drove/powered, two nocturnal cabin, coal cottage with more. Ore from Gruvåsen and also Hornkullen was melted here. Hornkullen was still getting smelted in Nykroppa already 1583. Mining at Gruvåsen (Pits) abolished (ended) presumably in the mid 1580's.
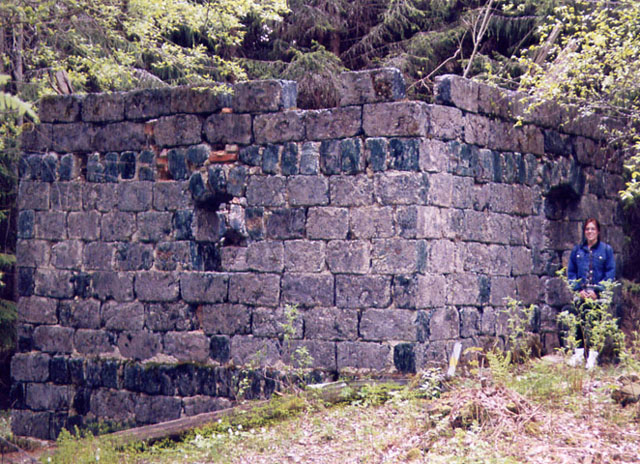
Högbergsfältet Ruins
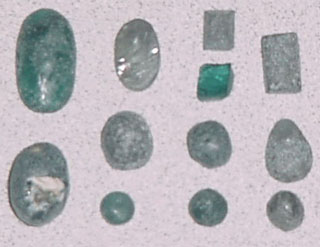
Rough shaped rounds
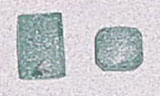
Rough shaped flats
Banners:
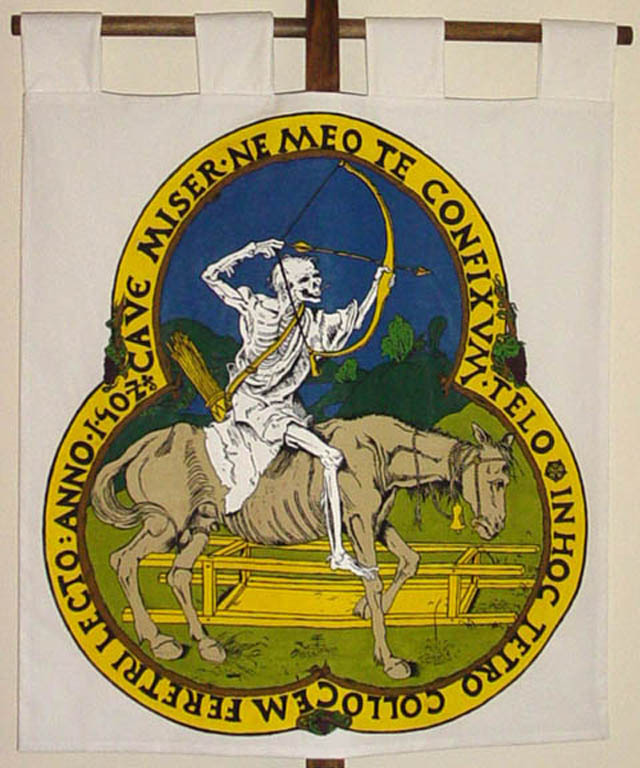
Death on Horseback.
This banner is a recreation of Albrech Dürer's "Death on Horseback". Those failure with this work may notice a few inconsistencies. Changes such as the red decretive clusters at the foil valleys are shown here as grape vines, the different head on the Death's arrow or perhaps most noticeably the date is included on frame to the horses rear rather then the small avian silhouette most are accustomed to. These variants are not artistic license; they exist because this work is based on the Benedict Master commissioned by Sixtus Tucher for his home instead of the actual stained glass window produced.
The words "CAVE MISER ּ NE MEO TE CONFIXVM ּ TELO ּ IN HOC TETR[IC]O COLLOCEM FERETRI LECTO: ANNO 1ּ50ּ2" are inscribed on trefoil frame. They translate as Take care, unfortunate one, that I do not lay you, pierced by my arrow on this hard bed of the funeral bier...
Furniture:
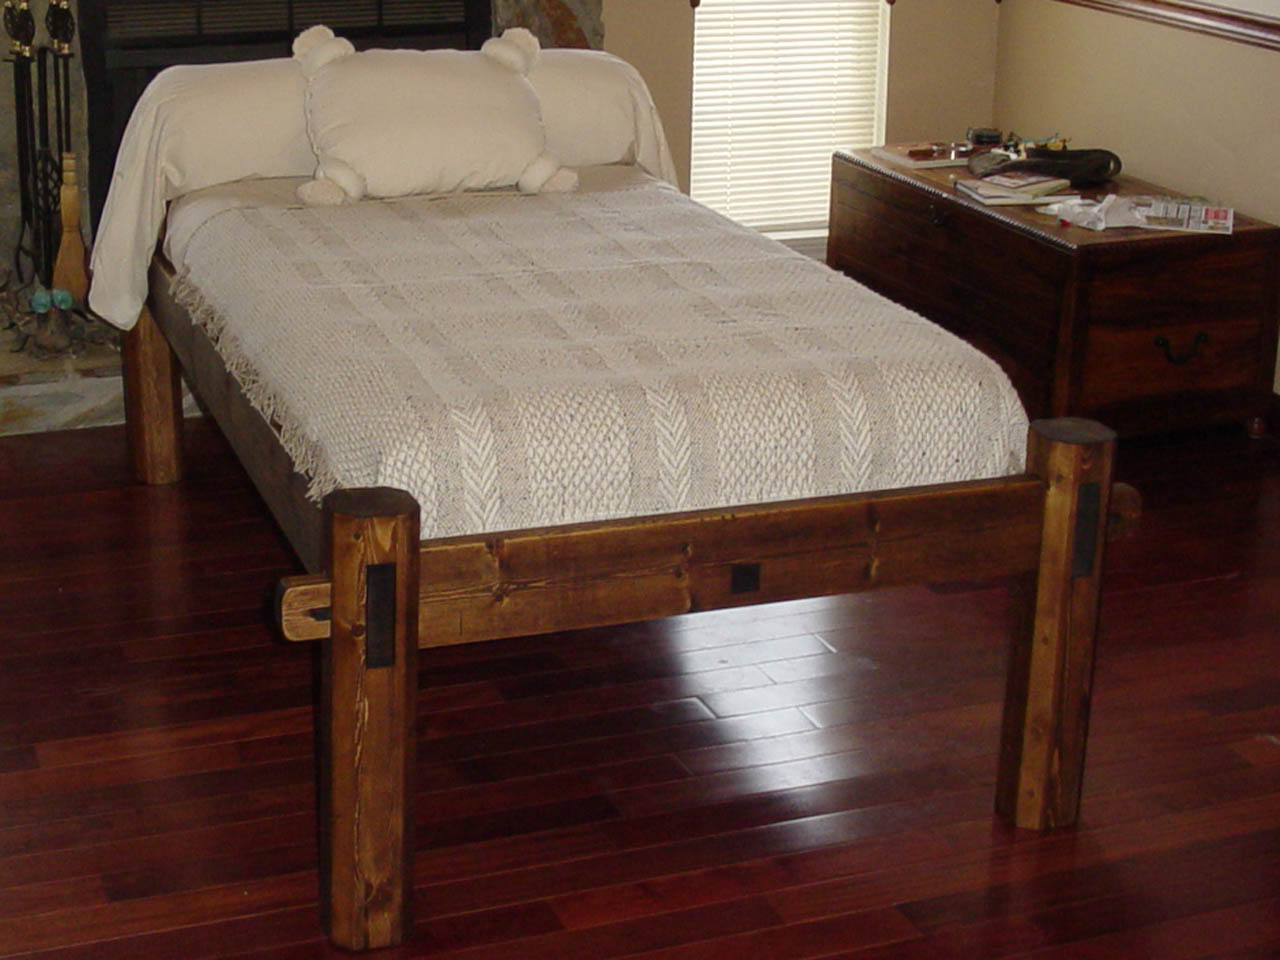
After spending one too many nights on camp-cots, my lady and I decided a real bed had become a necessity for period camping. I searched around for "period" designs, and even managed to closely examine a few fairly well maintained ones on our trip to Ireland. The brunt of my searches turned up that a majority of "transportable beds seemed to be either single person, dowel-type frames with rope interlacing, or standard beds dismantled for travel. My lady all but refused to sleep on a "rope bed", and we found none of the standard beds suitable for SCA use, so I decided period looking is better then nothing. The bed we chose is one of the nicer ones we looked at so it was chosen to use until I find a SCA-suitable antiquity and create my own pattern. While I can not vouch for how period the general design is, the assembly method of mortise, tenons and peg interlocks were widely used in period.
Over all, there really wasn't much that changed from the existing pattern other then first, resizing it to a twin size frame and second, revising the individual part sizes to conform to standard lumber sizes. This second set of changes made the bed more affordable to use as temporary furniture. True 2x6 lumber costs a bit more then most people wish to invest for something that will quite literally be bounced around in the back of our vehicles as you travel the roads of our gathering sites. The final change I made was to swap out the slats for plywood panels. When using an air mattress, it is much more preferable to have a constant surface then slats. It isn't a question of "will it" but rather "when will it" find dented or dinged slat edges, depress between them and be punctured.
To view a "How To" on making the bed above, or for the link to the original plans, double click on either the image of the bed or the Slat-type Bed text below it.
We have also made a few purchases and acquisitions to keep our pavilion feeling more period and cozy as well.
![]()
![]()
![]()
Copyright Terms, Copyright Wolfram von Taus © 2007