| Keef’s
IMVU > Developing Tutorials
> The Previewer’s Texture Tab
Develop
The
Previewer's
Texture Tab
A
Materials Tab Overview & How to Make Cycling and Scrolling
Animation in the Previewer.
So, you're
wondering what all those checkboxes and buttons do in
the Materials tab? Here we will walk through what each
and every one is for. Then we will dive into the world
of texture animation. By tutorials end you will know what
all the animation settings do and have made both a cycling
and scrolling animation.
Scarry lookin aint it... bwahahahahahahaha
Notes
on Animations: It is a common misconception
that in order to animate your product’s textures
you must use animated gifs, not so. All texture animations
in the Previewer use standard JPG images and the animation
effect is done by the animation settings in the Previewer
itself.
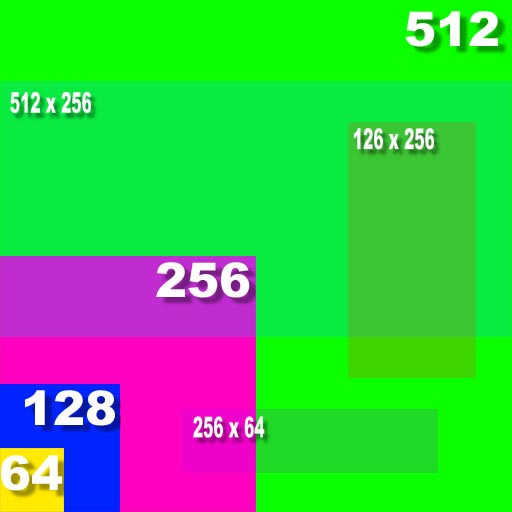
Notes
on Texture Sizes: As with all textures used
in the Previewer you need to keep to the 2x standards
and if using an Opacity map that needs to be the exact
same dimensions as the texture.
2x standard
sizes are 2, 4, 8, 16, 32, 64, 128, 256, 512 pixels.
Your textures may be any height & width combination
of these numbers. No texture should exceed 512 x 512.
Remember less is always more, always keep your textures
as small as possible to keep your final file sizes down.
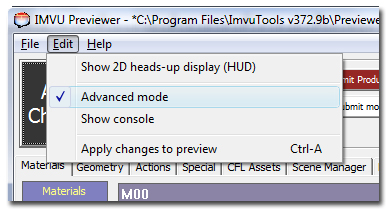
First off before
we start If you haven’t already you may want to
go to Edit, and make sure Advanced Mode is checked so
that you will see all the tabs.
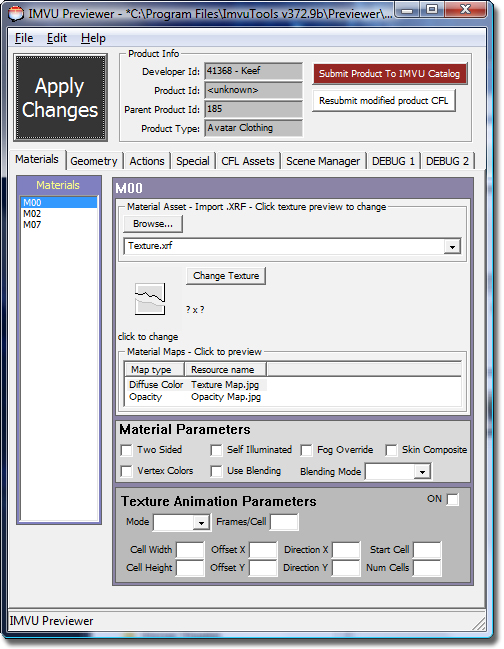
Overview
of the settings and what they do:
Apply
Changes:
This is
the button you hit for your changes to take effect in
the 3D window.
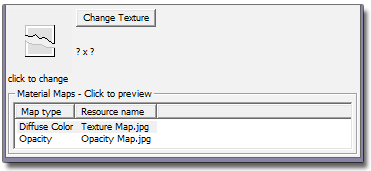
Materials:
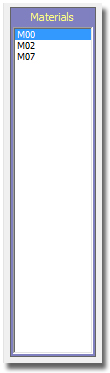 
Here
is the list of all the textures used in the prodouct.
The Material that is highlighted is the one you will
be editing (Remember the IMVU numbering scheme always
starts with 0, so 0 in actuality is 1)
Clothing
Items (as shown in example) only use one Material Listing
M00, M01,
M04, M03, ect.
For products
that use several sub meshes (rooms and furnature) there
is an additional mesh number in front. P00 is mesh 0,
P01 is mesh 1, etc.
If
one mesh has three textures on it they would be labeled...
P00-M00, P00-M01, P00-M02.
If it has a second mesh, those textures will be labeled...
P01-M00 P01-M01 P01-M02 and so on.
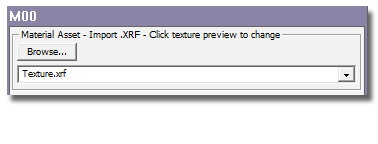
Material Asset - Import .xrf:
This is the
mesh's material file. All this file does is tell the
Previewer if it is a single texture or a texture with
an opacity map. It is also the file that assigns the
names you will see in the Diffuse Color and Opacity
boxes. This is all the XRF does. It does not contain
the texture itself.
This is where
you browse for your texture and your opacity map.
Note: if the XRF file did not specify an Opacity Map
there will not be a second option.
If Diffuse
Color is Selected You will see the thumbnail of the
Texture.
If Opacity is Selected You will see the thumbnail of
the textures Opacity Map.
Click on
the image or the Change Texture button to brouse for
your textures.
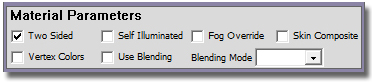
Now
for the checkboxes...
Two-Sided:
In
the case of a mesh that you will see both sides of, skirts
and such, check this button on to enable both sides to
be rendered. If only one side of your mesh is used keep
this off as it adds more unnecessary rendering strain
to video cards.
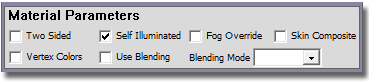
Self Illuminated:
Toggle
this on if you want your texture to appear to be lit from
within. Having this on will also override any room illumination
on that texture and can give an undesirable effect in
dark rooms. Use it wisely. It is best used for Skies,
Lights, Fire and such.
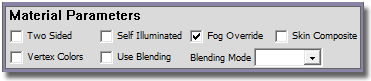
Fog Override:
If you want
this texture to be unaffected by a rooms fog settings
toggle this on. Also best used on Skies, Lights and
Flame.
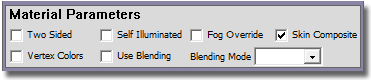
Here is
where if making a composite product mesh you let the
Previewer know to render it as such. If you are not
the mesh maker you should leave this setting be.
When this is checked it will place the skin texture
the avitar is using under your texture when you use
an opacity maps. You will find this setting used on
clothing items that cling to the skin and offer opacity.
Uncheck
it and the skin will no longer render.
Check it on a prtoduct not meshed for it and the skin
will render but in all the worng places. o.O
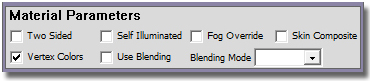
Vertex
Colors:
If a mesh
is made with Vertex Shading this is where you turn that
feature on.
If it is
part of the mesh Vertex shading auto applys the mesher's
shadowing to the mesh. Most meshes do not use this feature.
If a mesh
you are texturing uses this feature leave it on to use
the meshes embedded shadows.
If you are
a texturer like me and prefer do do your own lighting
and shadowing baked into the textures, turn this off.
If a texture
is rendering all black most likely this is on and shouldn't
be.
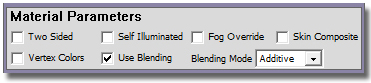
Use
Blending:
Here’s
where you set your opacity map settings. Click use Blending
and then Choose your blending mode in the drop down.
Additive adds the texture as light. You can get some cool
effects here.
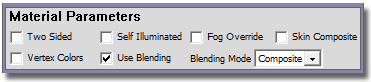
Composite
(the option mostly used) enables the alpha grayscale transparency
verses just black and white solid and clear. If your Opacity
Map uses gray this is the setting you need.
Ok,
now were done with the boring stuff here’s the fun!
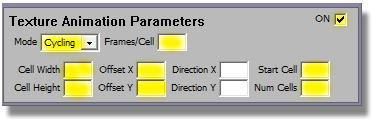
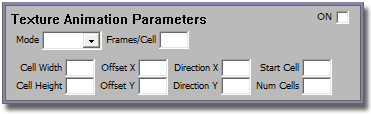
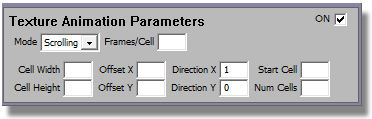
Texture
Animation Parameters...
On
turns the animation... well... on. lol
Mode tells it what type of animation to use, Cycling
or Scrolling.
Frames per Cell sets the speed for a Cycling animation,
big number slow, small numbers fast. Sets the smoothness
for a Scrolling animation, small smooth large jerky.
Cell Width and Height are used in Cycling Animations
(Think Film Cells) to set the parameters of the cell size
in the texture.
Offset
X and Y change what part of the texture the Cycling
uses.
Direction
X and Y are used in Scrolling Animations (think
waterfall) to set the direction of the movement
Start
Cell tells it what frame is the start of the Cycling
animation.
Num
Cells is used in Cycling Animations to set the
number of cells a texture has.
Assignment One,
Scrolling Animations:
Scrolling
Animations are ones that appear to slide along the surface.
Running Water, Waterfalls, Scrolling Marquees, etc.
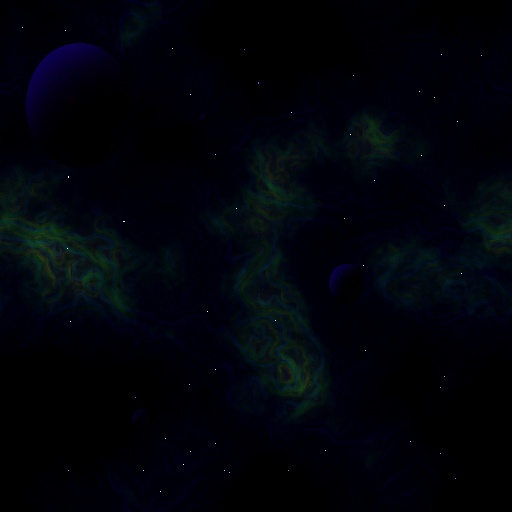
Right click
on this image I whiped up in Photoshop and save it to
your Previewer’s examples file while humming the
Star Trek theme song of your choice.
Now
launch the Previewer and derive from product 10860 the 3D
sample room. (If this sentence was Greek to you go to my
'How to Make a Shirt' Tutorial for Previewer basics.)
Now load the above saved texture into the texture slot.
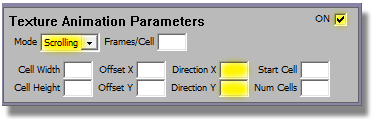
Highlighted
here are the only fields used in Scrolling Animations
Now we need to decide how we want this
to move. Up, Down, Right, Left, Diagonally? All can be done.
X and Y are relative to the mesh and not the room so you’ll
just have to play to see which is which.
For
now set Direction X to 1 and Y to 0.
Keep
the frames Per Cell box to 0
Set
the Mode drop down to Scrolling.
Then click
the ON checkbox and Apply Changes.
Weeee,
we're on the move!
Now
change the X to -1 and the direction will change.
Now
adjust the speed, Change X to 10, Change it to .01
Now
do the same with the Y setting.
Play
around with the different combinations, If you get motion
sick easily keep a barf bag handy, lol.
Now
let’s play with the frames per cell.
Set the frames to 5, 10, 20 and you’ll get a kinda
stop motion effect as it moves. 0 is smooth movemet then
the higher the number the jerkyer it gets.
Congrats!
You have now conquered scrolling animations!
Now
try it on these products... shirt 237 ... skin 252...
hair 11181
Here’s
some other textures I whipped up in PS to play with. Remember
when making your textures, seamless textures are what
you need to use for seamless scrolling.
Rainbow
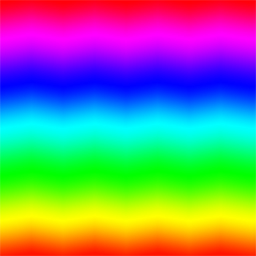
TechnoRipples

Ok, this
just looks freaky cool on the skin
:D
Assignment Two, Cycling
Animations:
Cycling
Animations are animations that appear to flicker or show a sideshow.
Flashing lights, very short and simple video clips, flame, etc.
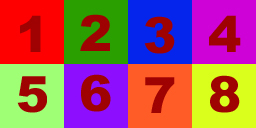
Right
click on this image and save it to your Previewer’s
examples file.
Now
launch the Previewer and derive from product 10860 the 3D sample
room.
Load
the saved texture into your texture slot.
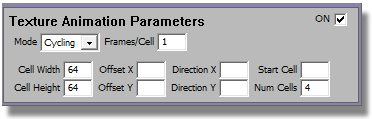
Highlighted here
are the fields used in Cycling Animations
This
texture is 256 pixels wide, 64 pixels high, and 4 cells.
Each cell is 64 x64.
In
the cell width box put 64 (that’s the 256 width
divided by 4, the number of cells)
In
the Cell Height box put 64 for the height of the texture.
In
the Num Cells box put 4 for the number of cells the texture
has.
In
the Frames per Cell box put a 1.
In
the Mode drop down set it to Cycling.
Now go up
to the On button and click it, then Apply Changes.
(WARNING
SEIZURE ALERT! lol)
Nauseated
yet, lol.
OK now go back to the Frames per Cell box and switch it
to 10, Apply Changes.
50, Apply Changes.
Ta
Da! You made a Cycling Animation!!! *Tosses Confetti*
Now
lets play with the other options.
Right
click on this image and save it to your Previewer’s
examples file.
This is an 8 cell texture 256 x 128 pixels over all, each
individual cell 64 x 64
Sill
deriving from product 10860 the 3D sample room.
In
the Cell Width box put 64 for the width of each cell.
In
the Cell Height box put 64 for the height of each cell.
In
the Num Cells box put 8 for the number of cells the texture
has.
In
the Frames per Cell box put a 10.
In
the Mode drop down set it to Cycling.
Now
go up and swich on the On button.
Now
were cycling 8 frames!
Lets
start playing with the Start Cell option...
The
Previewer’s numbering scheme stars with 0. So, 0
is 1, 1 is 2, 2 is 3, and so on. So having it set to 0
the cycling starts at the first frame. Now change it to
1 and it will skip the first one and start with the second
frame. Change it to 2 and it skips both 1 and 2 and starts
with three. Keep doing it until you get to 7 and only
see the eighth frame.
Now
set the Start Cell back to 0 and we’ll play wit the
Offsets. Y is up and down and X is across.
Basically it partitions off part of the texture so you only
use part of it.
Lets
start with Y, put 64 in the Offset Y box. This shifts
the texture 64 pixels down eliminating the top 64 pixels.
Now look at the animation. Only the bottom half of the
texture is being used.
Switch
the Y back to 0 and now put 64 in the Offset X box. Now
the animation eliminates the first 64 pixels. (Strangely
it still shows frame 5, no clue why, hmmmm)
Now
make them both 64 and you loose the top 64 and the left
64 and only see frames 6,7 and 8. Play with dif combinations
and see what happens.
Note:
I have found using odd numbers I get strange results,
sometimes good strange, most of the time annoying strange.
Just play around and see what happens.
Why
on earth would you want to use these Offset and Start Cell
features?
The
best example is the candlelight dinner room. Derive from
that room, 17273, and take a look at the candles. They
all use the exact same texture, but they take advantage
of these settings to vary they way they flicker so they
don’t all flicker in the same way at the same time.
In sharing the texture the file size stays down but in
using these settings it adds a randomness.
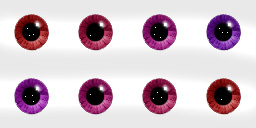
Here’s
some other textures I whipped up in PS to play with...
Color
Changing Twinkle Eye, Derive from 148
This is a 256 x 128 8 cell texture. Each cell is 64 x
64
Shimmer,
Derive from 10860 the 3D sample room... skin 252...
Pants 232...
This is a 512 x 128 4 cell texture. Each cell is 128 x128
*buries head in hands* don’t know if I should admit
to having made this one, lol.
I have found
the Animation function doesn’t work on all products
as expected or on some not at all. Composite Skin products
will not animate. There are also issues with eyes and
animations with some heads.
When making
a Cycling texture, you must make sure each element lines
up in each cell perfectly, even being just one pixel
off will become glaringly apparent when the texture
is in motion.
Texture Animations
can not be set to trigger words. Any product that changes
its look with a trigger word is using a mesh animation
and not a texture animation.
So that’s
it! You should now know
everything you ever wanted to know about the texture tab
and all its buttons and even stuff you didn’t want
to know to boot.
Now
get out there and get animating!!!!
|